Resurrect Shadow Detail In Your Photographs With the App InstaFlash

Instaflash_combo copy
“Are the shadows in many of your images so dark it’s hard to see detail in them? Would you like to see more detail in shadows without making highlights overly bright? Who doesn’t have this problem? There’s a quick and easy cure. Use InstaFlash to bring shadow detail out into the open.
Of all the flash simulation apps, InstaFlash can produce the strongest results and unlike many of its competitors it generates results that are surprisingly free of digital artifacts, like haloing …”
I consider InstaFlash a must have app.
Read the rest on The Huffington Post.

Correct Perspective With the App Front View


How many times have you wished you could quickly straighten lines in an image that have been distorted by perspective? Being able to control perspective is particularly important for architectural photography and it can be used to make stronger compositions in all images.
How many times have you wished you could control the aspect ratio of an image? Making an image more horizontal, square, or vertical or changing an image from one to another can be a powerful tool for creating more expressive images.
One app will do both — FrontView.
Read more at The Huffington Post.

Mobile Retouching Wizardry At Your Fingertips With App Touch Retouch


The iPhone app Touch Retouch performs the kind of stunning magic that first appeared in Adobe Photoshop only a few years ago. Adobe introduced this type of instant retouching based on pattern recognition under the name of Content Aware Fill. Now a similar technology is available for smartphone photography. You can also use the Clone Stamp tool to copy specific information from one part of an image to another, either to cover over an unwanted element or duplicate it.

With a little practice, you’ll start seeing photographs that you once might have ignored or passed by because of minor imperfections, which can now be convincingly removed in instants with the tap of your fingers. (It’s great for filling in the gaps in panoramic stitches too.)
.
.
.

Magically Change The Proportion Of Your Photographs With The App 'Liquid Scale'


You can use the app Liquid Scale to distort the frame of an image without distorting key elements in it. Like Adobe Photoshop’s Content Aware Scale, this software identifies image elements that are most likely to be more important than others and distorts other areas, typically areas that are smooth or randomly textured. There are limits to how far you can go before less distorted image elements begin to look unnatural, which are largely image dependent. In some cases, you can go so far as to convincingly turn a vertical image into a horizontal image. It’s magic.
This app will do more than change your images, it will change the way you see.
Read more and see more on The Huffington Post.
Plus find more app reviews.

Dual Apps Render Sophisticated Light FX – Lens Flare & Lens Light


When it comes to photography, you can do a lot with a little light. Adding light into your images offers many creative possibilities: add a sparkle to someone’s eyes, make highlights shine, enhance an atmospheric effect, trace a constellation in the sky, render a cinematic special effect, and much, much more. In short, you can enhance the center of attention in any image or create a new one.
Adding light into your photographs after exposure just got easier on your iPhone. Brain Fever Media makes two apps that can add light fx to your images: Lens Flare and Lens Light.
Lens Flare offers 45 different effects — mostly star patterns, some edge flares, and a few linear streaks.
Lens Light offers 54 different effects including rays, spotlights, streaks, scratches, and even suns, moons, and lightning.
Read more on The Huffington Post.

Reduce, Modify, Or Combine App Effects With Image Blender


Do you ever wish you could reduce the intensity of an effect? Do you ever wish you could combine the effects of multiple Apps with more control? You can, with the App Image Blender.
Image Blender is extremely quick and easy to use. Simply launch Image Blender, load one version of an image and then load another version of the same image (or another image). To reduce an effect, use the opacity slider. To modify the way an effect is applied to an image, change the blend mode of one image and change the combined effect. To rotate or scale an image double tap on the screen, then pinch and twirl to align one image with another. Finally, save a new image with the combined effect of your choice.
Blend Modes
Blend modes can be used to generate many creative effects. Image Blender offers most of the standard blend modes; Normal (for no special effect), Lighten and Screen (to lighten), Darken and Multiply (to darken), Overlay and Soft Light and Hard Light (for contrast effects), Luminosity and Hue and Saturation and Color  (for color effects), Color Dodge and Color Burn (for combined contrast and color effects), Difference and Exclusion (for special effects), and two others Plus Darker and Plus Lighter (with self-explanatory titles).
Image Blender Provides Global Not Selective Control
Image Blender doesn’t allow you to blend images selectively with masks – i.e. in or not in one spot or from side to side or top to bottom. (To do this try PhotoForge 2.) In some cases, you can achieve similar effects by photographing subjects on black or white or painting areas of an image black or white and using blend modes like Darken or Lighten to drop out either the darkest or lightest values.
Multiple Exposures
Image Blender can be used to combine two different images. When you create multiple exposures with Image Blender a few strategies are particularly useful for creating multiple exposures with Image Blender. One, make exposures that have the same background but contain moving objects for futurist motion and/or ghostly transparent effects; keep your camera still; consider using a tripod. Two, use images that have dark objects on a light background or light objects on a dark background; you can make background lighter or darker by processing them with other Apps; then you can use the blend modes Lighten or Darken to make the background disappear.
Creative Enhancements
There are many things you can do to creatively enhance an image by modifying App effects. Here are six.
1         Partially restore the original state of an image.
2         Modify the way an effect adjusts an image.
3         Overlay text or graphics onto an image.
4         Add a transparent texture to an image.
5         Make moving objects transparent.
6         Merge two images into a surreal composite
Isn’t it nice to know that when it comes to the effects Apps have on your image, it’s not an all or nothing take it or leave it proposition? You can get more control, with Image Blender.
Find Image Blender here.
Find more iPhone app reviews on the Huffington Post.

iPhone Experiments – Bones


Recently, during an African safari, I spent several days photographing animals. We saw all of the big five (lion, leopard, elephant, rhino, cape buffalo) and many other animals in one day. It was the first time I made a concerted effort to make wildlife photographs, which was excellent practice. I gained an increased appreciation for how moments of peak action (or lack thereof) can make or break some photographs. I made many competent photographs that entertained my family at home, which I have no intention of using professionally.
In between these sessions, I spent a few hours photographing the skulls of animals displayed in the camp. Initially, I photographed very freely, exploring many ways of photographing them. As I reviewed the images, I learned from both the successes and the failures, gradually refining my the point of view of the collection. I appreciate the images that go beyond direct representation and become suggestive of something more through abstraction and metaphor. Ultimately, these images, which I consider sketches, will lead to final results, which will result in professional products.
Unexpectedly, I found that these sessions helped me develop my thinking on how to incorporate the process of sketching, both with words, drawings and photographs, into the development and presentation of future professional work. In the right contexts, I might even publish, display or sell select sketches.
This session also helped me explore longstanding personal themes within my life and work. These images expand my understanding of the power of photography to transform our perceptions of a subject through close observation. They highlight for me the limitations of vision (and photography) to see beneath or beyond surfaces. They confirm how I frequently try to suggest the often unseen foundations of the things I photograph. They remind me of how much I love to draw bones, especially the human skeleton. They reinforce my longstanding desire to create sculptures, many influenced by these forms. They resurface my artistic influences; in particular Georgia O’Keefe and Henry Moore. I’m sure there are other valuable resources I can mine from this experience, if I give both the process and these results further thought.
Explorations often have many unintended consequences; often these become the discoveries we’re looking for when we engage in experiments. You’ll learn more from simply observing your creative process, without judgment, than from anything else. Awareness is everything. What makes a process of experimentation even more successful, richer and more relevant is subsequently reviewing our results and continually refining our lines of inquiry.
How could experimentation help you reveal, connect with and develop your influences?
What experiments would be most helpful to you?
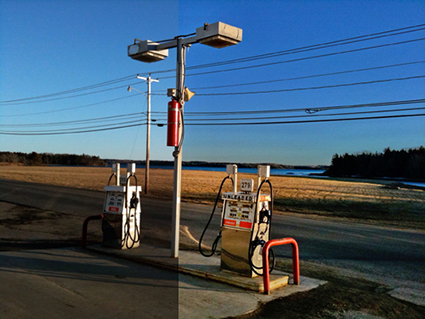
These images were made in Mala Mala, South Africa during my recent South Africa Photo Safari (sponsored by NIK).
Apps used were PicGrunger and Snapseed.
See more images and find more posts on The Huffington Post.