Creative Image Sharpening – Double Pass Versus Hybrid

Before sharpening

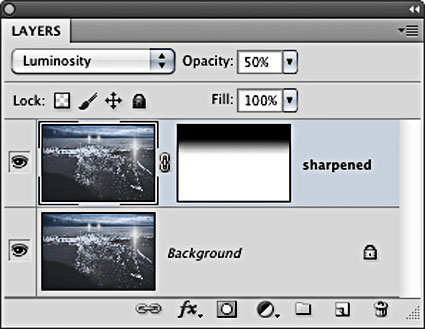
Unsharp Mask only
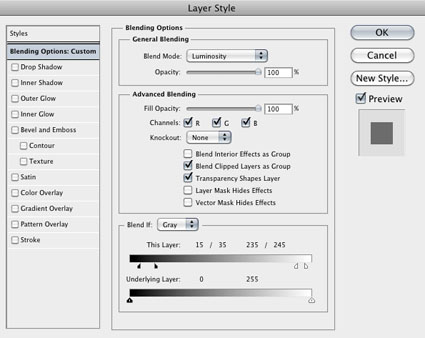
Unsharp Mask and High Pass filters combined
Different sharpening techniques make the world look different. A world of difference can be seen between the thin hard line of Unsharp Mask and the broad feathered line of High Pass Sharpening.
Can you choose a combination of both? Yes, you can! You can choose the texture of one, the halo of another, and the line of yet another, applying them either globally or selectively. You can customize the look and feel of detail in any image or image area with astonishing precision and flexibility.