
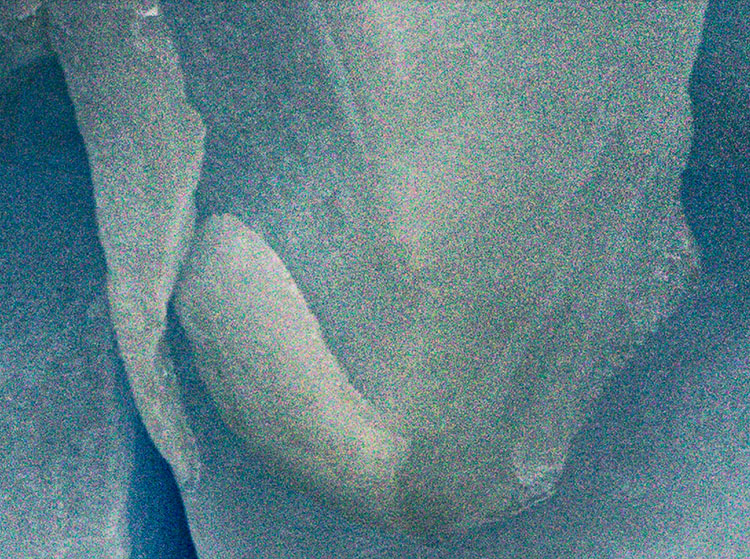
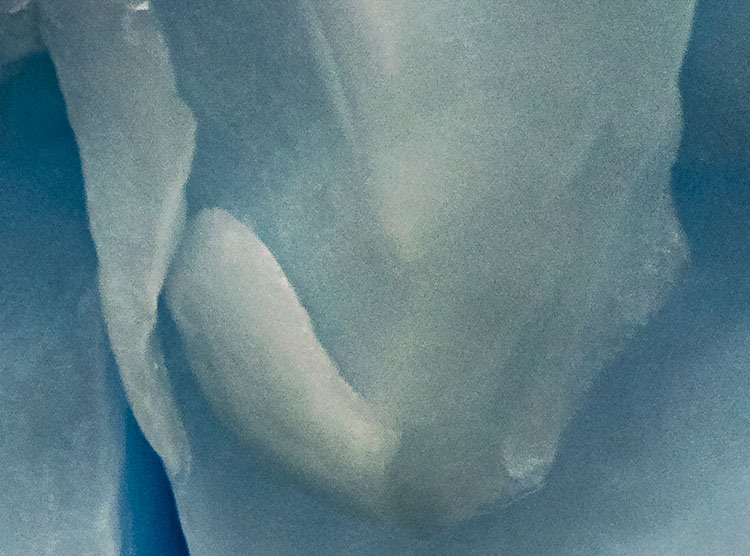
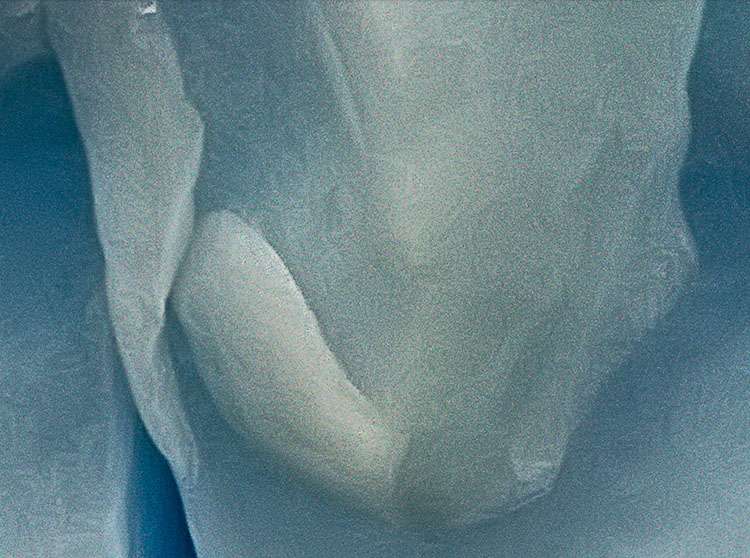
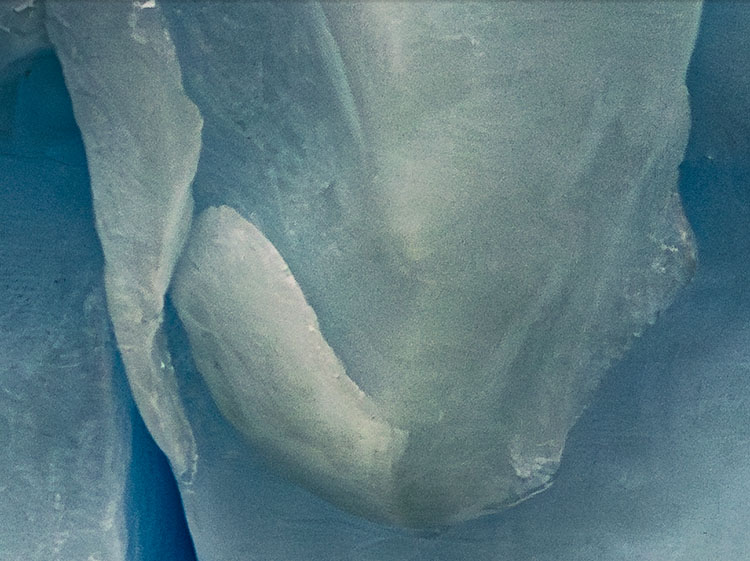
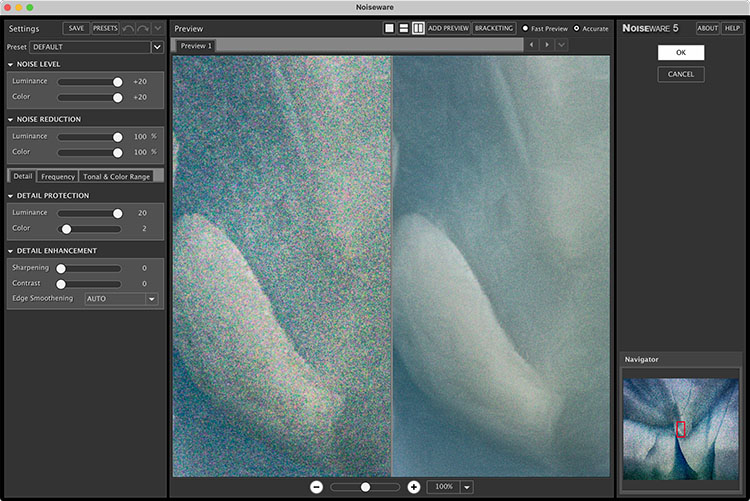
Before & After Noiseware
Who doesn’t have noise? If you don’t run into noise in your digital images, at least once in a while, you may not be pushing the envelope enough. You can photograph long after dark; if you haven’t tried it, you owe it to yourself to experience this—it’s magical. And if you find you don’t have a DSLR on hand, this should be no reason not to make pictures with a point-and-shoot or cell phone.
Whether you’re using a cell phone, a point-and-shoot digital camera or a DSLR at high ISOs or with very long exposures, you’re bound to run into some noise. Noise happens. When you have it, there’s a lot you can do about it. There are many ways you can reduce noise during postprocessing; you could even say there’s an art to it. Learning these techniques can improve good exposures and save others.
If Lightroom and Photoshop fail to adequately reduce noise in your images, it’s time to move to third-party plug-ins. For years, they’ve done a superior job of reducing noise, and they still do. While there are many fine third-party plug-ins for Photoshop (Noise Ninja, Neat Image, Dfine, etc.), one stands out from all the rest: Imagenomic Noiseware Professional.
For me, Noiseware is the most robust noise-reduction software available. Ironically, while it offers the most sophisticated feature set, very often the default settings when you first open an image are all you’re likely to need. In many cases, very little, if any, additional tweaking is necessary.
In part, this is because Noiseware analyzes the images you process and creates “profiles” or saved settings that it uses every time you open a new image. It intelligently learns your needs by tracking your past images and analyzing your new images. You can also use Noiseware’s tools to create your own profiles, which can be saved and reused. You can save your own Preferences for how you’d like Noiseware to behave and learn. Noiseware also offers 13 default settings (like Landscape, Night Scene, Portrait, Stronger Noise, etc.) and allows you to save your own custom settings, which can be created from scratch or by modifying the provided presets.
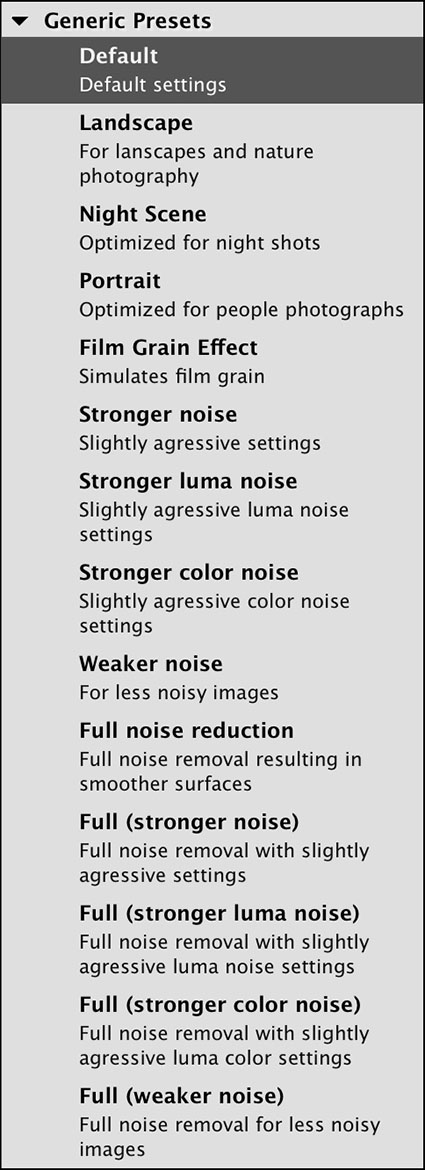 Standard Presets
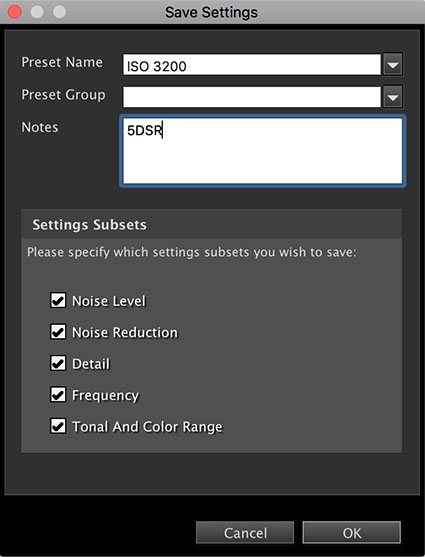
Custom Preset
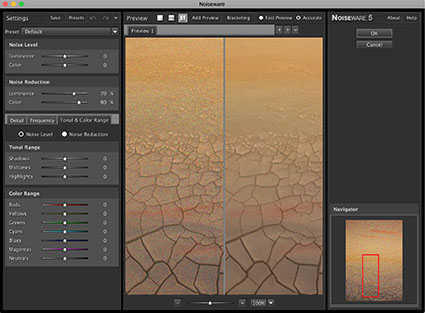
Noiseware’s ability to target noise reduction to specific aspects of an image is what makes it unparalleled. You can adjust Noise Reduction based on Luminance or Chrominance; higher settings produce stronger noise reduction. You can target Noise Level based on Luminance or Chrominance; higher settings tell the software there’s more noise. You can target Color Range; Noise Reduction and Noise Level can be customized by hue—reds, yellows, greens, cyans, blues, magentas, neutrals. You can target Tonal Range; Noise Reduction and Noise Level can be customized for shadows, midtones and highlights. You can target image areas based on Frequency (or amount of detail); Noise Reduction and Noise Level can be customized to High, Mid, Low and Very Low frequencies. Finally, you can enhance detail, first, by using Detail Protection to reduce the effect based on Luminance or Color, and second, by using Detail Enhancement, which provides Sharpening, Contrast and Edge Smoothening.
Defaults
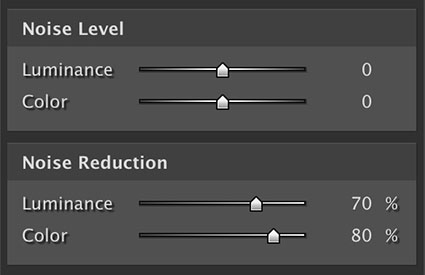
Noise Level helps prepare the filter by analyzing the image
Noise Reduction is the blurring effect
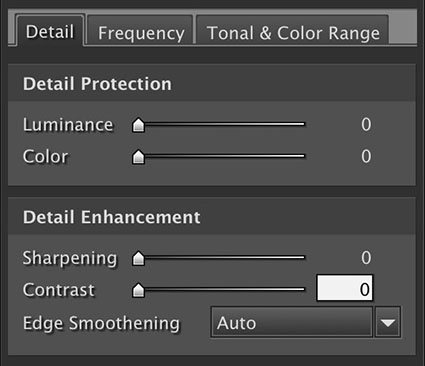
Detail Enhancement – turn it off and use Photoshop instead
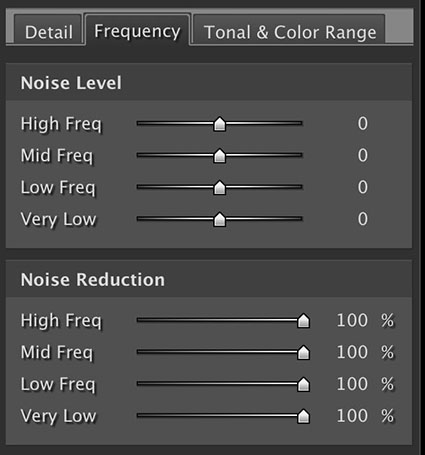
Frequency (of detail) targeting
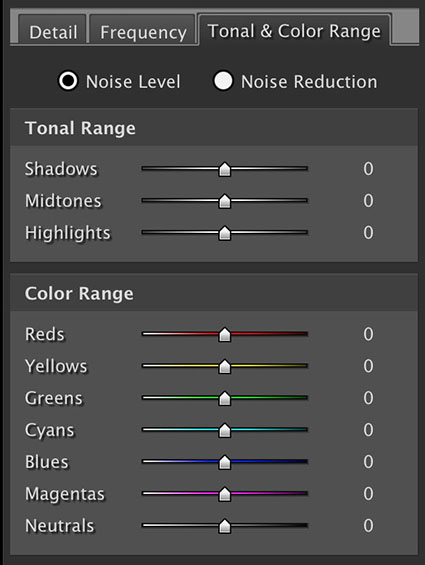
Tonal & Color Range targeting
Noiseware’s ability to provide this level of selectivity is extraordinary. It allows you to easily customize noise reduction for separate areas of an image without making complex masks. You’ll want to do this. Here’s just one example, among many, of why you want to do this. Smooth image areas reveal noise much more readily and they support more noise reduction, while highly textured image areas hide noise, but don’t support as much noise reduction without compromising apparent image sharpness.
Use Noiseware’s sharpening sparingly (if at all) and only for the most modest boosts to image sharpness, as you can create much more sophisticated and selective results in Photoshop—and almost every image can use a little sharpening after noise reduction. Always reduce noise before sharpening.
Combine today’s digital cameras with the latest software, and you’ll find that you’ll rethink many things about when and where you make exposures. You’ll shoot at higher ISOs that you once thought were unusable. You’ll shoot in low levels of light where you once thought it was impossible to get an exposure, much less a usable one. You’ll look at your digital files, and where once you thought noise was a deal-breaker, you’ll find it no longer is. Noise-reduction skills and noise-reduction tools are essential to any photographers skill set and toolkit. Master them, and liberate yourself.
.


