Single Exposure / Multiple Exposures
Need to make an exposure at a setting that’s sure to produce noise? Make a bunch of them. Then watch the noise disappear.
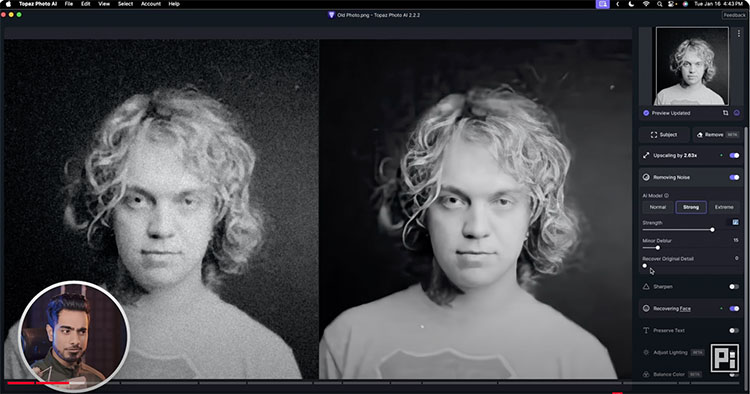
You can reduce noise in an image by combining multiple exposures of the same composition in Photoshop. Photoshop can search for the differences between the separate exposures and then blend them, keeping what stays the same and eliminating what changes. Random noise between separate exposures of the same composition will be substantially reduced, even dramatically, or disappear altogether. (This technique won’t eliminate fixed noise; hot pixels or column and row noise. There are other techniques for that, like using dark slides.)
You’ll find having this option will greatly reduce the reluctance you have towards using high ISOs. This means two things. You’ll be able to make images in lighting situations you thought you couldn’t and you’ll be able to make hand-held exposures in conditions you ordinarily wouldn’t be able to without severely compromising quality.
So how do you do this? Take these steps.
1 Shoot multiple exposures.
(Try to minimize camera motion as much as possible. It’s not necessary to use a tripod, but it can be helpful.)
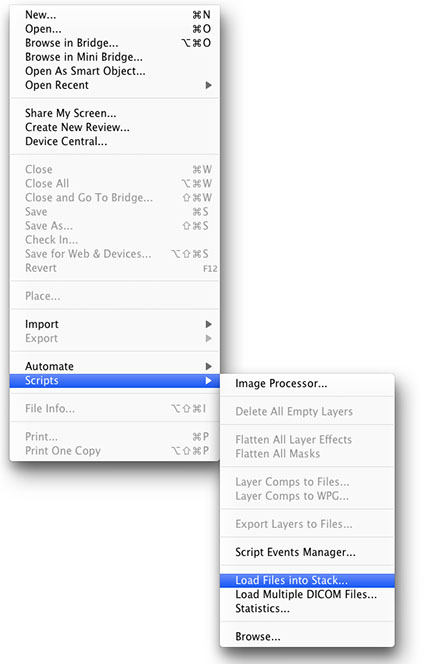
2 In Photoshop go to File > Scripts > Load Files into Stack

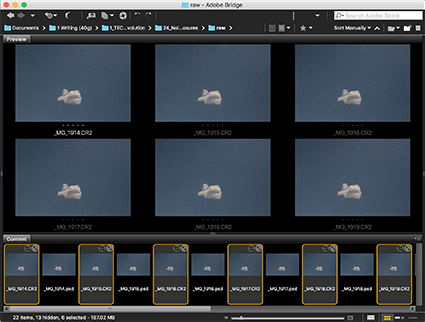
3 Click Browse and select the exposures to be used in the Stack and check Attempt to Automatically Align Source Images and Create Smart Object after Loading Layers.
(The resulting Smart Object will contain all exposures in a single layer.)
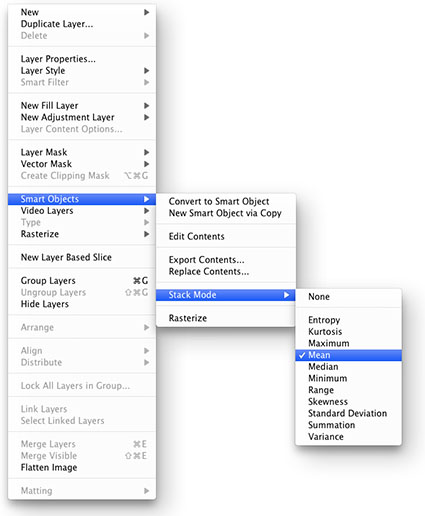
4 Go to Layer > Smart Objects > Image Stack Mode > Median to blend the separate exposures.
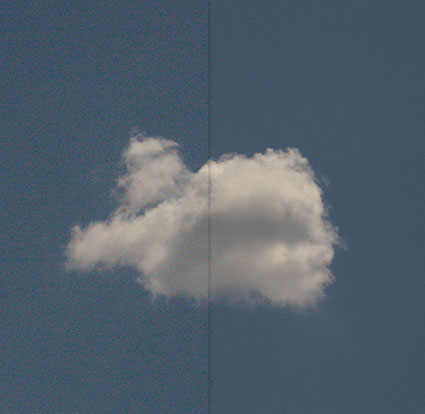
(You’ll see the noise substantially reduced.)
5 Optionally, compare the Image Stack Mode > Mean.
(This works best for exposures containing no movement.)
So what is Photoshop doing? Photoshop first aligns a series of images as separate layers, converts them into a Smart Object, and blends them, reducing or amplifying the differences between the layers with a variety of rendering modes. You can choose one of eleven rendering modes; Entropy, Kurtosis, Maximum, Mean, Median, Minimum, Range, Skewness, Standard Deviation, Summation, and Variance. Few people will ever use all of them; most won’t use any of them; but I recommend you try two – Median and Mean. (Stacks were designed for analytical tasks in various scientific fields, like astrophotography or forensics and they’ve since been put to many other uses.)
Median and Mean select values in between the highest and lowest values, smoothing out the differences between aligned layers in a stack. Median works best for images with some motion, either subject or camera, to remove moving objects or noise. Mean works best for processing exposures without motion. (Astrophotographers typically make many exposures, sometimes dozens or more, of the same subject and use Mean to reduce noise.)
The more exposures you make and combine the better the noise reduction. Only practical limits apply. How many exposures can you make? How many exposures can Photoshop process on your computer? You can stack and process as few as two images. Three is my recommended minimum. Six is better. After that, you get diminishing returns. (Try using your camera in burst mode more frequently.) The most challenging part of this technique is identifying situations where it’s helpful and remembering to make multiple exposures. If you have the exposures you can take advantage of this great feature; if you don’t have the exposures you can’t.
Combine the recent advances in digital cameras that offer exceptionally low noise at high ISOs, with new exposure techniques, with new post-processing techniques by the latest software, and you’ve got a profound paradigm shift in photography.
Learn these techniques and you’ll find your photographic options will expand dramatically. The most challenging thing isn’t learning the techniques; the most challenging thing is redefining what’s possible and practical. You’ve got to experience it to truly understand it.