Extending Format – You Can Use It For More Than Panoramas
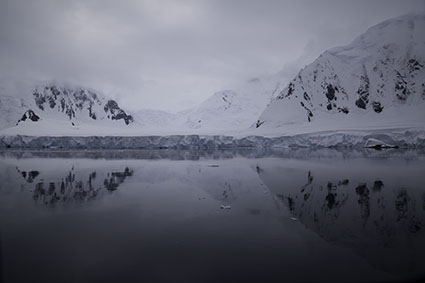
Left
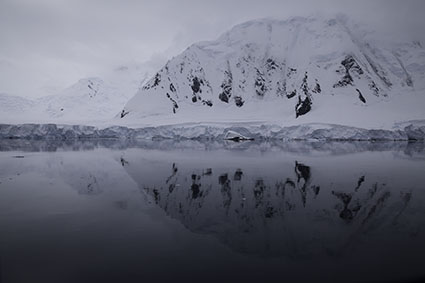
Right
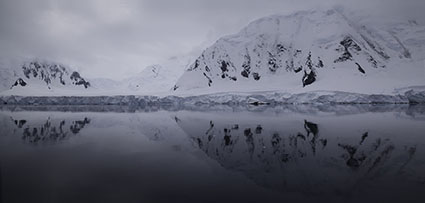
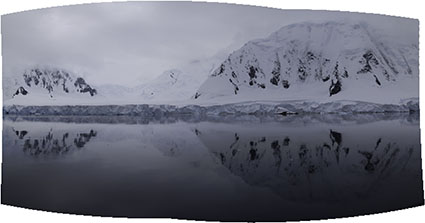
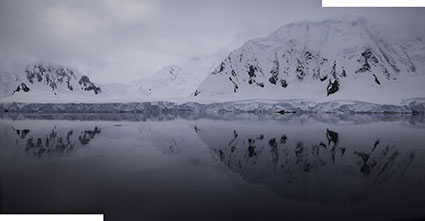
Panoramic stitches combine both
Think Outside The Frame
No one needs to learn to “think outside the box” more than photographers. The frame, literally a box, is often our greatest ally. Learning to see photographically is in part learning to see within the limits of this box and use them creatively. But there are times when this limits our vision unnecessarily. Once we’ve learned to see within the box, we then need to learn to also see outside the box – and start extending the frame with multiple exposures to perfect select compositions. Extending format techniques aren’t just for panoramic image formats. They can be used to give you the extra inch that can make all the difference in the world for your compositions.
Hand-held Exposure Techniques
While the best way to make exposures for panoramic merges is to use a dedicated panoramic head on a tripod, this may not be practical – or necessary. (There are three significant benefits to using panoramic tripod heads; one, they keep the camera level and without rotation throughout an exposure sequence, two they calculate the number of and overlap between exposures, and three they pivot the camera around a lens’ nodal point minimizing parallax.) Today’s software packages work miracles making what was once impossible possible. Several practices can help you make better hand-held exposures for panoramic merges.
Keep the horizon level in all the exposures; varying rotation can cause improper alignment and/or excessive cropping and/or retouching.
Shoot a little loose. Perspective correction in these types of photo merges often resulting in irregular borders that beg cropping – or retouching, if this is appropriate. The extra wiggle room you gain from shooting loose will allow you to crop the final results more precisely.
Don’t shoot the separate exposures edge to edge. Instead, overlap your exposures by a third for medium lenses, a half for wide-angle lenses, and two-thirds for fisheye lenses.
Make exposures with the opposite orientation as the final image orientation; if you’re making a horizontal composition shoot with a vertical camera orientation and if you’re making a vertical composition shoot with a horizontal camera orientation. This does two things. One, it increases the number of frames, and thus vanishing points, reducing the tendency for the required perspective correction to produce distortion artifacts. Two, it increases resolution – a tendency that becomes compounded with each added pass in multi-column or multi-row exposure sequences.
Once focus is set, turn off auto-focus during the bracketing sequence. Unwanted shifts in focus may ruin an exposure sequence. For this same reason, consider shooting all exposures in a single sequence at the same aperture setting, as significant variances in depth of field between frames may be challenging to merge convincingly.
Consider using manual exposure. While software can convincingly blend exposures with significantly varying exposures, if brightness across a scene remains fairly constant keeping the same exposure settings between different shots can aid the blending process. (The same is true for white balance, which can be set either during exposure or during Raw processing.) On the other hand, if brightness varies dramatically, bear in mind that simultaneous HDR exposure bracketing is not out of the question; it just increases the number of exposures needed.
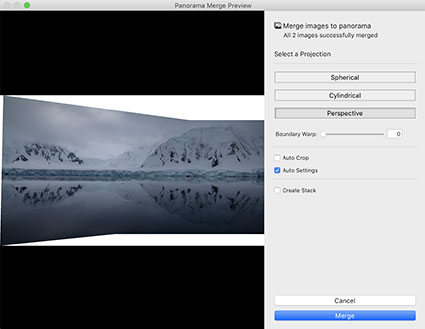
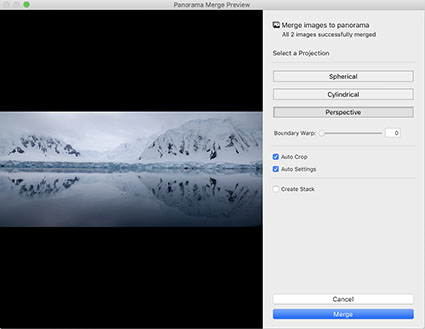
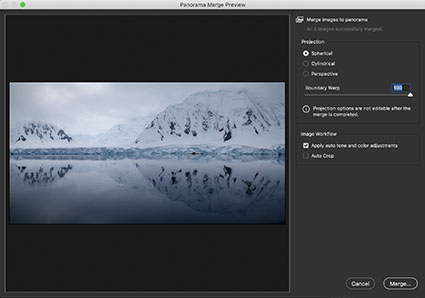
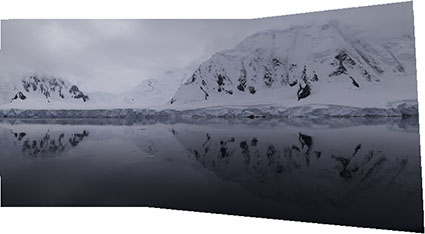
Lightroom’s Panorama Merge Preview
Auto Crop checked
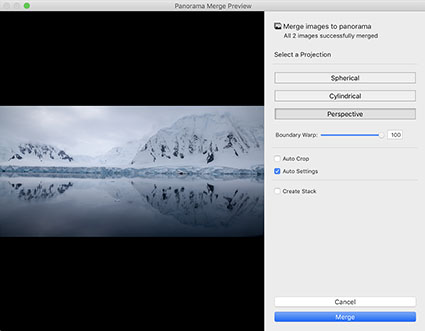
Boundary Warp slid to 100
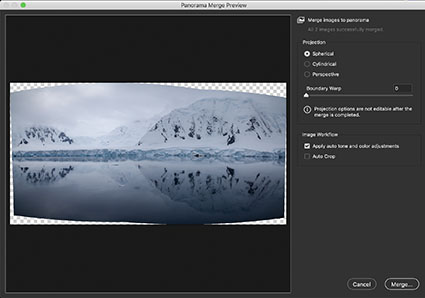
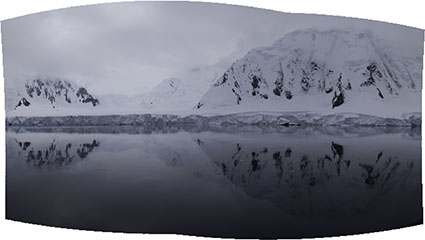
Adobe Camera Raw’s Panorama Merge Preview
Auto Crop checked
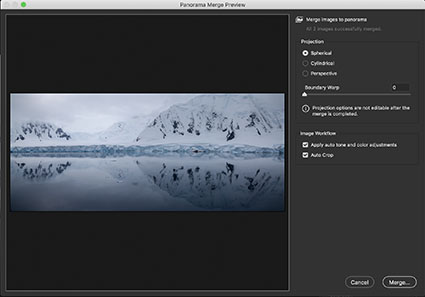
Boundary Warp slid to 100
Stitching / Merging
Merge to Panorama in Lightroom and Adobe Camera Raw
You can perform panoramic merges in either Adobe Lightroom or Camera Raw. Their interfaces may look different but they’re the same.
There are three advantages to making panoramic merges with these Raw converters. First, it creates a new combined file in DNG format and allows future access to the Raw data in the files. Second, they offer simple but powerful post-merge distortion (Boundary Warp) and Auto Crop options that Photoshop’s Photomerge doesn’t. (This means you’d only choose Photoshop when you wanted to use its additional merge projection options Collage and Reposition.) Third, the DNG file takes up less space than the PSD or TIFF file Photoshop generates.
How do you do this?
In Lightroom, highlight images and choose Photo > Photo Merge > Panorama.
In Adobe Camera Raw, highlight and open images before using the hamburger menu to choose Merge To Panorama.
Both Lightroom and Camera Raw will then offer you a Panoramic Merge Preview with Projection options – Spherical, Cylindrical, Perspective – that will distort the separate frames to align them. The Projection options yield significantly different results and it’s worth preview all of them before choosing your preferred result.
When you choose a Projection, be mindful of how you will ultimately crop or retouch the result. You can choose Auto Crop to remove white space surrounding the now distorted frame, which may remove wanted image information. Or, you can choose Boundary Warp to fill the frame by distorting the image further, which may or may not be pleasing. Or, you can use a combination of both. Or, you can use neither and retouch the results in Photoshop with tools like Content Aware Fill.
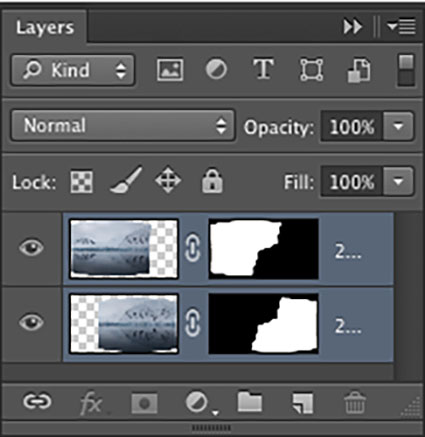
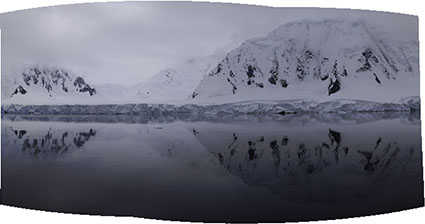
Photoshop’s Photomerge automatically layers, distorts, and masks exposures
Photomerge in Adobe Photoshop
Unlike Lightroom and Camera Raw, Photoshop’s Photomerge produces a PSD or TIF (no longer Raw now cooked) that places each exposure on a separate masked layer. These layers and layer masks can be adjusted as desired at any time in the future.
While Camera Raw and Lightroom’s more limited distortion options (Spherical, Cylindrical, and Perspective) often satisfy a majority of needs, it can still be rewarding to explore the wider variety of creative distortion options Photoshop’s Photomerge makes available (Collage and Reposition). They can be more pleasing with some images. Sometimes they makes the impossible possible.
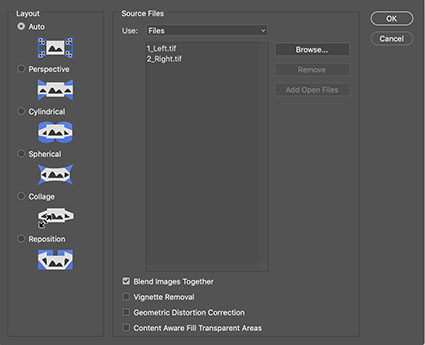
To use Photoshop’s Photomerge to combine multiple images into one by going to File > Automate > Photomerge and clicking Browse to select the files you’d like to merge.
Or, you can access Photoshop’s Photomerge through Bridge; highlight images in Adobe Bridge and choose Tools > Photoshop > Photomerge.
Or, you can access Photoshop’s Photomerge through Lightroom by first selecting images and then choosing Photo > Edit In > Merge to Panorama in Photoshop.
Below the file list are four options. You’ll probably find that you’ll use them more often than not.
Blend Images Together uses masks to create seamless transitions between exposures.
Vignette Removal evens out color shifts created by most lenses (to varying degrees) near the edges of the frame.
Geometric Distortion Correction straightens lines bent by some lenses.
Content Aware Fill Transparent Areas fills in empty spaces created by the panoramic distortion of the frame. Or, you can do this manually in Photoshop, which provides more control. If you selected Content Aware Fill Empty Areas this will create an additional layer at the top of your layer stack with one merged copy of all other layers plus the filled areas.
Photoshop offers 5 kinds of distortion
Perspective
Cylindrical
Spherical
Collage
Reposition
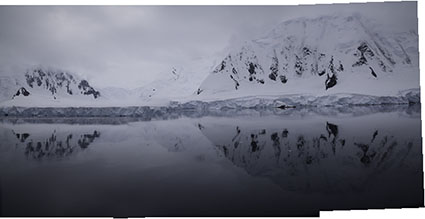
Distortion corrected after merge
Post-Merge Distortion
Once a merge is complete you can create further variances by using one or more of Photoshop’s powerful distortion tools – Free Transform, Puppet Warp, and the filters Lens Correction, Adaptive Wide Angle, and Liquify. These can be used for functions as obvious as straightening a horizon, whether uniformly on non-uniformly bowed, or as subtle as subtly adjusting shape, proportion, and line angle. While this step is often overlooked, it can produce substantial differences. (To apply one or more of these effects to all layers at one time, you can merge them into a single new layer by simultaneously tapping Shift, Option, Control, and E.)
Cropping And / Or Retouching
The distortion necessary to align and fine-tune image information within the frame also distorts the frame. To restore a rectangular shape requires one of two moves – or a little of both. One, crop. This eliminates some image information along the edges. Again, ensure that significant information is not lost in the final merged image by framing loosely during exposure. Two, retouch. Using the Clone Stamp tool, Healing brush, or Content Aware Fill synthesizes convincing image information to fill gaps left by distortion, often in a way that cannot be ascertained by the uninformed viewer, but it nonetheless changes the nature of the photograph created, either subtly or substantially; it’s a practice that may or may not suit your intention.
Try Vertical
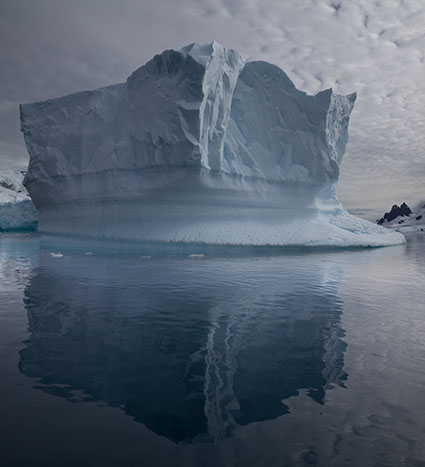
Vertical panoramas are equally compelling
Just A Little Extra Can Make All The Difference
Stitches are useful when you can’t fit it all in frame
Stitching Is For Everyone But Not Everyone Will Use It In The Same Ways
Regardless of whether you use panoramic aspect ratios, the practice of extending format through photo merges can help you perfect many compositions in ways that are often challenging and in some cases impossible to do otherwise. It can help you choose a better angle of view without eliminating essential information or include essential information when you either can’t or don’t have time to change angle of view. When this skill becomes second nature, you’ll find that you’ve become visually more versatile, flexible, and accomplished.
Read more MultiShot techniques.
Learn more in my digital photography and digital printing workshops.
cheights
12.02.2019 at 23:07Another trick that helps (thanks, Scott Kelby) is to move your feet instead of twisting your body. That will reduce parallax.