How To Change Depth Of Field In Photographs With Photoshop
.
Colin Smith demonstrates the most powerful way to change the depth of field or background blur in photographs using Photoshop’s depth maps, neural filters, and lens blur.
.
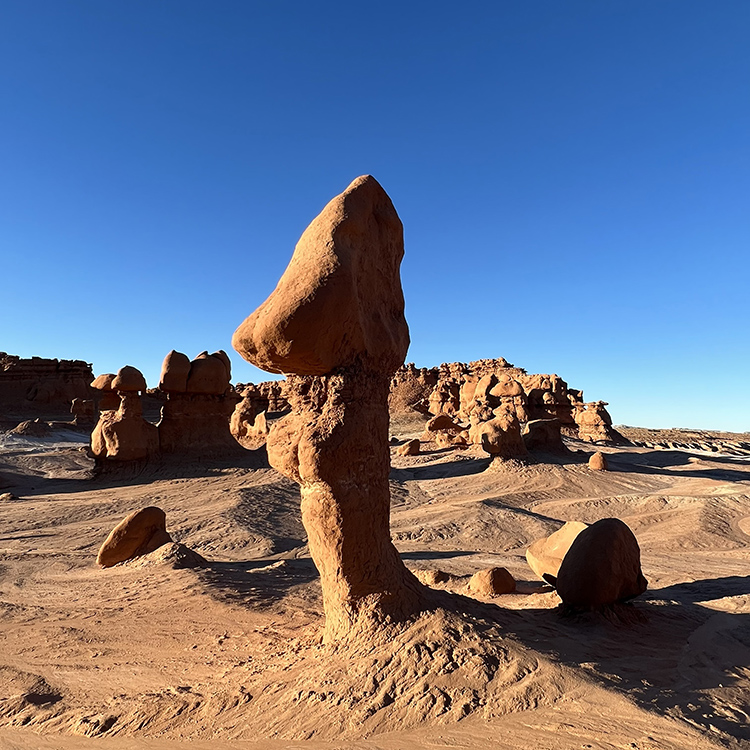
Fully focussed image

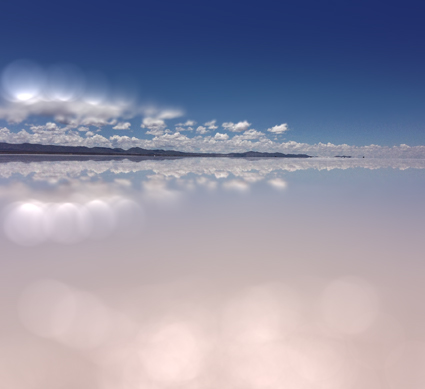
Photoshop's Depth Blur filter applied

One contour quickly masked
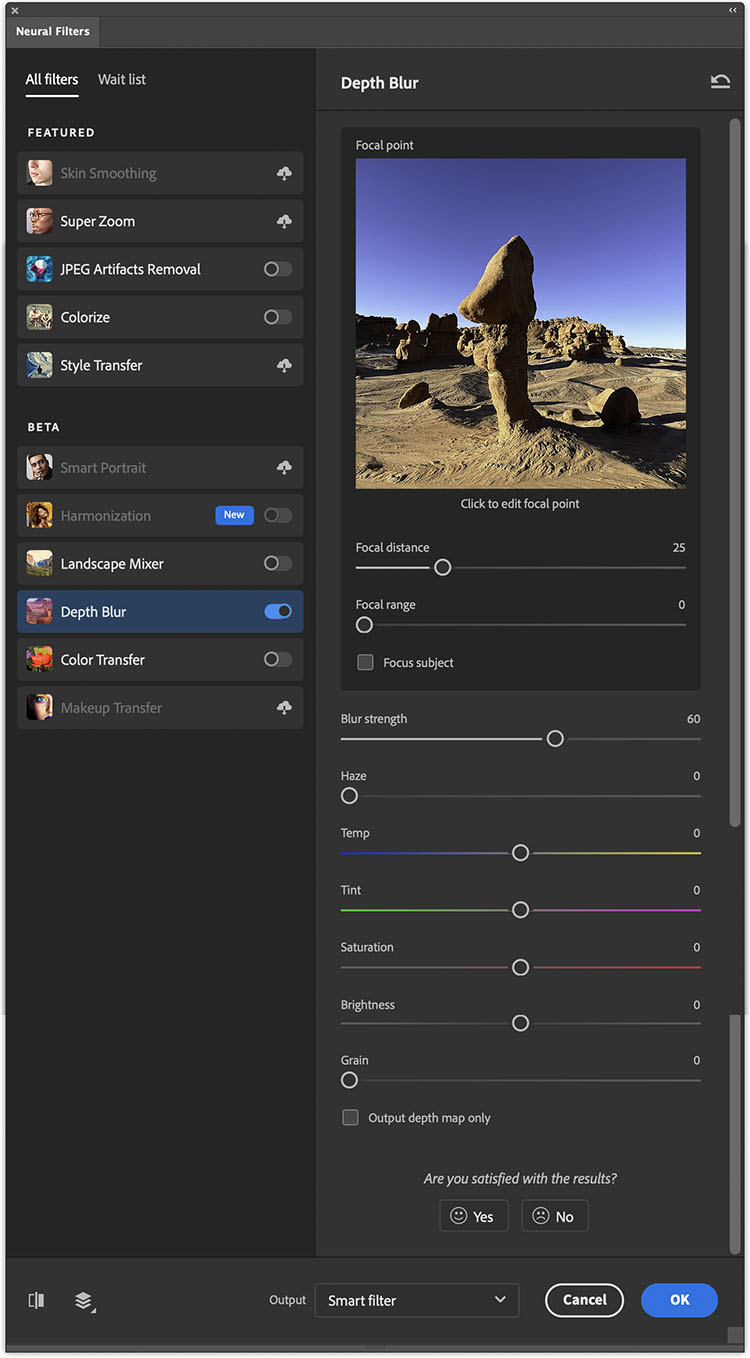
Photoshop’s AI neural filter Depth Blur is designed to simulate depth of field effects quickly and easily.
Here’s how to use it ...
.
.
Add noise with a separate layer.
Noise Makes Images Look More Natural
Be careful not to smooth your images so much that your images begin to look synthetic like they’ve been rendered by software rather than captured by hardware. Over-smoothing can happen when you aggressively reduce noise, retouch at lower opacities, or create blur effects. You can use noise to restore a more naturalistic appearance. And, there’s a way to do this in Photoshop that will allow you to control what kind of noise and how much it’s applied indefinitely.
Add Noise Effects On Separate Layers
When you add noise to digital files, place it on a layer that is separate from the image(s) so you can control both independently of one another. This way you’ll have extraordinary control and flexibility. When noise is placed on its own layer you can eliminate or change it at any time in the future, reduce its opacity, localize it with masking, desaturate it, target it into specific channels, move it, scale it, blur it, and much more. Here’s how to do it in Photoshop.
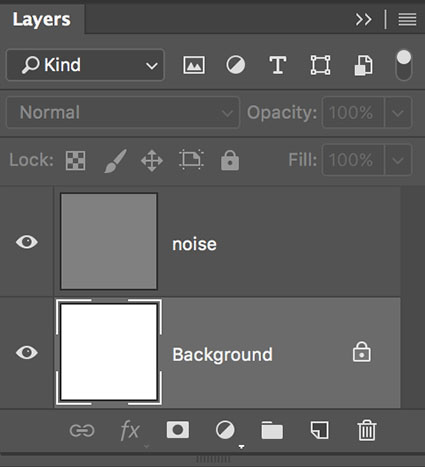
1 Create a new layer (Layer: New Layer),
set blend mode to Overlay,
check filled with Overlay-neutral color.
2 Filter the layer with noise (Filter: Noise: Add Noise).
3 Add a Hue/Saturation Adjustment layer clipped to the noise layer to reduce the saturation of the effect only.
4 Optionally, add a Layer Mask to the noise layer to localize the effect using either a selection, brush, or gradient.
5 Optionally, use Edit: Free Transform to resize the effect.
You can modify the effect at any time in the future, without compromising the original image information.
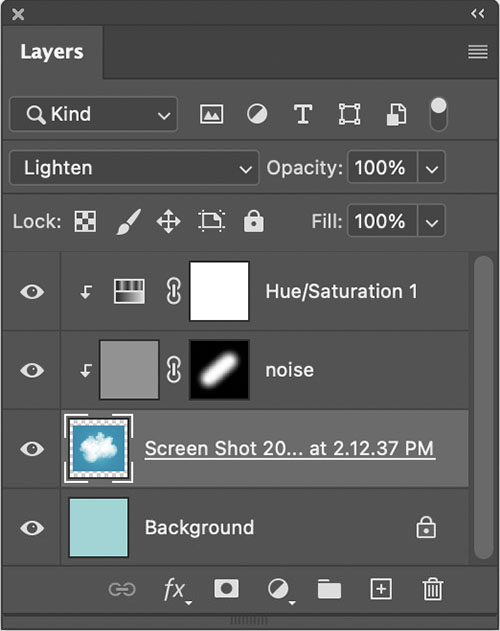
Noise can be clipped to a single layer.
Make Noise Layer Specific
You can clip noise effect layers to a single image layer. Simply press the Option/Alt key and click the line separating the two layers in the layers palette. Photoshop will then apply the noise only to the pixels on that layer. When a layer has transparency, like a retouching layer, no masking will be necessary once the noise layer is clipped to it.
Photographers go to great lengths to avoid noise. This is generally a good practice, but it can be overdone. There are many times when a little noise can make your images more convincing.
Read more of this technique here.
Learn more in my digital photography and digital printing workshops.
Did you get it? My enews Insights just broadcast!
This issue features great Bokeh / Blur FX techniques.
Sign up for Insights free here!