How To Use Noise In Images Creatively
Noise happens. Most of the time you want to lose it, but sometimes it’s better to use it. There are many reasons to use noise in your photographs.
Detailed areas look sharper with less noise reduction.
Make Images Look Natural & Sharper
Be careful not to reduce noise so much that your images begin to look synthetic like they’ve been rendered by software rather than captured by hardware. When you need to aggressively reduce noise, you’ll find there will be times when adding back a little noise will produce more satisfying results. You can also use noise to restore a more naturalistic appearance to highly retouched areas and even synthetically rendered elements. Surprisingly, adding a touch of noise will make even slightly out of focus images appear sharper.
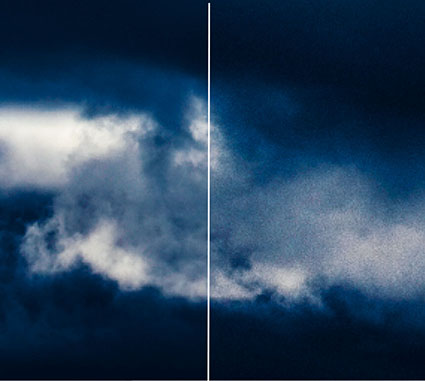
Reduce Banding
You can use noise to reduce or eliminate banding. Don’t confuse the linear banding sometimes produced by different output devices; this kind of banding can only be removed by maintaining the machine. However, irregular banding that follows color or tonal transitions in digital files, usually the result of aggressive image editing, often in 8 bit instead of 16-bit mode, can be substantially reduced or removed altogether by adding a little noise. Before you try this, try to identify where banding was introduced during your editing and redo those edits so that banding doesn’t occur; prevention is the best cure. Consider adding noise as a solution only when this is either unavoidable or impossible.
Unite Images From Multiple Sources
You can use noise to unify images from multiple sources with varying noise structures. One day, you may find you need to composite images with different noise characteristics, either from multiple sources (different resolutions and capabilities) or from one source used under very different conditions (different ISOs or exposure times).
First, reduce noise in each source separately, as much as possible without compromising image quality adversely. Next, using the noisiest element as a baseline, add noise to the other elements to make them seem as if they were all drawn from a single source used under the same conditions. In some cases, you may decide to have variances, small or large, in noise between different elements for creative effect. Textured elements, like the foreground in a landscape, hide noise better than smooth ones, like skies, so consider treating them differently. How far should you go? There are no formulas here as different people have different tastes and many different solutions will work within a range of acceptability. Look carefully and use your best judgment to create an effect that is pleasing or convincing to you; that’s the best way to ensure it will be pleasing or convincing to others.
Build Creative Effects
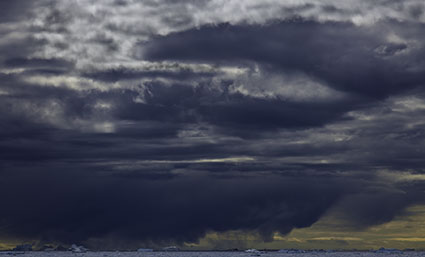
You can use noise as a creative effect. Many great photographers have used noise for creative effect. Shiela Metzner, Michael Kenna, and Robert Farber are three. Images may become more evocative because they contain noise. Many people use words like rough, gritty, nostalgic, impressionistic, mysterious to describe the effects of noise. For some, noise can be merely a gimmick (a meaningless distracting stylization unrelated to a way of seeing or relating to images) for others, noise can be a truly compelling artistic device (a meaningful element that enhances or creates a way of seeing and relating to images and thus a useful clue to artistic intention). In your images, one way or another, noise will either be there or not. Either one is a choice and a statement. So think carefully about what level of noise is most appropriate for your images.
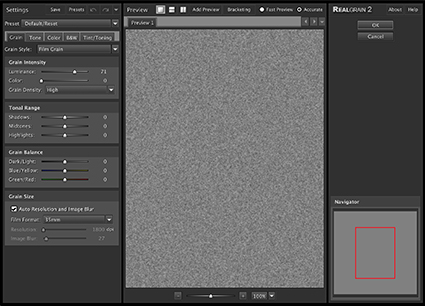
Imagenomic’s RealGrain
Customize The Look And Feel Of Noise
Noise can come in many forms. Organized or random patterns. Small, medium or large-sized or some combination of all three. Hard-edged or soft-edged. Monochromatic or polychromatic, of any hue and saturation level. Light or dark. Targeted in specific tonal ranges (shadows, midtones, and/or highlights). You can customize the look and feel of noise in your images with a relatively simple digital imaging toolset.
Photoshop offers two filters that are particularly useful for noise effects.
Noise (Filter: Noise: Add Noise) offers simple controls; Amount controls the intensity of the effect; Uniform and Gaussian control the random pattern generated; and a monochromatic checkbox. (The color of noise can be controlled more precisely with an adjustment layer. Apply noise in full color to an effect layer – 50% gray set to a Blend Mode of Overlay. Make a Hue/Saturation adjustment layer clipped to the noise layer. Use the Saturation slider to control saturation. Use the Hue slider to control Hue. You can even use the Edit pull-down menu to control a specific color of noise. For instance, to have only red noise, you can change all the blue and green noise to red.)
Grain (Filter: Texture: Grain) offers more control over the patterns generated; Regular, Soft, Sprinkles, Clumped, Contrasty, Enlarged, Stippled, Horizontal, Vertical, Speckle. All of them are useful. Horizontal and Vertical create patterns that are so regular that they are the least likely to be chosen.
After exploring these two filters, if you still haven’t found what you’re looking for, consider third-party plug-in noise generators such as Imagenomic’s RealGrain or Nik’s Color FX and Silver FX Pro.
Try Multi-pass Noise
Noise applied multiple times adds up differently than noise applied once. This is true of all filters that involve an element of randomization. In rare instances, when one application of noise won’t do the job, consider applying a filter (or filters) multiple times at reduced intensities. There are three ways you can do this. One, use a lower filter setting and apply it multiple times to the same layer. Two, apply the filter at full strength and then reduce the Opacity (or Blend Mode) by fading it (Edit: Fade) – and repeat. Three, apply a reduced application of noise to multiple effect layers. Multipass applications of noise can be particularly useful when trying to reduce extreme banding. If one pass won’t do, try two.
Add Noise Effects On Separate Layers
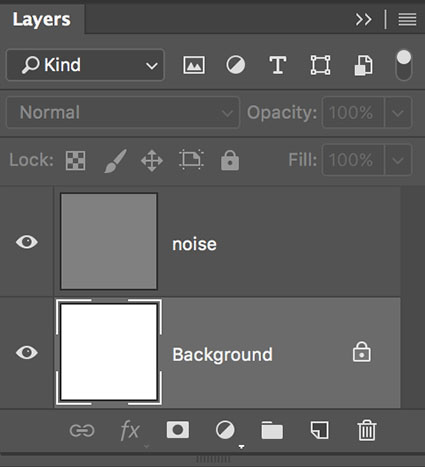
When you add noise to digital files, place it on a layer that is separate from the image(s) so you can control both independently of one another. This way you’ll have extraordinary control and flexibility. When noise is placed on its own layer you can eliminate or change it at any time in the future, reduce its opacity, localize it with masking, desaturate it, target it into specific channels, move it, scale it, blur it and much more. Here’s how to do it in Photoshop.
1 Create a new layer (Layer: New Layer) set to Overlay blend mode filled with 50% gray.
2 Filter the layer with noise (Filter: Noise: Add Noise or Filter: Texture: Grain).
3 Add a Hue/Saturation Adjustment layer clipped to the noise layer to reduce the saturation of the effect only.
4 Optionally, double click the layer to activate Layer Styles. Uncheck specific Channels to remove the noise from them. Use the This Layer sliders to reduce the amount of the dark and/or light noise. Use the Underlying Layer sliders to remove the effect from shadows and/or highlights.
5 Optionally, add a Layer Mask to the noise layer to localize the effect using either a selection,brush or gradient.
6 Optionally, use Edit:Free Transform to resize the effect.
7 Optionally, use Filter: Blur: Gaussian Blur to soften the effect. (Or use any other blur filter, like Motion Blur, to add unique distortion effects.)
You can modify the effect at any time in the future, without compromising the original image information. You’ve got a lot of options. That’s the point. You’ve never had so much control over noise – until now.
Let’s go into some of the finer points.

Noise can be clipped to a single layer.
Make Noise Layer Specific
You can clip noise effect layers to a single image layer. Simply press the Option/Alt key and click the line separating the two layers in the layers palette. Photoshop will then apply the noise only to the pixels on that layer. When a layer has transparency, like a retouching layer, no masking will be necessary once the noise layer is clipped to it.
Build FX Layers That You Can Use Again And Again
It can take some time and experimentation to create a custom noise you like, but once you find it, you can use it again and again. Noise on effects layers can be quickly and easily dragged and dropped between open files.
Try Noise On Image Layers
Noise builds up differently on the varied tonal structure of image layers than it does on effects layers whose pixels are all 50% gray. In most cases the difference is not significant or useful. In rare cases, it can be. In some extreme cases of banding, filtering a duplicate image layer multiple times (at lower intensities) may be helpful.
Avoid adding noise to the Background layer as long as possible. Instead, try duplicating the Background layer and then applying noise to the copy. If you have multiple image layers that you’d like to apply a single noise effect to multiple layers, you have two options. One, merge them into a new layer. Hold the Command/Control key before selecting Merge Visible from the layers palette submenu. Make sure adjustment layers are turned off and that the noise layer is moved to an appropriate position in the layer stack. Two, place the layers you want to affect into a group; pressing the Shift or Command key highlight them all and then select New Group From Layers in the layers palette submenu. Change the blend mode of the group from Pass Through to Normal, so the noise layer will only affect the layers inside the set. Finally, add the noise layer inside the group.
Explore Your Options
Take a little time to explore your options here. This toolset is relatively easy to master. The key to applying it masterfully is in looking carefully and responding sensitively to what you see. Use noise consistently in your images and you can mimic any other preexisting noise structure or customize a unique look no one has seen before. Noise is an essential quality of photographic images. With a little preparation and effort you can virtually have as much or as little of it as you like.
No Comments