What To Do With Photoshop’s Color Management Dialogs
Knowing what to do with the color management dialog boxes you encounter while you’re editing your digital images in Photoshop is the key to making sure that the rich, saturated, wide-gamut color you choose to master your files in stays wide-gamut and doesn’t change – unless you want it to.
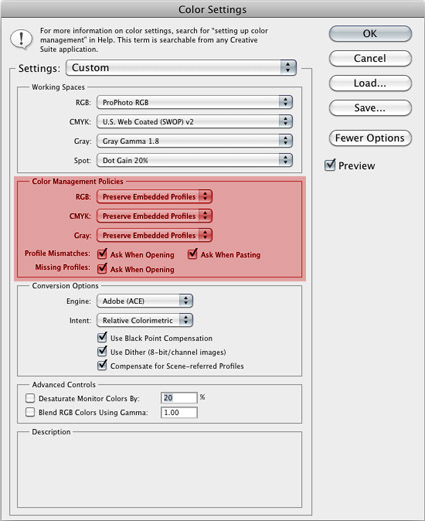
When you set Color Settings in Photoshop (Edit : Color Settings), you not only choose Working Spaces (RGB, CMYK, Gray, and Spot) to create new files in (Choose ProPhoto RGB for the widest-gamut color space.), you also set Color Management Policies that determine what happens when you’re dealing with files that are not created or edited in the same color spaces.

For RGB, CMYK and Grayscale files you can choose to turn Color Management Off, to Preserve the Embedded Profiles, or to Convert to Working color spaces. You rarely, if ever, want to turn color management off; you only do this when you want to ensure that no color space conversions take place, for example when opening target files for creating printer profiles. Similarly, you typically don’t want files automatically converted to a default working color space without your knowing that it’s happening, as they are when you set the policy to Convert to Working; you’d only want this to happen when you’re batch converting a number of files to quickly bypass color management dialog boxes. In the vast majority of cases, you’re better off served leaving the default settings at Preserve Embedded Profiles. This way, any time a color management operation is about to take place, you’ll get one of three dialog boxes that not only alert you but also give you control over how the operation is handled.
So what do you do when you encounter these three dialog boxes – Missing Profile, Profile Mismatch, and Paste Profile Mismatch?

