Photoshop Color Settings
Excellent Photoshop Color Settings can be set up in a few seconds.
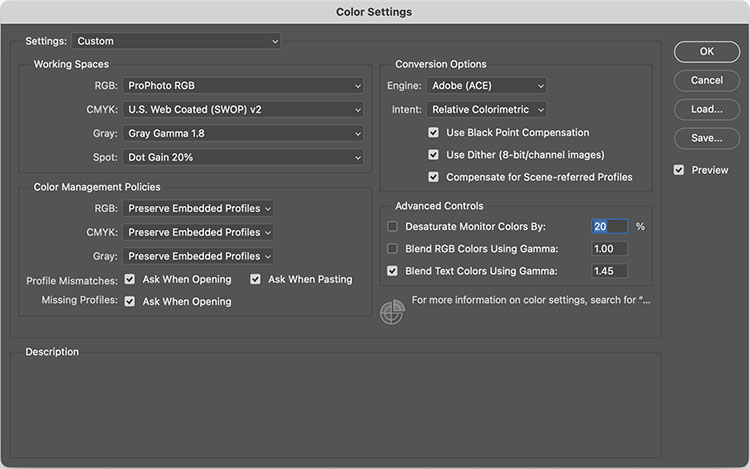
1 Go to Photoshop’s Edit Menu select Color Settings.
2 Start with Settings of North American Prepress 2 and then change RGB to ProPhoto RGB. (Optionally change Gray to Gray Gamma 1.8.)
3 Click OK.
Here’s a little more about the underlying assumptions of this recommendation.
1. Choose a device-neutral wide gamut editing space to create your images in. Wide gamut editing spaces can contain all the data your camera or scanner delivers. Smaller gamut editing spaces may not. Preserve your high-quality information. ProPhoto is today’s preferred wide gamut RGB editing space. It’s the only default that can contain all the colors your camera can capture.
2. Minimize the number of color conversions applied to your files. Set Photoshop to Preserve Embedded Profiles. Always keep your master file in the color space it was created in. Convert only derivative files.
3. Make sure you know about all the color conversions your file goes through. Set Photoshop to alert you whenever a color conversion may take place. Check Ask When Opening / Pasting with Profile Mismatches and Missing Profiles.
Standardize your workflow, using these settings for all your work (with few exceptions).
Read more on Color Management here.
Learn more in my digital photography and digital printing workshops.