The Art of Packing

There’s an art to packing. Practice it with care. You’ll get better every time you do it. Learning this art will help you make the most of any photographic expedition and enjoy it more.
Do pack the essentials. Don’t pack too much. Traveling with too much is hard to handle, tiring, and can be costly. Less is more – up to a point.
Clothing
It’s tempting to bring too much clothing. Bring only versatile essentials. Find light, washable, quick-drying, versatile clothing you can walk or go to a casual dinner in. Find out ahead of time what kinds of laundry services will be available during your trip and plan to use them – frequently. Bring a good pair of light waterproof hiking boots. Dress shoes don’t work when you’re walking in the wilderness. Bring sun protection; sunscreen, hat, and sunglasses. Unless you’re traveling in a desert, bring waterproof rain shells (jacket and pants). If you’re likely to be in cold situations (early mornings or snow), bring light gloves, hat, long underwear, and a warm light sweater or pullover. If you’re going to be in an arctic or alpine environment bring two pairs; staying dry is key. Leave the big ski parkas and pants home. Layers rule.
Bags
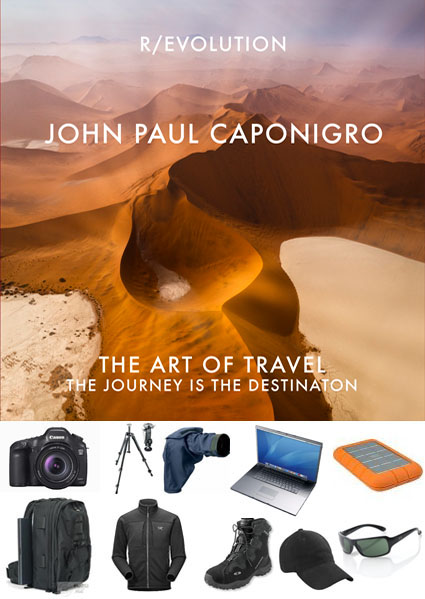
The right bags can make journeys easier. Wheels save you an enormous amount of wear and tear. Make sure your camera and/or computer bag fits under an airplane seat or in overhead compartments. (I use LowePro MiniTrekker and Roadrunner bags.) If you’re flying on small airplanes to more remote regions, check weight limits and take them seriously. Check your clothes; carry your gear. Avoid checking your gear; it can get damaged or stolen. If you’re ever forced to check your gear, carry on one camera and lens around your neck. I travel with one larger camera bag and one small backpack. I carry on the camera bag and pack the backpack in my checked baggage. Once I’m in the field, I walk with my small backpack carrying only the things I need for that location – camera, cards, extra battery, two lenses, water, power bar. (I always pack power bars, for morning when breakfast is light or late or mid afternoon when my fuel reserves can get low.) I also pack an extra duffle bag, just in case I need to check an extra bag – it comes in handy for laundry too.
Cameras and Lenses
Always carry a backup camera. If one is damaged or stolen, you’ll still be able to shoot with the other. It’s convenient (but not necessary) if the two cameras you carry are the same. That way you’ll only need to carry one set of accessories, like batteries, chargers, cords, etc.
Your choice of lenses is important. Lenses help you make the most of many situations. I travel with lenses for three ranges – wide, medium, and long. I rarely walk with all three lenses. To decide which lenses to take, I first look at the location and decide whether I’m most likely to work wide (close environments) or long (wide open spaces), take the appropriate lens, and a medium lens for versatility. All of my lenses are zooms, providing extra versatility. (Canon 16-35mm, 28-135mm, and 100-400mm) Lens shades are important. Polarizing filters are the most useful filters.
Dust and Moisture
Protecting your equipment from moisture and dust is a significant concern. I pack all of my lenses and cameras in sealable plastic bags. (I use Ziplocs.) I store them in them, whenever I’m not using them. I never put my gear away wet. Pack a small cloth to wipe down equipment that does get damp. If you’re likely to shoot in rain or snow consider using a rain cover for your camera. (I use Aquatech’s.) Bring a sensor cleaning system. (I use Visible Dust products.) Dust happens. It’s a lot more efficient to remove it in the field than in post-processing.
Storage
Having the right media to store your images is important. It’s worth investing in a few large media cards so you don’t run out of storage to shoot with in the field. (I use SanDisk 32GB CF cards). At the end of each day, I download onto one portable hard drive and backup to a second.. (I use LaCie 1TB Rugged drives.) When I fly, I pack one in my suitcase and carry one with me at all times. You might also consider carrying a large capacity thumb (32GB plus) drive with you at all times. Put your 5 star images on it. What if your hard drives were lost or stolen? You can replace equipment, but you’ll never be able to replace your images.
Customs
Getting all your gear through security and customs is rarely a problem. That said, in any security situation where my equipment is being screened I take as many precautions as practical to ensure equipment doesn’t fall out of a bag or bin and isn’t dropped when it’s handled. Clearing customs can be more problematic in some countries than others. Do a little research on the web and determine if a carnet (an official government document proving ownership) is recommended. Even if it’s not, I always travel with a copy of my insurance policy that lists my equipment and the serial numbers of each piece.
Before you travel, take the time to get organized and be prepared. You’ll make better photographs and enjoy traveling more too.
Learn more in my digital photography workshops.
View my webinar The Art Of Travel here.
View my Equipment Packing List here.
Printing – Finding the Coated Side of the Paper

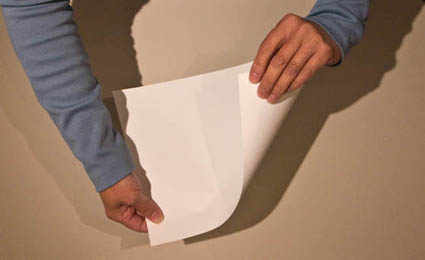
Finding the side of a paper that’s optimized for printing can sometimes be challenging. Here are a few tips to help.
1 Look for the logo – the logo is always on the back.
2 Compare whites – the coated side is often whiter.
3 Feel the surface – the coated side is smoother.
4 Lick the paper – the coated side sticks more.
5 Feel the edge – paper is cut coated side up leaving a tiny lip/edge on the back side.
If you have other tips for finding the coated side of paper, comment here!
Learn this and other tips and techniques in my Fine Digital Print workshops series.


