The Best Ways To Use Multi-Colored Histograms In Adobe Lightroom & Camera Raw

.

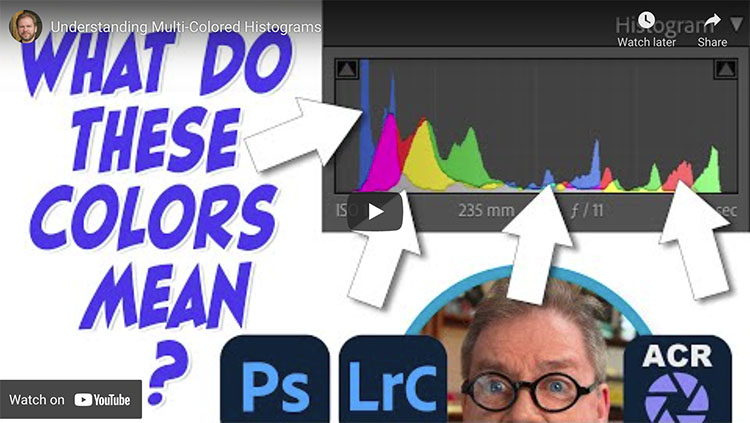
The colors that appear in Lightroom, ACR, and Photoshop’s histograms can be useful to detect color casts, determine if detail is being lost, and know more about the colors that make up an image. I start by blindly interpreting a bunch of histograms while I cannot see the image that it represents (but you can). I then explain how basic color works and how that relates to the colors that appear in the histogram.

Check out more of Ben Wilmore’s Digital Mastery here.

Learn more in my digital photography and digital printing workshops.

Evaluating Histograms


Review Histograms After Exposure

One big advantage of shooting digitally is the ability to view a histogram in the LCD screen on the back of your camera body. A histogram is a graph of the relative distribution of the data in your image from shadows on the left to highlights on the right. You can use a histogram to evaluate not only the tonal distribution but also the quality of your exposures. By viewing the histogram immediately after exposure, you can determine if you need to make additional exposures at alternate settings to get better exposures. Simply program your camera to display a histogram immediately after exposure. You'll find this immediate feedback will result in much higher success rates.


Insights Members can login to read the full article.
Email:
or Sign up

Digital Exposure


The histogram on the back of your camera is generated by a processed JPEG version of your Raw files. Your Raw files are unprocessed / uncooked, high resolution, uncompressed, wide-gamut, 12-14 bit, and so have more information in them, particularly in the highlights. This means the histogram can be misleading. What looks good is usually underexposed. Weight your histograms high. How high? At what point do highlights clip? It’s uncertain. Practically, it depends on the scene; higher if the scene doesn’t contain delicate highlight detail; less high if it does. To be safe, bracket, one slightly high and one very high. You can even program your DSLR to do this automatically for you. Here are four histograms.

1   Underexposed
2   A good exposure
3   A better exposure
4   Overexposed
Learn this and other techniques in my workshops.