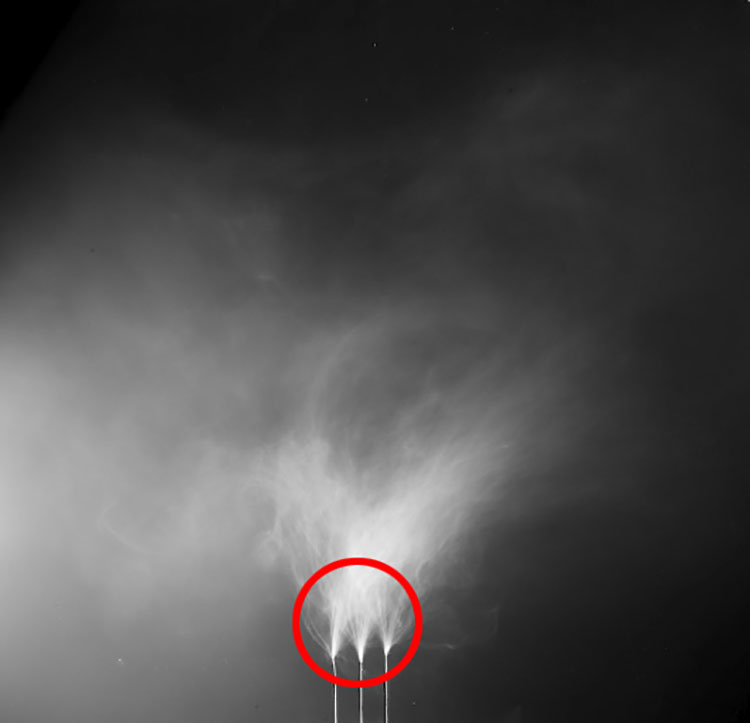
Ink Spattering and Pooling

overinking

Problem
My prints looks slightly granular and dark with lost detail in deep shadows.

Solution
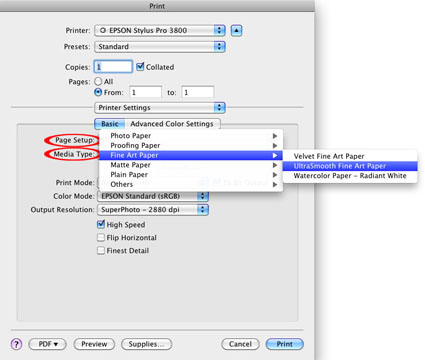
My prints looks slightly granular and dark with lost detail in deep shadows.Make sure the Media Type is specified correctly.

MediaSetting_USFA

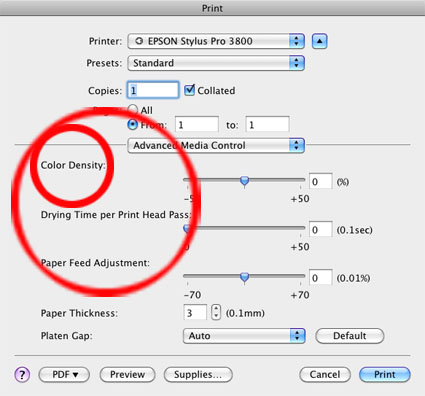
Then reduce the ink limit with the Advanced Media Control Color Density slider.

ColorDensityDryTime

This happens most frequently with third party papers, where the ink limit needs to be adjusted from another manufacturers defaults. Start with the nearest paper type for the Media Setting and then use Advanced Media Control to reduce the Color Density or increase the Drying Time or both.

Read more Printing Tips.
Learn more in my Fine Art Digital Printing Workshops.

Printing – Humidity


Extreme humidity can impact print quality. This is particularly true for but not exclusive to matte papers, which are more absorbent.
We printed for my Annual Exhibit in high humidity. The paper had absorbed a lot of moisture and so there was substantially more dot gain. The prints were coming out substantially darker and we were having trouble maintaining shadow detail. It’s made me want to store all of my paper in a climate controlled environment (using a dehumidifier or air conditioner). Or, climate control my entire studio. Rather than reprofiling for an atmospheric condition that changes unpredictably, we compensated with proofing. We lightened the files selectively before printing. With a little testing, we came up with standard adjustments that could be used on multiple images, with customized shadow masks for individual compositions. It pays to think about the impact of humidity on your printing. Control humidity when you can. Compensate for it when you can’t. You get better prints.
What do you do to compensate for excessive dot gain due to environment or overinking? Comment here.
Check out my Printing downloads here.
Check out my DVD The Art of Proofing here.

Find out about my The Fine Digital Print Workshop Series here.

Gloss Differential

Gloss differential is an uneven reflectance of the surface of a print. In inkjet printing, very dark colors are produced with substantial amounts of ink while very light colors are produced with little or no ink. This can produce differences in reflectivity throughout the surface of a print in many images. While this is not an issue for most matte surfaces, it can be distracting when looking at glossy prints under specific angles of light.

Recent ink technology includes additives designed to reduce gloss differential to produce more even print surfaces. In addition, some separation routines reduce it even further. Epson printer drivers include two features in their Advanced Black and White mode, Highlight Point Shift and Highlight Tonality slider, that can be used to reduce gloss differential. Running these settings to a maximum virtually eliminates gloss differential. Because clear and very light black ink are used in these delicate areas, this darkens the print only slightly. You can compensate for this by lightening the file before printing.

How can you identify gloss differential? Make a print with very bright highlight areas. Look at those printed areas under bright light while varying the angle of the surface of the print and compare the reflectance you see there to darker surrounding areas.

What can you do to reduce gloss differential? Use the latest inksets. Optionally, use the most recent black and white software routines to reduce it even further. (Epson’s Highlight Poiint Shift is designed for this.) Hold your highlights slightly full to avoid paper white, which will be less reflective. Finally, consider spraying, varnishing, or waxing the surface of your prints.

Read more with my online Printing Resources.

Learn more in my digital photography and digital printing workshops.