Use Screenshots For Complex Notes In Photoshop
Adopt a non-destructive workflow. When you can’t, take notes.
Non-destructive Photoshop workflows do more than let you change edits to a file in perpetuity, they also create a record of what you’ve done to an image. For instance, when you reopen a Smart Object, you can simply check the interface to see any and all of the Adobe Camera Raw settings currently being applied. So, if you’re not sure whether the latest detail rendering and noise reduction algorithms are being used for a given file, all you have to do is open the Smart Object to verify this. Or, when you click on an adjustment layer you can see those settings in the Adjustments panel. So, if you’re not sure whether an adjustment layer caused clipping, you can toggle it on and off to verify this; if it is you reset the values; if it’s not you find the real source for the clipping.
Despite Photoshop’s increasingly flexible interface, there are still many times when you need to work destructively. Not all edits can be applied as Smart Objects, Smart Filters, or adjustment layers. Many filters still can’t be applied as Smart Filters. HDR merge settings can’t be applied non-destructively. Adjustments from third-party plug-ins, such as noise reduction with Noiseware or Tonal Contrast from NIK’s Viveza can’t be applied non-destructively. But you can create records of the settings you use with destructive edits, making it easier to see what you did later and helping make future refinements faster and more precisely.
How? Take notes in Photoshop. There are many ways to take notes in Photoshop. There’s the Note tool. You can use a Text layer. You can record information in the title of a layer. For complex settings, all of these can be more abstract and time-consuming than necessary, reducing the likelihood that you’ll actually make them.
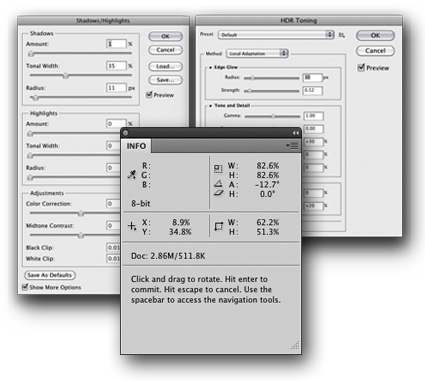
There is an easy way to make notes of complex interfaces. Use screenshots. A screenshot takes a picture of your screen, either entirely or partially. Store images of the destructive edit settings inside the file you used them on and you’ll have excellent notes for future reference. Doing this only takes a few seconds. Read More


