A Grand Overview Of Photoshop’s Blur Filters

Photoshop Blur Filters

There are many reasons to explore blur in your images; remove distractions, direct attention, enhance space, modify mood, and add interesting visual artifacts are six among many. Blur can be controlled at the point of capture and in post-processing. Thoroughly understanding your post-processing options will help you make choices about when and how to control blur in your images before, during, and after exposure.

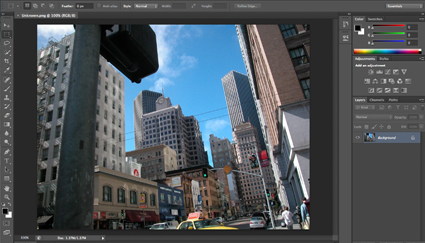
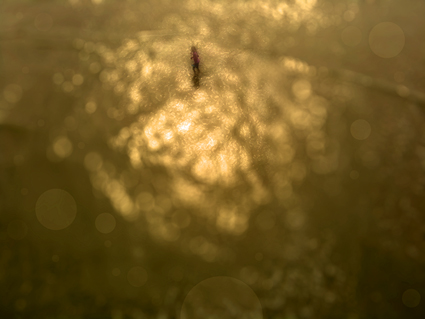
When it comes to post-processing blur, you’ve got options! Photoshop currently offers fourteen filters; Field Blur, Iris Blur, Tilt-Shift, Average, Blur, Blur More, Box Blur, Gaussian Blur, Lens Blur, Motion Blur, Radial Blur, Shape Blur, Smart Blur, Surface Blur - in order of appearance in the Filter: Blur drop-down menu.

At first glance, the list is overwhelming. Where do you start? Get started with this quick survey of available options.


Insights Members can login to read the full article.
Email:
or Sign up

A Quick Visual Comparison Of All Of Photoshop’s Blur Filters

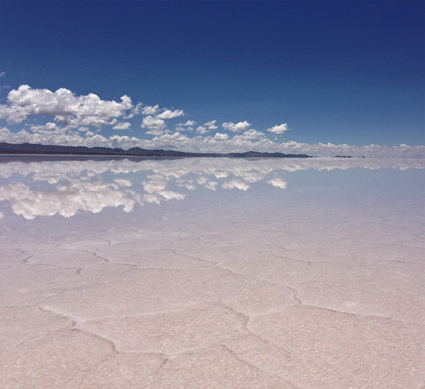
A_1_BlurFiltersBefore

Before Blur FX

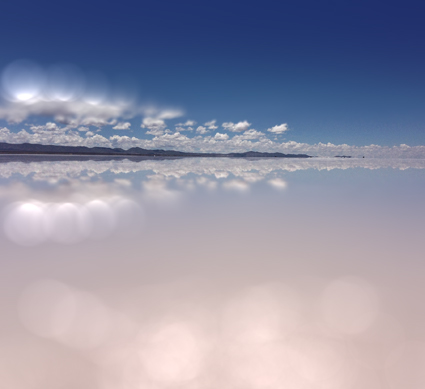
B_15_Tilt-ShiftBlur_full

After Blur FX

There are many reasons to explore blur in your images: remove distractions, direct attention, enhance space, modify mood and add interesting visual artifacts are a few among many. Blur can be controlled at the point of capture and in post-processing. Thoroughly understanding your post-processing options will help you make choices about when and how to control blur in your images before, during and after exposure.

When it comes to post-processing blur, you’ve got options! Photoshop currently offers 14 filters: Field Blur, Iris Blur, Tilt-Shift, Average, Blur, Blur More, Box Blur, Gaussian Blur, Lens Blur, Motion Blur, Radial Blur, Shape Blur, Smart Blur, Surface Blur – in order of appearance in the Filter > Blur drop-down menu. (If you want to extend your software palette even further, explore onOne Software’s FocalPoint.)

At first glance, the list is overwhelming. Where do you start? Get started with this quick visual survey of available options.

Read More

5 Reasons Why You Still Need Photoshop


Let’s say you’re not interested in compositing or adding FX or inserting text or painting on your photographs. Do you still need Photoshop? Short answer – yes. If so, why?

One Big Reason, Look No Further

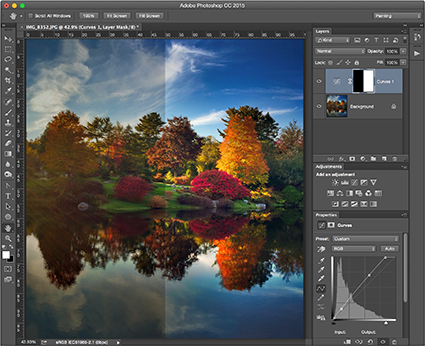
One reason alone ends the discussion for me. The single biggest reason is precise localized tone control or dodging and burning with Curves. Nothing but Curves offers as precise control. It can add a special glow into all areas of an image, any one area, and treat different areas differently. I can’t think of anything more useful than that.

But can’t you do something similar in Lightroom (LR) or Adobe Camera Raw’s (ACR) using the six Basics sliders (Exposure, Contrast, Highlights, Shadows, Whites, Blacks), in combination with the Adjustment Brush, Graduated Filter, or Radial Filter, even in combination with Color, Luminance, or Depth Range Masks? If close is good enough, yes. If you want to make your images really shine, no.

Is it hard to do in Photoshop? No. It’s easy.


1  Open your image in Photoshop.

2  Make a selection.

3  Make a Curves adjustment layer.

4  Double click on the layer mask and slide Feather to the right.

5  Repeat if you want to make a different adjustment to another area of an image.

6  Save your file, when you’re done.


If you only use Photoshop to do this one thing, most of your images will improve. I can’t say I use this with every image I process, but it’s close. I can say the number of images I don’t want to do this for is very small. It’s a simple thing really, and I look forward to the day we can do it in Lightroom and Camera Raw.

Go Ahead, Look Further, And Find More Reasons

Want to go a little further? Let’s revisit the question, “Why do you need Photoshop?” Every time Adobe’s Raw processor(s) become more fully featured it is worth asking. Or, you might rephrase it as, “What can Photoshop help me do that Lightroom / Camera Raw can’t do as well?”

Here are five reasons.


1  Fine Retouching

2  Precise Masking

3   Advanced Color Adjustment

4  Creative Sharpening

5  Plug-Ins


Let me go into a little more detail for each one.


Insights Members can login to read the full article.
Email:
or Sign up

How To Avoid Over Sharpening

Antarctica CLXXI
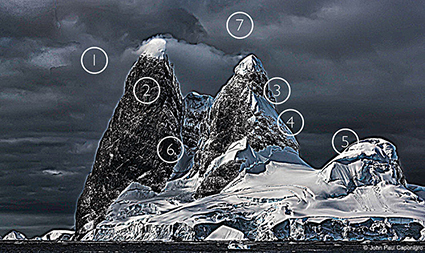
Identifying and developing a sensitivity for the artifacts digital sharpening produces will help you choose a sharpening method and what settings to use during any stage of your sharpening workflow. You can easily see the artifacts digital sharpening produces by overdoing it. Apply a filter like Unsharp Mask at maximum strength and look closely at what happens.
Following are the seven most common digital sharpening artifacts.
1. Noise
2. Exaggerated Texture
3. Visible Light Halos

4. Visible Dark Lines
5. Loss of Highlight Detail
6. Loss of Shadow Detail
7. Increased Saturation
These artifacts can be reduced in one or more ways.
Read more on Digital Photo Pro.
If you know what to look for, you’ll know what path to choose and how far down it to go. Training your eye for what to look for and understanding the upper limits of what other people find to be naturalistic, or at least not distracting, is the first step to developing your unique sharpening style. The second step is learning how to produce certain effects and avoid others with the tools at your disposal. Once you’ve taken these steps, you can take the third and final step, knowledgeably putting craft in the service of your vision to make compelling visual statements. Enhancing detail is one area of expertise that’s well worth mastering for all photographers.
Learn more in my digital photography and digital printing workshops.

How To Evaluate All Photoshop Color Adjustment Tools

PS_Curves_Full
1_LuminosityGraph
2_HueGraph
3_SaturationGraph

.

The Photoshop Color Adjustment Tool Survey – The Go To, The Exotic, And The Redundant

.

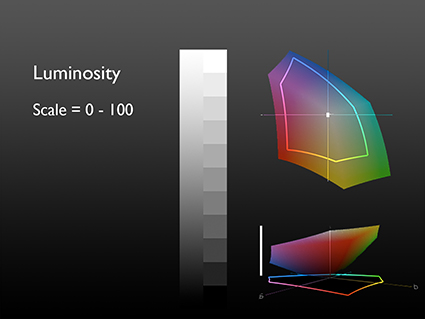
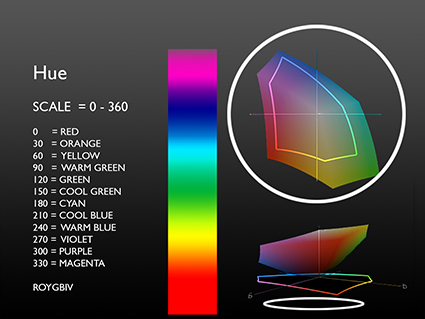
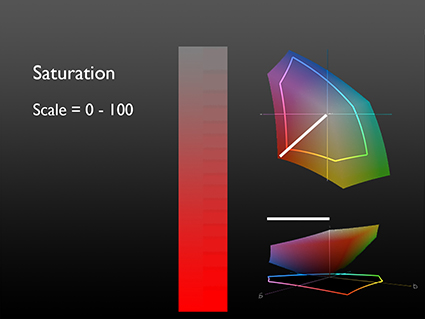
You can evaluate any color adjustment tool, in any software ­– past, current, or future –based on the control it offers over one or more of the three elements of color – Luminosity, Hue, and Saturation.
Use this as a strategy for quickly mastering the intricacies of color adjustment in Photoshop: own the six go to tools; familiarize yourself with the eight exotic tools; forget about the eleven redundant tools.

.

Go To Color Adjustments

.

There are a six color adjustment tools I shudder to think of living without; Curves, Hue/Saturation, Vibrance, Selective Color, Photo Filter, and Black & White

.
5a_Curves

.

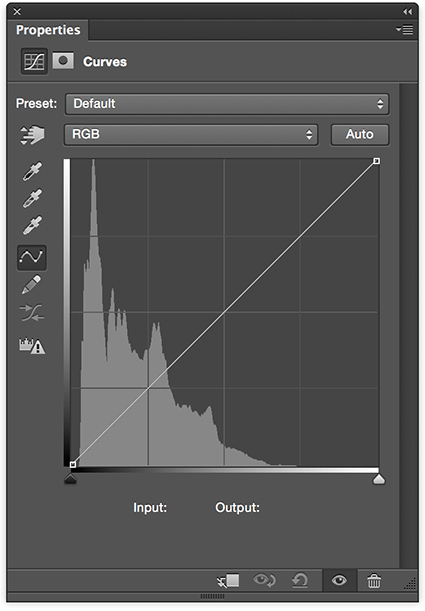
Curves offers the ultimate control over luminosity; no other adjustment offers such precision over the relative darkness and lightness of shadows and highlights. Using the separate channels, Curves offers the same kind of precision when adjusting hue.

.
5b_HueSaturation
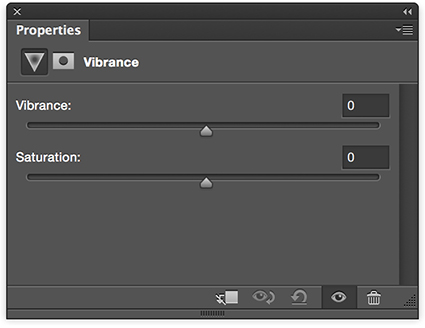
5c_Vibrance

.

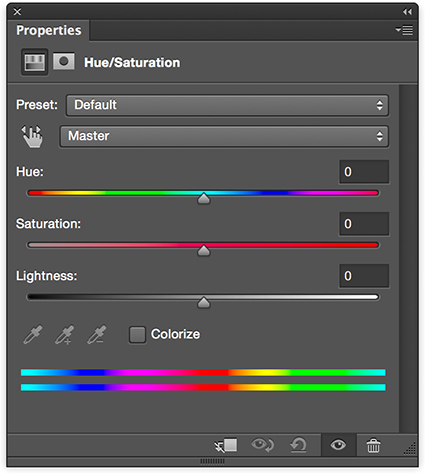
Hue/Saturation and Vibrance are the two essential tools for adjusting saturation.

.
What’s the difference? Vibrance saturates less saturated colors more and prevents clipping in very saturated values, producing a heavier appearance. Hue/Saturation produces a lighter more intense effect, so use it cautiously; you can quickly clip values, producing an overly smooth, overly saturated synthetic appearance if used aggressively. Similarly, handle its Hue slider with care; it’s really more useful for color transformation than it is color enhancement. Unlike Vibrance, Hue/Saturation offers the ability to adjust individual hues without the need for masking. Neither has the ability to selectively adjust the saturation of highlights, midtones, and shadows; for this you’ll need a luminosity mask. Vibrance provides only a very limited ability to selectively adjust colors with different levels of saturation while Hue/Saturation provides none. (For a way to do this read my article Saturation Masking on DigitalPhotoPro.com.)

.
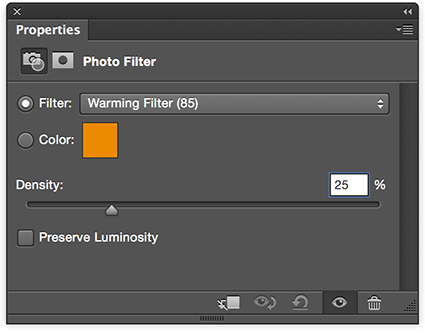
5d_PhotoFilter

.

Photo Filter offers the ability to adjust the hue and to a more limited degree saturation of an image much like an analog lens filter would do, only much more precisely and flexibly. Though less intense, it preserves hue variety better that a Color Fill layer set to a blend mode of Color.

.
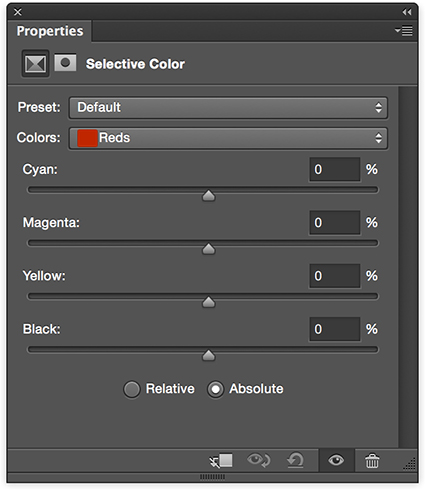
5e_SelectiveColor

.

Selective Color trades in subtlety, referencing CMYK adjustments without leaving RGB working spaces. Its ability to adjust the hue of whites, neutrals, and blacks and its ability to mix white and black into other hues, producing reduced saturation tints and shades, makes it unique.

.
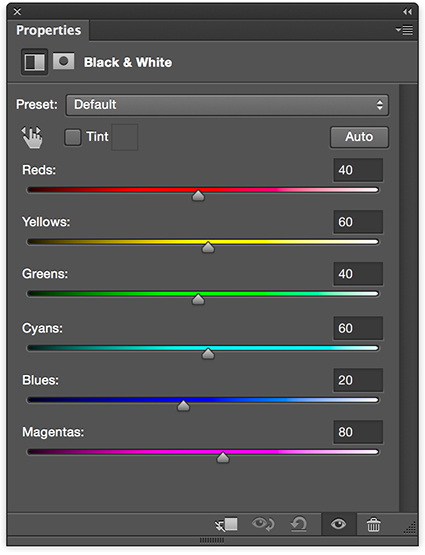
5f_BlackWhite

.

Black & White is the simplest and most powerful tool for converting color to black and white, first reducing saturation to zero and then adjusting luminosity based on original hues. It shines brightest when used in combination with Hue/Saturation and when applied selectively with masks in multiple passes.

.

Exotic Color Adjustments

.

You’ll see and think about color differently once you use Photoshop’s three most exotic color adjustment tools; Color Lookup Tables, Gradient Map, and Match Color. (For more detail on each of these adjustments read my previous articles on DigitalPhotoPro.com.) They affect luminosity, hue, and saturation in complex non-uniform ways.

.
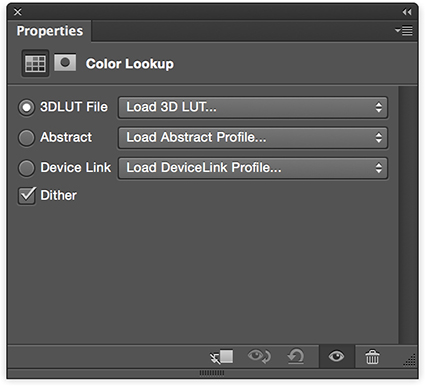
6a_ColorLookUp

.

Color Lookup Tables combines multiple color routines or recipes into a single adjustment, making it easy to create consistent effects across multiple images; it’s most frequently but not exclusively used for color grading the many stills in a video.

.
6b_GradientMap

.

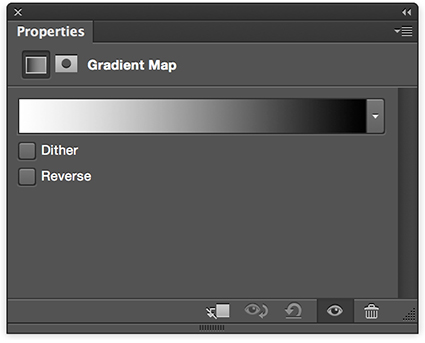
Gradient Map uses the luminosity values of an original to selectively distribute new colors into an image.

.
6c_MatchColor

.

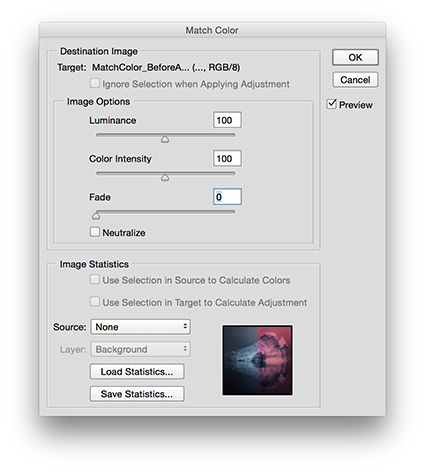
Match Color applies the color values of one image to another, based on a complex statistical analysis of the color relationships in both; it has an added benefit of being able to neutralize strong color casts, such as those found in underwater exposures, without the use of a second image.

.

Five other exotic color adjustment tools are worth noting.

.

While preserving shadow and highlight detail is best done during exposure and Raw conversion, and while you can mask a Curves adjustment to the shadows or highlight, both the adjustment Shadows/Highlights and HDR Toning offer occasionally useful sharpening options that Curves doesn’t, in the form of Radius sliders, which potentially makes them more related to detail enhancement than color adjustment.
Cast Equalize (resets dynamic range), Posterize (reduces gradation), and Threshold (reduces all values to pure black or white) into the really exotic category. They have real uses for very graphic images and for analysis but offer little that is useful for photorealistic images.

.

Redundant Color Adjustments

.

Part of mastering a tool is learning what not to use. Many of Photoshop’s color adjustment tools are redundant, offering similar control over the same elements of color – with less power and precision. You can simplify your toolset by eliminating these eleven adjustment types from your workflow. Instead, use the tools that give you more control.

.

Brightness/Contrast (Use Curves instead.), Exposure (Use Curves instead.) Levels (Use Curves instead.), Color Balance, (Use Curves instead.), Invert (Use Curves instead.), Equalize (Use Curves instead.), Desaturate (Use Hue/Saturation instead.), Replace Color (Instead, use Select By Color Range and then Hue/Saturation.), and Channel Mixer, Apply Image, and Calculations (Instead, use Layer Styles to blend channels, with or without a mask. (For more on this technique see my previous article Blending Channels on DigitalPhotoPro.com.)

.

See the pattern(s)? Two adjustments, Curves and Hue/Saturation, and one layer technique can outperform all of these eleven adjustments.

.

Blend Modes

.

You can make any color adjustment in Photoshop more precisely target an element of color by using one of four Blend Modes – Luminosity, Hue, Saturation, and Color (a combination of Hue and Saturation). Simply change an adjustment layer’s blend mode from its default Normal. If, instead, you apply an adjustment directly to an image, immediately after applying it, select Edit: Fade (Command / Shift / F) to change the Mode. As a general guideline for all color adjustments, I recommend you make a standard practice of using the blend mode of the element of color you are adjusting, making exceptions when desired.

.

Lightroom & Camera Raw

.

Can the separate but related programs Lightroom and Camera Raw do things that Photoshop can’t? Yes. While the majority of these two interfaces, which differ in appearance but not in function, provide controls that are quite similar to but sometimes more limited than what you find in Photoshop, they can do three things that can’t be done in the same way in Photoshop: first, White Balance (Curves and Photo Filter are similar but different.); second, Clarity (High Pass filtration is similar but different); and third, the HSL panel is able to produce luminosity adjustments of individual hues without adverse side-effects on dynamic range.
While the precision of the adjustments provided in Lightroom and Camera Raw is often more limited, it’s usually best to do the basic heavy lifting during Raw conversion – it’s less destructive – and then either dramatic transformations and/or fine-tuning in Photoshop.

.

In the future, if we discover a single interface that allows us to precisely and without side-effects control the luminosity, hue and saturation of any range of brightness (L), colors (H), and intensities (S), then we’ll have found the Holy Grail of color adjustment. For now, the Photoshop interface, a product of more than 25 years of continual expansion, is more complicated than it needs to be, but it’s capable of producing magic – so much magic. When you clarify your thinking about color, you’ll find it becomes much easier to navigate interfaces and master color adjustment. Keep it simple. Remember, color only has three elements – Luminosity, Hue, and Saturation – so color adjustment is all about controlling the relationships between them … nothing more and nothing less.

.

Read more color theory resources here.

Read more color adjustment resources here.

Learn more in my digital photography and digital printing workshops.
New Features In Photoshop CC 2015

PSCC2015
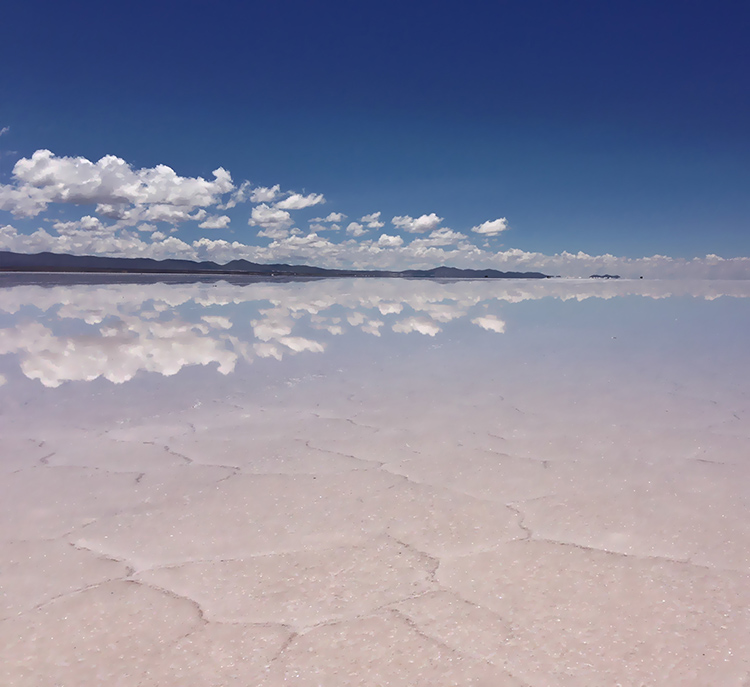
Photoshop CC 2015 was updated Nov 30.
What’s new?
Here’s a list of updates with links for more detail.

Find a timeline of Photoshop CC’s new features dating back to June 2013 here.
Learn more in my digital photography and digital printing workshops.
4 Reasons You Should Use Photoshop's Smart Objects

SmartObjects425
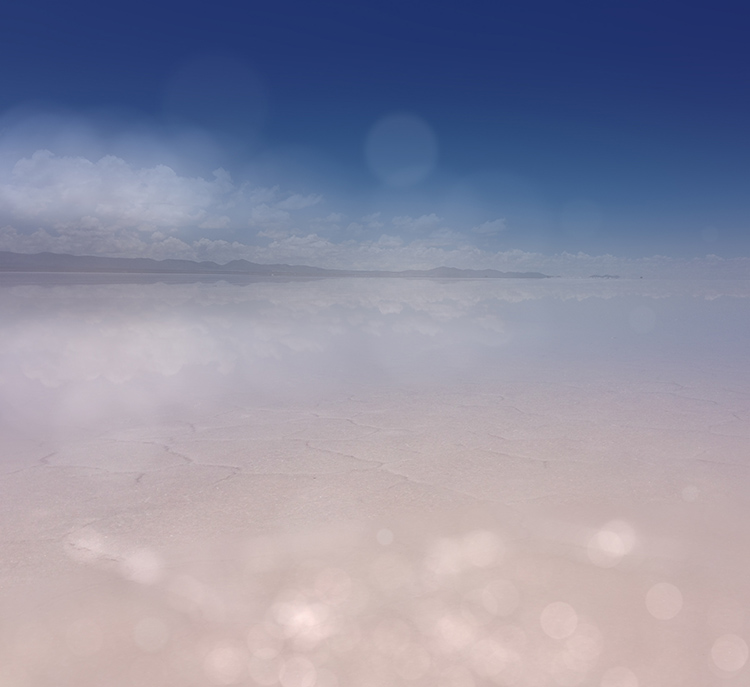
Smart Objects are smart layers, and they have been in Photoshop for years. They have been evolving, but few people truly understand them and fewer still take full advantage of them. There are major benefits to learning what Smart Objects offer you and how they can change your workflow. Here are four things Smart Objects can do for you.
1. Change Or Update RAW Conversion Settings.
2. Apply Filters Nondestructively.
3. Apply Nondestructive Scaling And Distortion To Layers.
4. Blend Multiple Exposures Or Layers With Stack Modes. 
The first benefit, Change Or Update RAW Conversion Settings, is the most essential; something every Photoshop user should know how to use. Here’s how to use it.
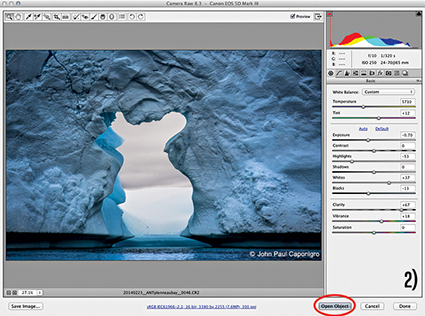
Whether you’re using Lightroom or Bridge/Photoshop, if, and only if, you acquire a RAW file as a Smart Object, by double-clicking it, you’ll be able to change conversion settings and even update the RAW-processing algorithms to the latest version. Forgot to adjust a setting? Found better settings? Want to take advantage of advances made in the latest process version of ACR? All of these are reasons to use Smart Objects.
To acquire a RAW file as a Smart Object in Lightroom, go to Photo > Edit In > Open As Smart Object In Photoshop. With Adobe Camera Raw, click the blue underlined line at the bottom of the window to access Workflow Options and check Open In Photoshop As Smart Objects, which will set this as a default for opening files. The Open Image button will change to Open Objects. Notice that in Photoshop the bottom layer uses the file name instead of Background, and it contains a small rectangular icon that indicates it’s a Smart Object.
But wait, there are three more reasons to use Smart Objects. You’ll find the steps for the other three benefits detailed in my column on Digital Photo Pro.
There’s more than one kind of Smart Object; those that reaccess Raw file data and those that don’t. Smart Objects have limits; the list is steadily diminishing. Smart Objects come at a price; larger file sizes. While Smart Objects aren’t simple, but they’re extremely powerful and flexible. For this reason, I consider them essential components of an optimum Photoshop workflow. Exactly how and when you implement Smart Objects will depend on the specific challenges you face with a given image. While everyone needs to be aware of the possibilities Smart Objects offer, make your use of Smart Objects as simple as possible, but not simpler. You’ll find that even the most minimal implementation of Smart Objects will be extremely helpful.
Read more on Digital Photo Pro
Learn more in my digital photography and digital printing workshops.

Using Adobe Camera Raw As A Filter

ACRFilter
Photoshop CC introduced a long-awaited feature that will change how you adjust your images, when you adjust your images and what you adjust your images with—the ability to use Camera Raw as a filter.
Since it was introduced, Adobe Camera Raw (ACR) has been the industry-standard tool for processing RAW files—the beginning of a digital photographer’s workflow before moving into Photoshop. Sometime later, ACR extended its functionality to other file types like JPEGs. Today, you can use its full power at any point in your workflow while working in Photoshop. This opens up many new possibilities.
Using the Adobe Camera Raw Filter is useful for noise reduction, detail enhancement, color adjustment, localized lens correction, creative distortion and even tone-mapping 32-bit HDR images. Go beyond the maximum setting of Clarity, with two ACR Filters. Set different white balances for different regions of an image. Apply Lens Correction distortions locally. Global, local, double and crossprocessing—the ACR Filter can do it all.
While the ACR Filter revises workflow, it doesn’t rewrite it completely. It’s still better to do the lion’s share of image adjustment during RAW conversion with ACR or Lightroom (both offer the same RAW conversion engine)—preferably as a Smart Object so you can easily change the settings or update the process version. For instance, you’ll get better shadow and highlight detail using ACR during conversion than you will using the ACR Filter after conversion.
So when would you use the Adobe Camera Raw Filter? When the ACR toolset does something Photoshop’s toolset doesn’t. Or, when the ACR Filter does a task more quickly and easily, without sacrificing quality or flexibility. To decide this, compare the two toolsets …
Read more at Digital Photo Pro.
Learn more in my digital photography and digital printing workshops. 

Photoshop Plus Lightroom For $9.99 A Month

LR_425
PS_425
The Photoshop Photography Program is available to anyone (long term and new customers alike) for a limited time only – Offer Expires Dec 2.
It includes all of the following for $9.99/month with a 12-month commitment.
– Photoshop CC
– Lightroom 5
– 20GB of online storage
– Behance ProSite
– Access to training resources on Creative Cloud Learn
– Ongoing updates and upgrades
(Though not legally stated, it’s Adobe’s intention to keep these same rates for everyone in this program indefinitely.)
Questions? See Adobe’s FAQ and terms.

Controlling Blur FX With Photoshop

7_final_425

Photographers use blur (or bokeh) for a variety of reasons: to enhance space through depth of field; to add interesting visual artifacts; to simplify them; to change the quality of their expression. In the past, blur was controlled almost entirely through exposure; now it can also be controlled during post-processing, giving photographers an unprecedented array of options and ways to customize the look and feel of their images. Knowing what you can do, how far you can go, and when you can do it may change the way you shoot, one time, sometimes, or all the time.
There are many blur filters in Photoshop; Field Blur, Iris Blur, Tilt-Shift, Gaussian Blur, Lens Blur, Motion Blur, Radial Blur, Shape Blur, Smart Blur, Surface Blur (in order of appearance in the Filter: Blur drop down menu. The choices are extensive and it pays to familiarize yourself with your options by experimenting with them; you’ll find you have an extraordinary set of options that you can modify and combine creatively. If you only use the filters Gaussian Blur and Lens Blur, you’ll still have game-changing control at your fingertips, once you learn how to extend and modify them.
There are several important non-destructive strategies you can use to gain more control over all filter effects that will enable you to go further in your explorations and generate more sophisticated and compelling results Try one or all of the moves in this classic progression. Apply a filter to a duplicate layer and then modify its Opacity, Blend Mode, Blend If Sliders, and add a layer mask …
Read more on Digital Photo Pro.
Learn more in my digital photography and digital printing workshops.