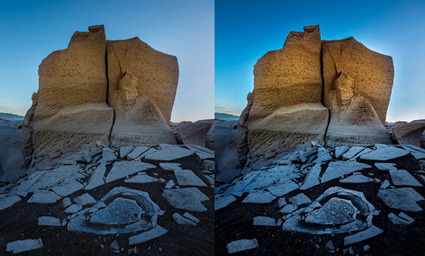
Using Adobe Camera Raw As A Filter

Photoshop CC introduced a long-awaited feature that will change how you adjust your images, when you adjust your images and what you adjust your images with—the ability to use Camera Raw as a filter.
Since it was introduced, Adobe Camera Raw (ACR) has been the industry-standard tool for processing RAW files—the beginning of a digital photographer’s workflow before moving into Photoshop. Sometime later, ACR extended its functionality to other file types like JPEGs. Today, you can use its full power at any point in your workflow while working in Photoshop. This opens up many new possibilities.
Using the Adobe Camera Raw Filter is useful for noise reduction, detail enhancement, color adjustment, localized lens correction, creative distortion and even tone-mapping 32-bit HDR images. Go beyond the maximum setting of Clarity, with two ACR Filters. Set different white balances for different regions of an image. Apply Lens Correction distortions locally. Global, local, double and crossprocessing—the ACR Filter can do it all.
While the ACR Filter revises workflow, it doesn’t rewrite it completely. It’s still better to do the lion’s share of image adjustment during RAW conversion with ACR or Lightroom (both offer the same RAW conversion engine)—preferably as a Smart Object so you can easily change the settings or update the process version. For instance, you’ll get better shadow and highlight detail using ACR during conversion than you will using the ACR Filter after conversion.
So when would you use the Adobe Camera Raw Filter? When the ACR toolset does something Photoshop’s toolset doesn’t. Or, when the ACR Filter does a task more quickly and easily, without sacrificing quality or flexibility. To decide this, compare the two toolsets …
Read more at Digital Photo Pro.
Learn more in my digital photography and digital printing workshops.


No Comments