Creative Image Sharpening With HDR Software

SharpeningCompared

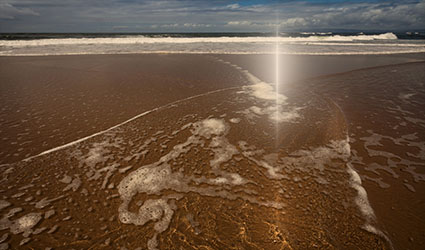
Unsharpened / Hybrid / Strong HDR

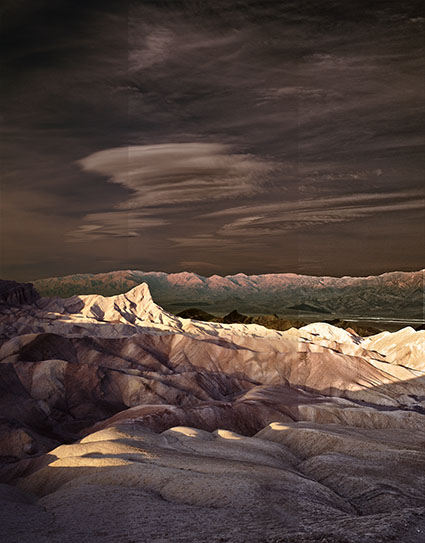
HDR software is most typically used to render shadow and highlight detail, but it can also be used to enhance tonal separation and detail in any range of tones, even in images with extremely low contrast. The very same tools that are used to compensate for HDR side effects can be used to sharpen any image.

When multiple bracketed exposures are merged into a single processed file, shadows and highlights that exceed the dynamic range of a camera’s sensor are compressed into the dynamic range of a digital file, taking the mid-tones with them. Depending on the HDR software used, a variety of tools are available to restore contrast and separation in mid-tones. If used aggressively, these tools produce the telltale signs of contemporary or grunge HDR artifacts – halos and texture accentuation. These are the very same artifacts that digital sharpening routines use more conservatively to make images appear sharper - only they look different.

Unlike the hard halo and line produced by the filter Unsharp Mask and more like the soft line produced by the filter High Pass, HDR sliders can give you still more points of control over line and texture, each with a slightly different flavor.


Insights Members can login to read the full article.
Email:
or Sign up

3 Things Creative Sharpening Can Do For Your Images

Refraction LXIX 2

Of the three stages in a sound sharpening workflow – capture sharpening, creative sharpening, and output sharpening – creative sharpening is the stage that has the most impact. The goal of creative sharpening is to give an image a specific look and feel. There are at least three things creative sharpening can do for your images.

One, creative sharpening can prioritize; it can direct attention to specific areas of an image.

Two, creative sharpening can enhance; qualitative aspects of images like texture and line, can be amplified to produce stronger responses.

Three, creative sharpening can be used to accentuate different qualities of light; a great deal of detail is carried by the luminosity component of color and changing it changes the overall appearance of light within the image.

Used consistently creative sharpening can produce a distinctive style that is more easily recognizable to viewers. (Remember, sharpening is a way to enhance details and it may also be used with its counterpart blurring to make effects appear even stronger by comparison.)


Insights Members can login to read the full article.
Email:
or Sign up

Creative Sharpening With HDR Software


HDR software is most typically used to render shadow and highlight detail, but it also can be used to enhance tonal separation and detail in any range of tones, even in images with extremely low contrast. The very same tools that are used to compensate for HDR side effects can be used to sharpen any image.
When multiple bracketed exposures are merged into a single processed file, shadows and highlights that exceed the dynamic range of a camera’s sensor are compressed into the dynamic range of a digital file, taking the midtones with them. Depending on the HDR software used, a variety of tools are available to restore contrast and separation in midtones. If used aggressively, these tools produce the telltale signs of contemporary or grunge HDR artifacts: halos and texture accentuation. These are the very same artifacts that digital sharpening routines use more conservatively to make images appear sharper—only they look different.
Unlike the hard halo and line produced by the filter Unsharp Mask and more like the soft line produced by the filter High Pass, HDR sliders can give you still more points of control over line and texture, each with a slightly different flavor.
Find details on using Adobe Photoshop and NIK’s HDR Efex Pro.
Read the full article on Digital Photo Pro.
Find more sharpening resources here.
Learn more in my digital photography and digital printing workshops.

Creative Sharpening With NIK’s Viveza and ColorEfex Pro


Both NIK’s Viveza and Color Efex Pro offer useful additions to a digital artist’s set of detail enhancement tools. Viveza provides Structure while Color Efex Pro provides Tonal Contrast. Consider them both useful variations of the types of effects you can produce with Photoshop’s High Pass filter. So what specifically are the visual differences?
Like Photoshop’s High Pass filter, Viveza’s Structure provides a single slider but offers more options with the inclusion of negative values for soft focus effects. In contrast to High Pass, Structure enhances contours with a line that is not as pronounced as Unsharp Mask (Structure is almost incapable of producing artificially hard contouring.) and thinner than High Pass (Structure can’t be used for enhancing planar contrast like high values of High Pass.). Structure accentuates texture somewhat, which can enhance noise as well as detail, but not as much as Unsharp Mask. When Structure is applied, luminosity contrast increases, more so in shadows than in highlights where very high values stop just short of compromising shadow detail. Think of Structure as occupying the visual territory that lies between Unsharp Mask and High Pass.


Insights Members can login to read the full article.
Email:
or Sign up

Creative Sharpening – Control Halo & Line Separately


Digital sharpening produces its affects by accentuating contrast, both of texture and of contour. The accentuation of contrast along contours is produced by creating both a dark line and a light halo. While the filters used to sharpen images, such as Unsharp Mask or High Pass, don’t offer independent control of the light and dark components of a contour, you can control them separately using layers. It will take two layers to separate halo from line; one for the halo and one for the line. Filter the two layers differently to produce different thicknesses (Radius) and intensities (Amount) of halos/lines. Then, you can use the Blend If sliders of layers to specifically target either high or low values by moving either the shadows (black triangle) or highlights (white triangle) sliders of This Layer, making those values no longer visible. Some people like to set the Opacity of these two layers to 50% before filtration, so that they can conveniently readjust the intensity of the affect, moving the opacity slider up to make it stronger or down to make it weaker. If you do this too, remember that only the filter’s Radius setting can adjust the thickness of the contours it produces.


Insights Members can login to read the full article.
Email:
or Sign up

Target Image Contours With Edge Masks


Edge masks target only the contours in an image. (Think of edge masks in Photoshop as the creative sharpening equivalent to the Masking slider in ACR or Lightroom’s capture sharpening.) They keep smooth areas smooth, while accentuating the contrast/sharpness of contours. They can be particularly useful for images that contain moderate to significant amounts of noise. In many cases, they allow the use of more aggressive applications of sharpening effects. Edge masks can help you take all of the creative sharpening effects you design up a notch – or two.


Insights Members can login to read the full article.
Email:
or Sign up

Unsharp Mask


Precise sharpening can improve almost any image. It helps to know when to apply it, what type of sharpening to apply, how to apply it and where to apply it. Forget the filters Sharpen, Sharpen More and Sharpen Edges. They're just default settings of Unsharp Mask. Even Smart Sharpen offers few advantages over Unsharp Mask; it's particularly useful for compensating for trace, but not substantial, amounts of motion blur. My advice? Start with the classic and master it.
Why is a filter that makes images appear sharper called Unsharp Mask? In silver-halide-based photography, unsharp masks are made with out-of-focus negatives that are registered with an original positive image. During exposure, the blurring adds contrast around contours, making images appear sharper. Digital unsharp mask works the same way; it uses blurring algorithms to add contrast to contours, again making images appear sharper.


Insights Members can login to read the full article.
Email:
or Sign up