Capture Sharpening With Lightroom & Adobe Camera Raw
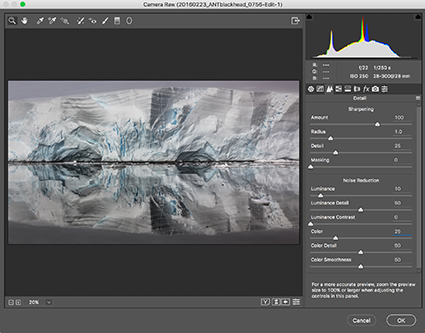
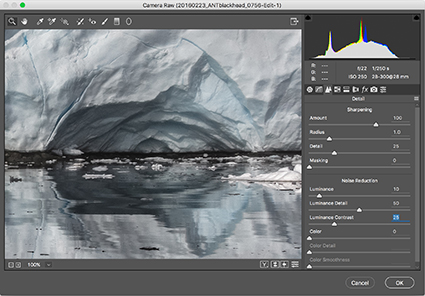
Adobe Camera Raw's Detail panel
Optimal image sharpening is best done in three stages – capture (Do it during Raw conversion.), creative (Do it in Photoshop.), and output (Automate it.).
This article covers the first stage of sharpening – capture sharpening.
Capture sharpening benefits all images. Capture sharpening compensates for inherent deficiencies in optical and capture systems. All lenses and sensors have specific characteristics and deficiencies. They do not all have the same characteristics or deficiencies.
To speed your workflow, default settings for the best starting point for capture sharpening can be determined for all images created with the same lens/chip combination and saved for subsequent use. To optimally sharpen an image, you’ll need to modify these settings to factor in additional considerations – variances in noise (ISO, exposure duration, temperature), noise reduction settings, and the frequencies of detail (low/smooth to high/fine texture) in an image.
No Comments