Resurrecting Detail In Challenging Images With Photoshop
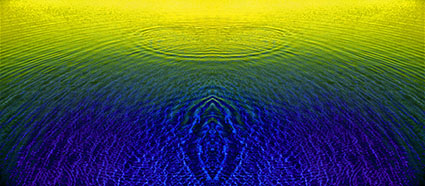
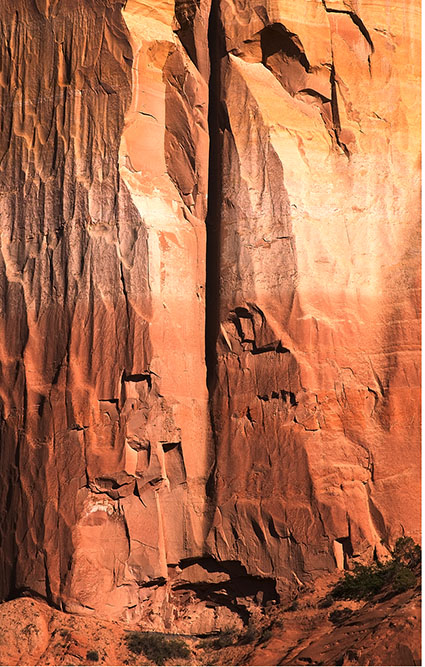
Before channel blending
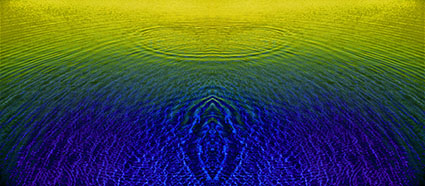
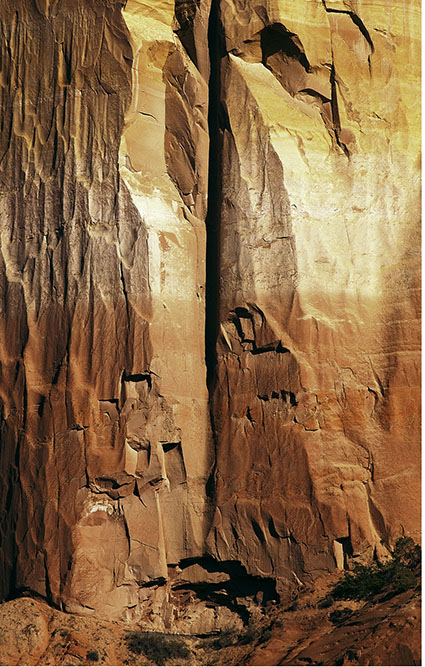
After channel blending
Big problems call for big solutions. Blending channels is a powerful color adjustment strategy that can handle even the biggest challenges.
Color adjustment occurs by modifying the tonal structure of individual grayscale channels. Typically, the information within them is adjusted. Less typically, the information within them is replaced.
Blending channels is one way of replacing them. Blending channels takes information from one channel and combines it with information from another. Rather than simply enhancing existing tonal values, blending channels reshapes one channel’s tonal structure with another’s. Consequently, in a most cases, blending channels calls for a substitution of information by percentage not a wholesale replacement of the deficient channel. You usually blend channels from different versions of the same image because blending channels from different compositions produces a highly altered effect.
Blending channels is complex. It often produces additional unintended color affects that may require further correction, such as shifts in hue that aren’t uniform across the tonal scale. Blending channels is neither the simplest nor the most direct path to color adjustment, but in certain situations (files that are exceptionally problematic) it may be the best path. The resulting benefits can be dramatic.
When is blending channels appropriate? In extreme cases. Blending channels is designed to correct major color deficiencies. It’s recommended if a channel is severely deficient, either globally or in select areas. For example, by being extremely light or dark or having very low contrast, a channel may be lacking desired detail. That detail can be found in another channel. Fine-tuning color is best left to more traditional methods of color adjustment.
Many Methods
There are several ways to blend channels; Channel Mixer, Apply Image, Calculations, and using channels as layers. Let’s review the options in detail.
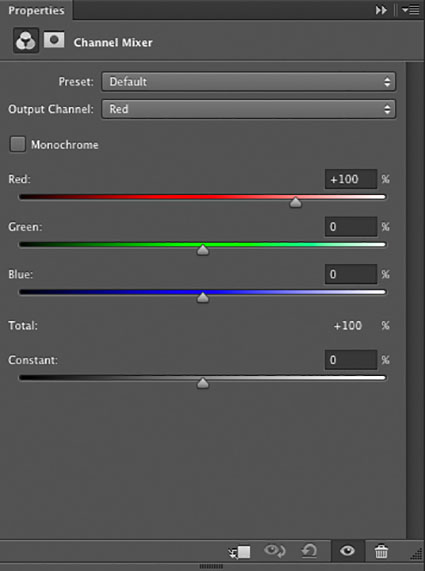
The Channel Mixer (Layer: New Adjustment Layer: Channel Mixer) blends percentages of channels within a single document. It can be applied as an adjustment layer and so corrections made this way can be changed or masked indefinitely. It cannot be used to blend channels from two documents. The Channel Mixer is an excellent choice for making global (the same percentage of channels for the whole image) color to black-and-white conversions. If you want to control black-and-white conversions locally (different percentages of channels for different image areas), use channels as layers instead.
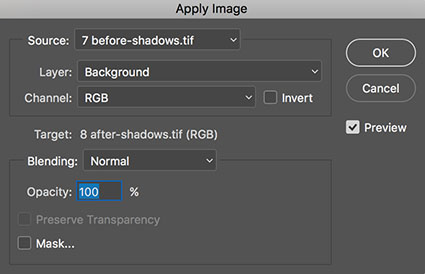
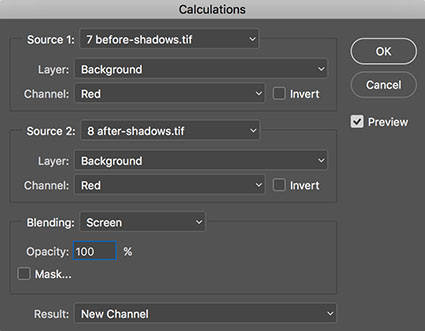
The commands Calculations (Image: Calculations) and Apply Image (Image: Apply Image) can also be used to blend channels. With these two commands you can combine any two channels, from different documents, from any layer, at any opacity, with most blend modes. With Apply Image you target the channel you wish to change. With Calculations you blend to create a new document, a new channel, or a new selection. Neither Calculations nor Apply Image can be used as adjustment layers or layers, consequently corrections you make with either of these features are made permanently to an image. With Apply Image and Calculations you can take advantage of two less frequently used blending modes not found with other tools (Add and Subtract) but you cannot take advantage of four frequently used blending modes (Hue, Saturation, Color, and Luminosity) – even if you use the Fade command.
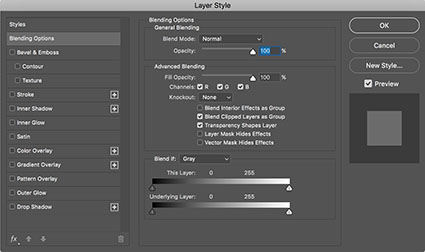
For the greatest control and flexibility use channels as layers. How do you do this? Copy any channel and paste it into any destination as a layer. (Target a channel (click on it); copy it (Select: All; Edit: Copy); then target the master channel (RGB) and paste (Edit: Paste).) You can activate, deactivate, mask, change, or replace this new layer indefinitely. Use Layer Styles (double click on the layer icon in the Layers palette) to determine Blend Mode, Opacity, Advanced Blending (to select which channel is affected) and Blend If options (to determine how This Layer affects the Underlying Layer or which values of the overlying layer affect the values of the underlying layer). What’s more, you get a dynamic preview of any changes you make while you make them. The adjustments you make are flexible, so you can remove them or fine-tune any of the settings future editing sessions. You can even blend two or more channels first, as layers, and then use the resulting new layer to blend with the Background layer. By turning channels into layers, you can achieve everything that the other methods achieve and more.
One File, Many Channels
You may be surprised to find that every file has at least ten channels to choose from. How do you get so many? Consider the file in different color spaces – RGB, CMYK, and LAB. Convert a duplicate file into another color space and you can use any and all of the resulting channels. In fact, you can choose between many, many more channels when you consider that when converting to CMYK there are five different options for generating a Black Plate (None, Light, Medium, Heavy, and Maximum) with two styles for each with two Separation Types (UCR and GCR). But, for the vast majority of situations, I recommend you try to keep things as simple as possible and stick with the standard three.
Be cautious with older files and lower end scanners when blending with the blue channel as it often contains significant amounts of noise. In fact, in some instances, blending channels can be used to replace some or all of the blue channel and thereby remove unwanted noise. Unlike blurring or despeckling, this method of removing noise will not compromise sharpness, but it may produce unwanted color shifts that will require subsequent correction.
A Good Preview
The possibilities are staggering. Is there anything that can help with the decision making process? Yes. A good preview. You’ll want to have multiple documents of the same image in different color modes (RGB, CMYK, LAB) visible at one time to simultaneously see the blended and the blendee. You may even want to make a side-by-side comparison of the component channels of a single document. To do this, use the Split Channels option in the Channels palette submenu. This command will break a single multi-channel document into multiple single-channel documents. (If a file has layers it must be flattened first to use Split Channels.) While doing this with several documents will quickly fill a screen, having the channels separated makes evaluating their relative merits infinitely easier.
Classic Strategies
With so many possibilities, how do you choose one channel as the best candidate to blend with another and how do you use it?
First, identify the channel causing the problem. Then, find the channel with the best contrast in the areas you wish to enhance (at a low opacity) or replace (at 100% opacity). (Stronger adjustments require higher opacities.) Finally, deal with any unintended side effects.
There are several tried and true strategies for dealing with classic problems. First, create detail where there was none before. Second, create contrast that wasn’t there before. Third, add more contrast to existing tonal relationships, if the values can’t be adequately enhanced using Curves.
Look to the Luminosity channel in LAB. Look to the black plate in CMYK. Look to complementary colors. Complementary colors often contain the best possibilities for increasing contrast (Red and Cyan, Green and Magenta, Yellow and Blue), in highly saturated values.
What are you looking for? Better detail in shadows or highlights, better contrast, and a similar tonal distribution. If you change the relative distribution of tones in a channel, you’ll create a non-uniform color shift where some colors will shift more dramatically than others.
Sometimes channel blending produces unintended side effects.
In most cases, these side effects can be cured.
Blending channels can produce unintended side effects. There are times when it’s better to achieve the necessary effect with this technique and accept its side effects, if the side effects are easier to cure than the initial problem. Typically, all that’s required is a little dose of additional tonal enhancement, either to the master channel (tone and contrast) or a single channel (color). If you find this is not the case, take this as a sign that this is not the right technique for the problem you face.
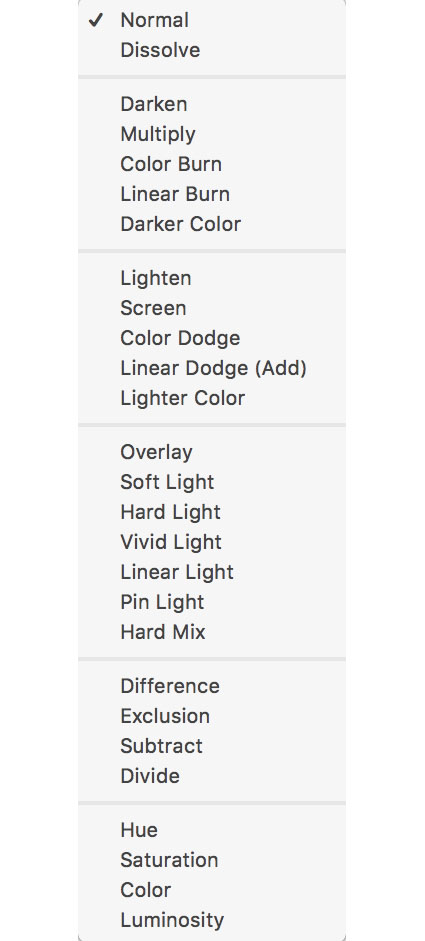
Layers offer many Blend Modes
Control The Mix With Blend Modes
As well as controlling the amount channels are blended you can control the way they are blended, by using blending modes. Blend modes determine how new values are mixed with old values. There are dozens of blend modes to choose from.
As color adjustment is achieved by altering the luminance (light and dark) values of select channels (Channels create but don’t contain color or saturation.), when it comes to blending channels, you can limit the number of blend modes you use to those that affect tone; five are particularly useful – Lighten, Screen, Darken, Multiply, and Luminosity.
Lighten displays the lightest values of both This Layer and the Underlying Layer; its neutral color is black (you can’t lighten with black).
Screen multiplies the inverse values of the pixels lightness or darkness. It’s like registering same image in the same location from two projectors. Think of it as industrial strength lightening. Its neutral color is black (you can’t lighten with black). Screen can do wonders for opening up deep shadows. It has a tendency to blow out highlights. Use a contrast mask to remove the effect from highlights.
Darken displays the darkest values of both This Layer and the Underlying Layer; its neutral color is white (you can’t darken with white).
Multiply multiplies the values of the pixels on both layers and then divides by 255. It’s like registering two identical transparencies on a light table. Think of it as industrial strength darkening. Its neutral color is white (you can’t darken with white). Multiply can do wonders for reclaiming subtle highlight detail. It has a tendency to block up shadows. Use a contrast mask to remove the effect from shadows.
Luminosity combines the luminance values of This Layer with the hue and saturation of the Underlying Layer; it has no neutral color.
Enhance The Blend
You can enhance a channel before (or if you use channels as layers after) blending it with another. Use any adjustment method that makes the data better to blend with. As you’re blending with black-and-white images, Curves is usually all you need for it offers the most precise control of tone. For instance, you might increase the contrast of an image before using it to blend with. If you’re using the channels as layers method, all you have to do is group a Curves adjustment layer to the new layer being used to blend with. The contrast of overlying layer can then be fine-tuned as the blend with the underlying layer is occurring. This way you don’t have to guess how much contrast needs to be added before blending, instead you see how much contrast to add while the blend is occurring.
Constraining The Effect
While blending channels may solve problems that other adjustment methods can’t, they may also produce new problems.
In a great many cases, if the tonal distribution of a single channel is substantially altered using another channel, color may shift in an unintended manner. If this happens simply make an additional adjustment to eliminate any side effects. There are times when the color shifts you encounter will be non-uniform (more in some areas than others), which may lead you to making more complex corrections than you had anticipated.
If the problem solved with channel blending and the resulting side effects lie in different areas of the image, consider masking away the side effects rather than correcting them. There are several ways of masking the side effects of channel blending from selected areas. One, simply brush them away by painting with a black brush on a layer mask. Two, use a contrast mask to hold back the effect from highlights or shadows. Three, use the Blend If function in Layer Styles; by sliding the black arrow to the right or the white arrow to the left you drop out the effects from values below or above them – by holding the Option key (Command on PC) you can split the sliders to fade the effect more smoothly.
If you think you’re not used to blending channels, think again. Every time you turn a color image into a black-and-white image you blend channels. In a grayscale conversion three channels are blended to create a single channel while when using either Hue/Saturation or Channel Mixer three channels are blended to equal RGB values. But, when it comes to color adjustment, blending channels is used infrequently, perhaps because it’s so little known. Blending channels is a sophisticated adjustment method. In a majority of cases you don’t need a method that’s this complex. Blending channels is best used in exceptional situations for enhancing originals with substantial problems. If you find that you use this technique frequently, you’re probably not addressing the real problem, the quality of your originals. Nevertheless, when you run into files with severe problems, blending channels will often save the day.
Read more on Color Adjustment here.
Learn more in my digital printing and digital photography workshops.
No Comments