“Look at three ways to adjust your skies in Lightroom and Photoshop. Each works a little differently, and some make automatic selections – which works well sometimes. While others require a little more work but can give better results.”
“Adobe added Curves to the masking tool in Adobe Camera Raw, but has yet to add the same feature to Lightroom Classic. Here’s how to cheat and apply Curves using the masking feature in Lightroom Classic.”
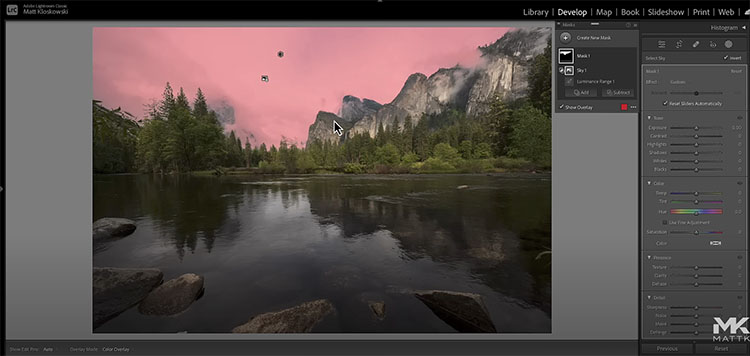
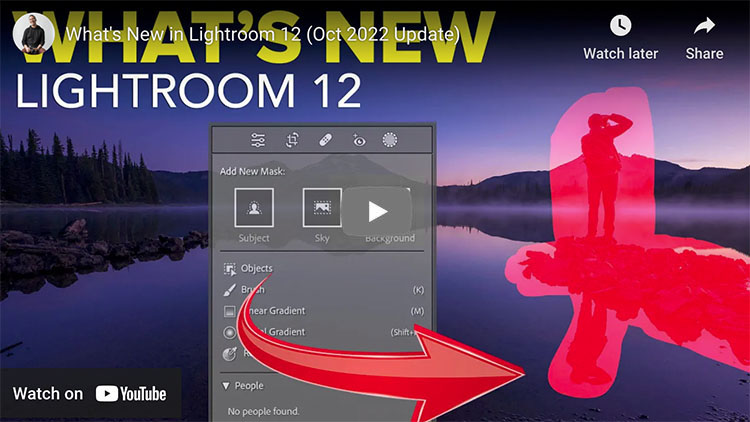
“The new Masking Section added into Lightroom was a BIG DEAL! But…did you know there’s a Hidden Button that makes it EVEN BETTER by giving way more control? In this video, I show how we can use this hidden function to realistically add drama to skies, add Special Effects, light a Macro Shot AND add Highlights to a Portrait!”
00:00 – Introduction
00:34 – What is Intersect?
01:03 – Darkening the Sky with Intersect
02:19 – What does Intersect do?
02:31 – Adding Drama to the Sky
03:57 – Intersect and a Portrait
04:23 – Adding Street Lighting with Photoshop
05:06 – Adding Street Lighting with Lightroom
06:22 – Lighting Macro with Intersect
07:31 – Adding Side Lighting / Highlights
07:48 – Highlights with a Layer Style in Photoshop
09:06 – Highlights with Intersect
10:08 – Lightroom Virtual Summit 2022
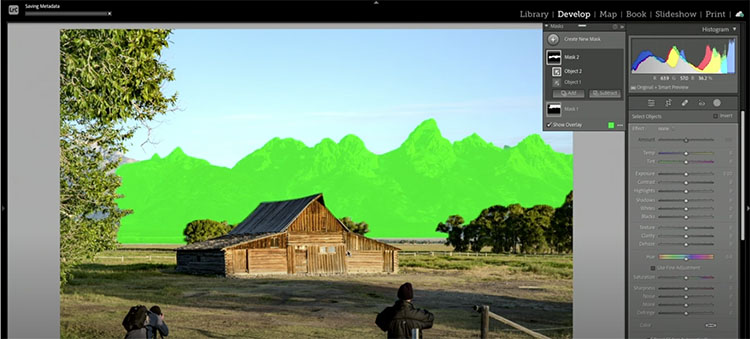
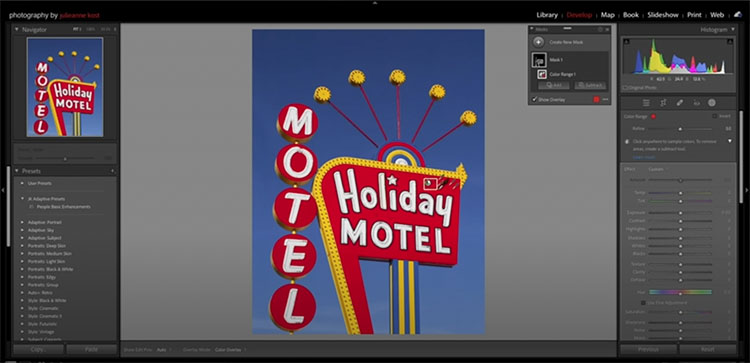
“Discover how to take your photographs to the next level using masking to enhance and adjust selective areas of an image. In this video, Julieanne Kost shares tips, tricks, and techniques for making the most out of Lightroom Classic’s masking tools, including new automated selections based on Adobe Sensei (Select Subject, Object, Sky, People, and Background), manual painting tools (brush, eraser, linear and radial gradients), and Range Masking (color, luminance, and depth). She also walks through Auto Sync, Copy/Paste, and using Adaptive Presets – all guaranteed to make your workflow more efficient.”
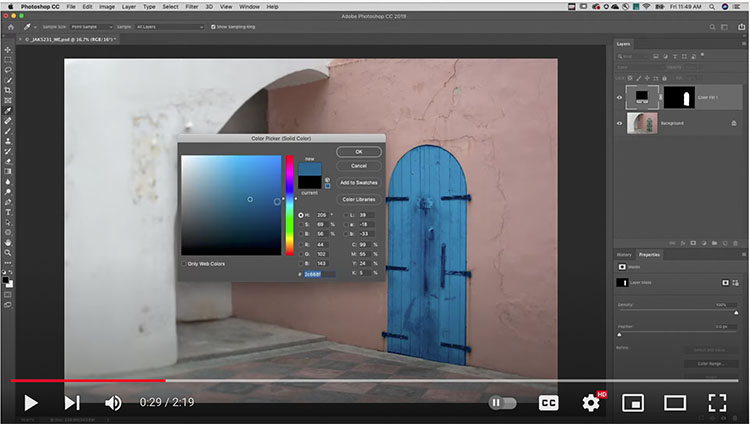
In this short video tutorial, you’ll discover how to change colors in a photograph using a Solid Fill Layer, Hue/Saturation, and Curves Adjustment Layers.
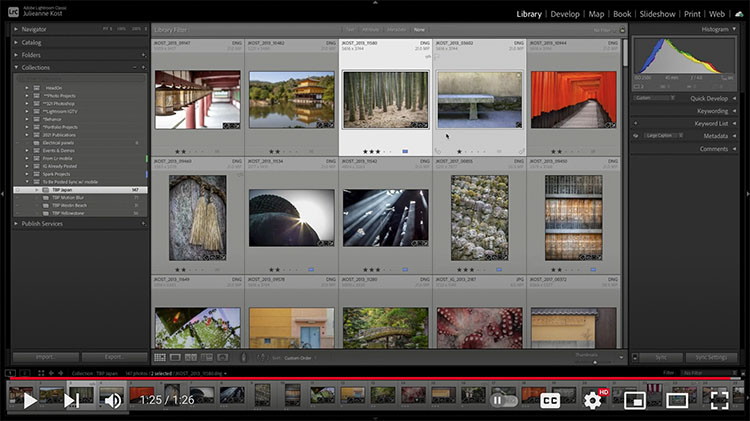
In this Quick Tip, Julieanne Kost demonstrates how to quickly reorder photos by selecting multiple images rather than the time-consuming technique of dragging (and dragging and dragging!) and dropping photos into position.
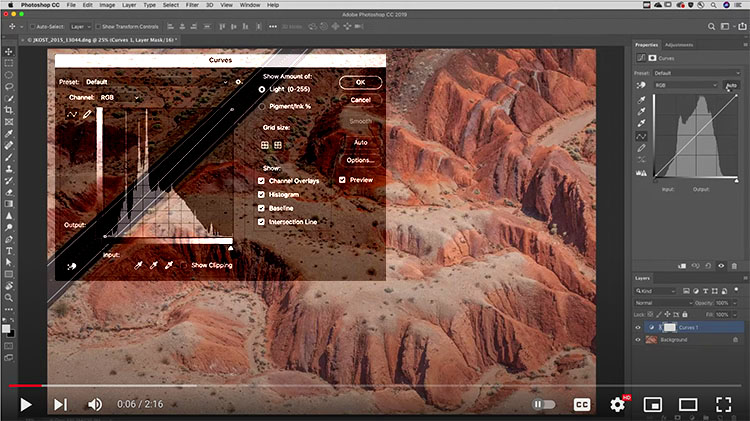
In this short video tutorial, you’ll learn essential tips for working with the Curves panel in Photoshop, including how to customize the Auto options, add and delete points, use the Targeted Adjustment tool, and adjust color and tone.
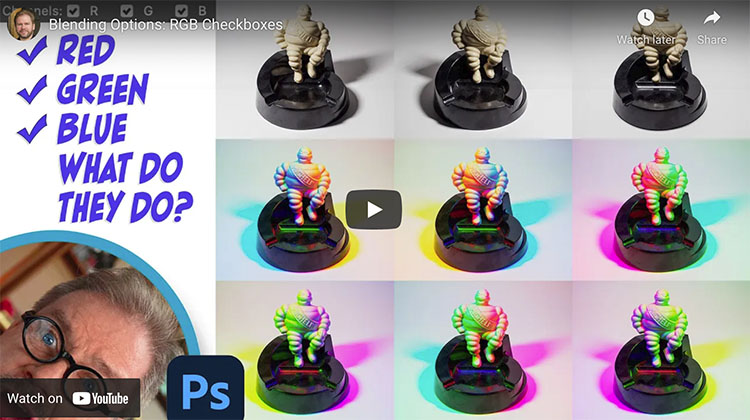
Learn a bunch of creative effects you can apply using three simple checkboxes. My favorite use is to light an object from three different angles and then combine the three images into a colorful result.