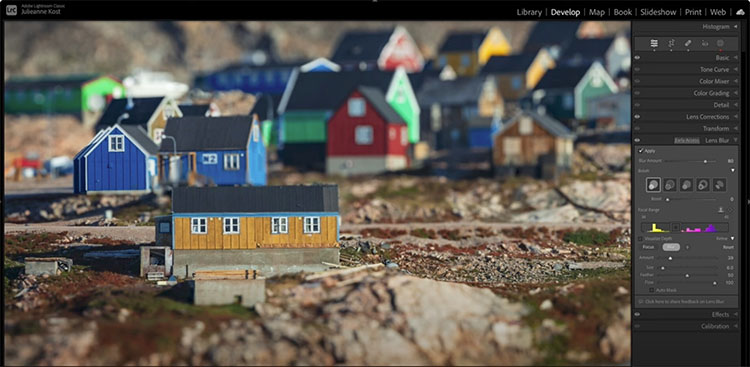
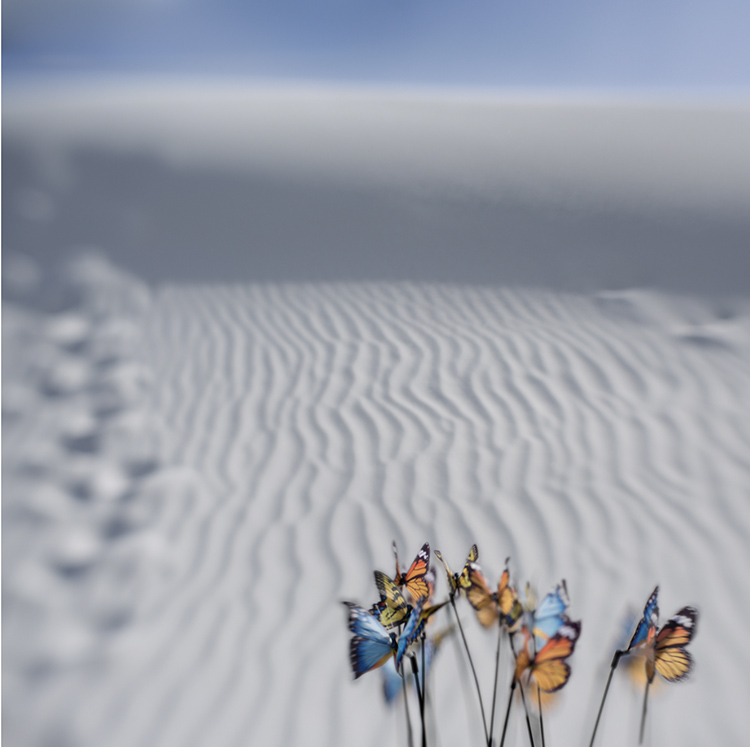
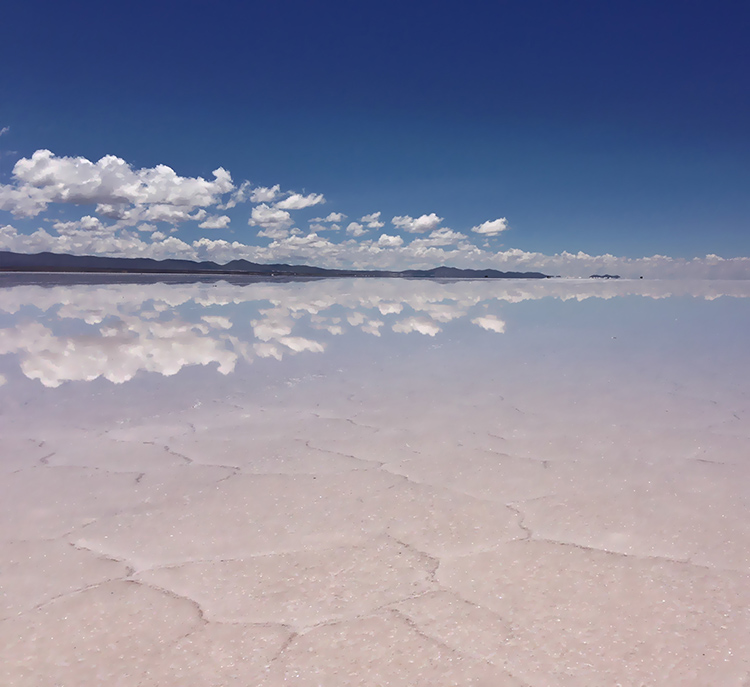
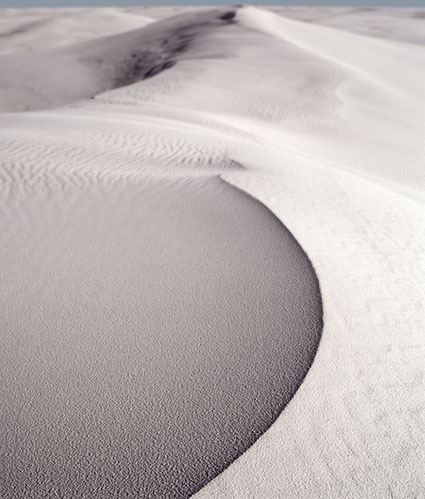
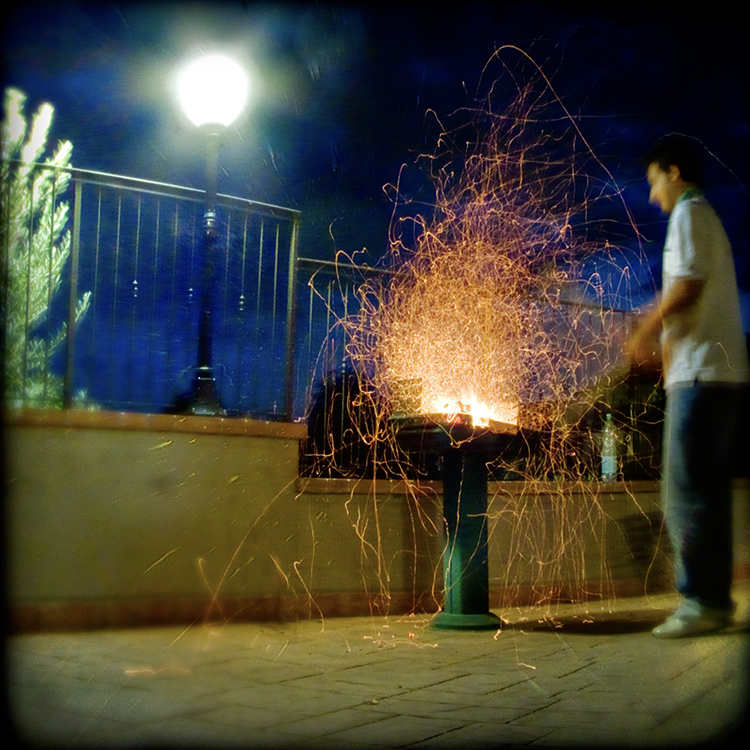
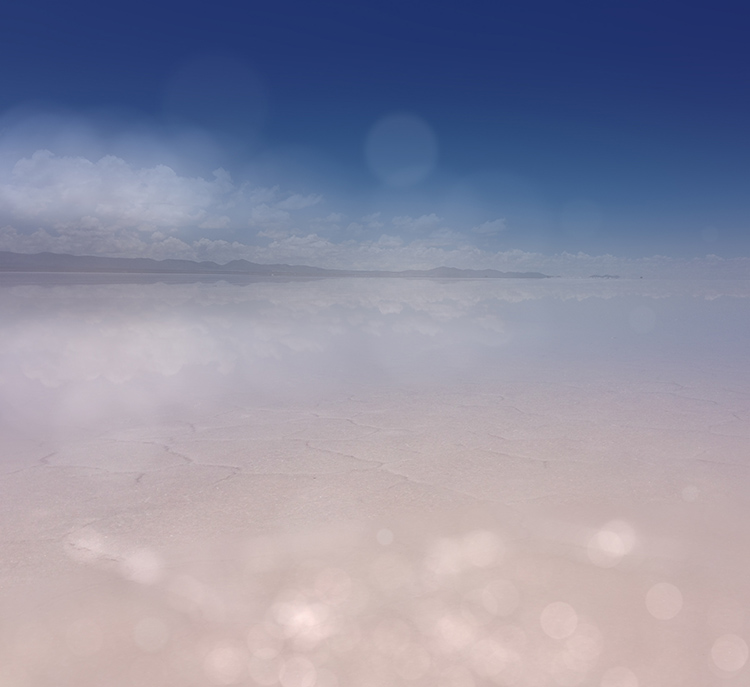
Quick & Easy Depth Of Field Effects With Photoshop’s Depth Blur
Fully focussed image
Photoshop's Depth Blur filter applied
One contour quickly masked
Photoshop’s AI neural filter Depth Blur is designed to simulate depth of field effects quickly and easily.
Here’s how to use it ...
3 Ways To Blur Image Backgrounds With Photoshop From Easy To Precise
.
.
The Top 5 Reasons To Blur Your Images
View more of Arduina Caponigro’s images here.
One of the best things about photography is that it records so much detail; one of the worst things about photography is that it records so much detail. The question becomes, “Is all of the detail in the frame significant?” and “Are the qualities of the information presented appropriate for the statement being made?” Photographers are obsessed with making sharp images and for good reason, if the main subject is out-of-focus it usually frustrates viewers – with a few notable exceptions. Sharp focus is often mistaken for good technique, when in fact it’s just a technique, sometimes better and sometimes worse. There is such a thing as too much of a good thing. Too much sharp information may become overstimulating. Overly sharp images grate on nerves, especially if digital sharpening artifacts draw attention to themselves and away from more important aspects of an image. So, it’s equally important to understand when to use blur, how much, what kind but most importantly why.
Here are five key reasons to use blur in images.
Focus Attention
You can make focussed areas seem even more focussed and important bey reducing the focus of other areas, a little or a lot. This is a classic move used frequently by portrait and street photographers when trying to emphasize people and reduce or even eliminate distracting background elements.
Accentuate Space
It’s not only focus but also its relationship to blur that gives us clues to depth-of-field or how deep a space we’re looking at. Increase the difference between the two and space within the frame is enhanced.
Enhance Mood
Texture has inherent aesthetic qualities like sharpness and softness that can greatly enhance an image’s mood. Just ask, how do you want an image to feel physically and emotionally?
Show motion
While photographs are by their nature still, life is constantly in motion, and you may want to record that. While the artifacts cameras produce aren’t the same as our bodies visual experience of motion they provide a range of visual codes that can suggest motion and can even be fascinating visual experiences in and of themselves, at times providing us new windows into the world, whether it’s the subject or the camera that moves.
Create Abstractions
By deemphasizing details you can direct more attention to the foundations of images. Go further and you can produce simplifications that are virtually unrecognizable and become new aesthetic experiences.
Detail is an essential element in every image but there’s a wide range of ways to treat it and reasons to do so. If you’re not sure what you prefer, explore many ways before committing to a solution that feels right to you. As you find that you’re called towards certain treatments ask why and how that’s serving the statements you’re making with your images. You may become more conscious of what you’ve found your way to unconsciously and in so doing discover more about how your style reveals your vision and aspects of yourself.
Don’t forget to explore your digital options. There’s a wealth of new exposure combinations and digital post-processing techniques that may serve you well. If you find you prefer analog processes and effects, ask yourself why. Your answer may be significant even revealing to you and your audiences. What you choose not to do can be just as revealing as what you do. Just make it intentional.
Read more about Blur.
Learn more in our digital photography and digital printing workshops.
A Grand Overview Of Photoshop’s Blur Filters
Photoshop Blur Filters
There are many reasons to explore blur in your images; remove distractions, direct attention, enhance space, modify mood, and add interesting visual artifacts are six among many. Blur can be controlled at the point of capture and in post-processing. Thoroughly understanding your post-processing options will help you make choices about when and how to control blur in your images before, during, and after exposure.
When it comes to post-processing blur, you’ve got options! Photoshop currently offers fourteen filters; Field Blur, Iris Blur, Tilt-Shift, Average, Blur, Blur More, Box Blur, Gaussian Blur, Lens Blur, Motion Blur, Radial Blur, Shape Blur, Smart Blur, Surface Blur - in order of appearance in the Filter: Blur drop-down menu.
At first glance, the list is overwhelming. Where do you start? Get started with this quick survey of available options.
Fast & Easy Ways To Blur Image Backgrounds in Photoshop
How To Blur Your Images Creatively
Explore ways to use blur in your images creatively.
The Top 5 Reasons To Blur Your Images
Quick & Easy Depth Of Field Effects With Photoshop’s Depth Blur
How To Combine Focussed & Defocussed Images Using Photoshop
A Quick Visual Comparison Of All Of Photoshop’s Blur Filters
A Grand Overview Of Photoshop’s Blur Filters
Control Blur FX In Photoshop With Amazing Precision
Create Sophisticated Motion Blur Effects With Photoshop’s Path Blur Filter
How To Create More Realistic Blur Effects By Adding A Little Noise
3 Color Tweaks To Improve Image Blur’s Depth Of Field
2 Ways To Quickly Add Bokeh Flares To Your Images
Enhance Blur Effects With Selective Sharpening | Coming
How To Achieve Optimum Exposure
Achieve optimum exposures.
Use The Exposure Triangle Creatively | Coming
Setting Your Digital Camera’s File Format
Setting Your Digital Camera’s Color Space
13 Essential Tips For Low Light & Night Photography
8 Essentials To Achieve Perfectly Focused Exposures
Test Camera – Dust | Coming
Test Camera – ISO | Coming
Test Lens – Sharpest Aperture | Coming
Get Better Exposures Using Hyper-Focal Distance | Coming
How To Hold Your Camera Steady | Coming
What To Do When You Don’t Have A Tripod | Coming
Shoot In Bursts To Reduce Camera Shake | Coming
Use Camera Motion Creatively | Coming
Multi-Shot Techniques
Multi-Shot – Extending Format – Panorama
Multi-Shot – Extending Depth Of Field – Focus Stacking
Multi-Shot – Extending Resolution – 3 Ways Increase Resolution
Multi-Shot – Extending Bit Depth – 32 Bit Tone Mapping
Multi-Shot – Extending Dynamic Range – HDR
Multi-Shot – Remove Or Multiply Moving Objects
Extend Depth of Field With Focus Stacking
Foreground in focus
Background in focus
Two exposures combined to achieve infinite depth of field
How deep would you like your depth of field to be? The choice is yours. Today, there are virtually no limits. You can extend depth of field beyond the physical limitations of any lens/camera system with multi-shot exposure practices and software – by compositing multiple exposures.
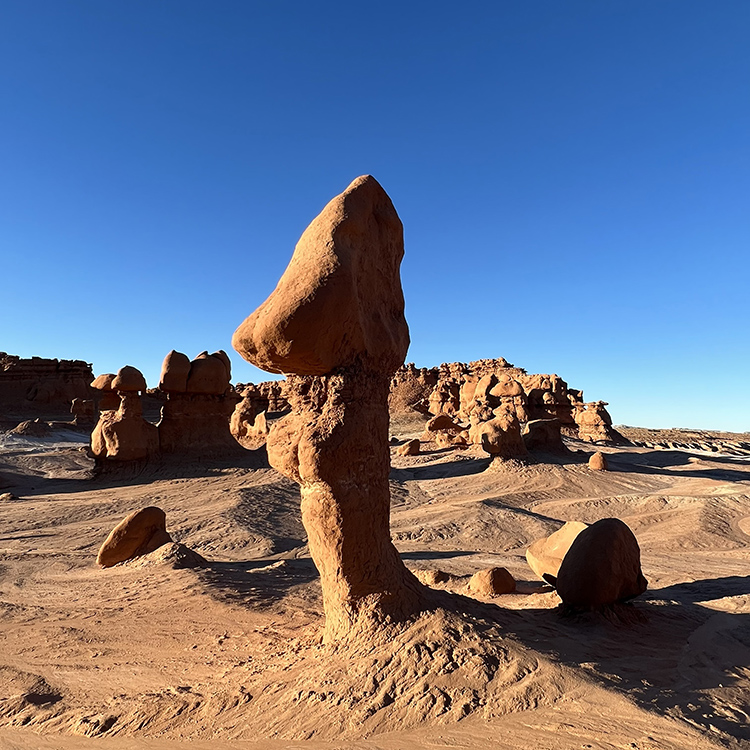
To do this you first need to make a set of focus bracketed exposures, optimizing focus in different image areas. How many exposures you’ll need will depend on how much depth of field a scene contains. At a minimum, make two exposures; one focused on the foreground and another focused on the background. Making three exposures is better; one each for foreground, middle ground and background. When dealing with extreme depth of field, like macro or microphotography, you’ll want to make more exposures, at least three, probably six, possibly more. When in doubt, make more exposures than you think you’ll need; you don’t have to use them all when you stack the separate exposures, but they’ll be there if you need them. Unlike bracketing for HDR, it’s almost impossible to automate these types of bracketing sequences in camera as focus needs to be adjusted for each frame. However, for tethered shooting, you can use software such as Helicon Remote to take control of your camera and automate this process and other bracketed sequences like HDR and time-lapse. Whenever possible use a tripod to make focusing during exposure more precise and registration during post-processing easier. While using a tripod always delivers more reliable results, don’t let this stop you from trying this technique hand-held, especially with simpler sequences, like those used in landscape. You may notice that In cases involving extreme depth of field, you may notice the relative size of objects may change between individual exposures. These effects will be automatically adjusted during the merging process.
Before you combine a set of focus bracketed exposures, make all the Raw conversion adjustments you’d like to make to the final file. It’s quick and easy to process a focus bracketed series of files; process one file in the series ideally and then Sync the other files to it. Once a Raw file is rendered, you can’t re-access the data in it, such as ‘recovering’ highlights or ‘filling’ shadows, without re-rendering it. While, you can adjust lens distortions after stacking with Photoshop’s filter Lens Corrections, it’s much easier, faster and more robust to apply Lens Corrections during raw conversion, before focus stacking 16-bit TIFFs.
Once you have a processed set of focus bracketed exposures you can automate the process of stacking and blending them into a single file in Photoshop. (Unlike HDR and Panorama merges, you can’t make a focus stacked merge in Lightroom – currently.)
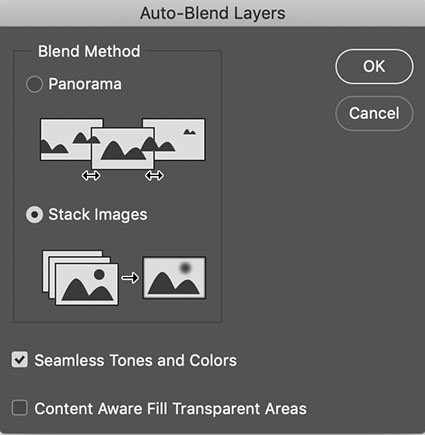
Photoshop’s Auto-Blend Layers dialog
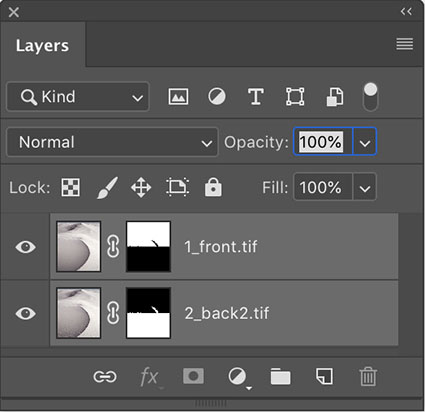
Photoshop’s auto-masked layer stack
Take these four steps.
1 Using Adobe Bridge highlight all of the files you’d like to combine.
2 Go to Tools > Photoshop > Load Files Into Photoshop Layers
3 In Photoshop’s Layers palette highlight the layers
4 Go To Edit > Auto-Blend Layers, check Stack Images and click OK
You can then further refine these results, including manually adjusting the automated masks or distorting layers, but this is rarely necessary. Photoshop does a fine job for a majority of applications.
.
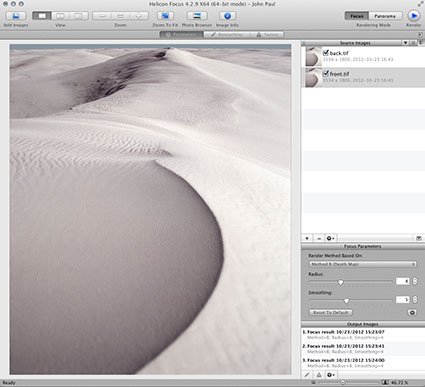
Helicon Focus’ main window
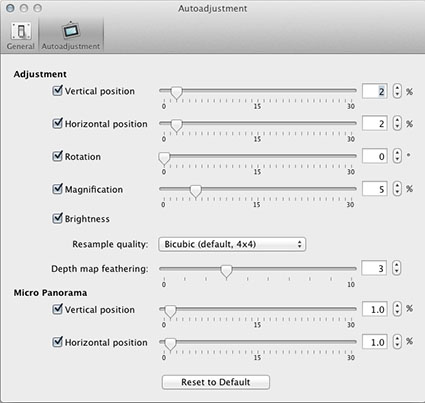
Helicon Focus’ Autoadjustment panel
Extend Depth Of Field With Focus Stacking
How deep would you like your depth of field? The choice is yours. Today, there are virtually no limits. You can extend depth of field beyond the physical limitations of any lens/camera system with multishot exposure practices and software that composites multiple exposures.
- 1
- 2