Space is limited! Sign up today!
Learn more about eBooks here.
Learn more about DVD's here.
Enjoy my free screensavers.
View the complete website ...
Read great thinkers thoughts.
Listen to the experts.
View the great photographs.
Find out how photographers think.
Ask photographers questions.
Learn about photographers lives.
Read what photographers say.
Check out the tools I use.
Discount Adobe Discount BorrowLenses Discount Epson Discount Chromix Discount Flypaper Textures Discount FotoQuote Discount Helicon Focus Discount Imagenomic Discount Moab Papers Discount NEC Discount PhotoKit Discount Photomatix Discount Visible Dust
BorrowLenses
Epson Stylus Pro Adobe Influencer X-Rite Coloratti Lowe Pro Pro Kelby Training NAPP Photoshop Hall Of Fame
November 26, 2011 | Leave a Comment |
Today I begin my fourth trip to Antarctica.
Follow my Antarctica blog for daily updates.
You can read my daily posts from my 2009 voyage there now.
Find out more about my ongoing Antarctica project – book, galleries, maps, facts, statements and more.
Preview the book of work from my first three trips to Antarctica in 2005, 2007, and 2009 above.
Email me to find out about my Antarctica 2013 workshop first.
Category: Destination - Antarctica
November 25, 2011 | Leave a Comment |
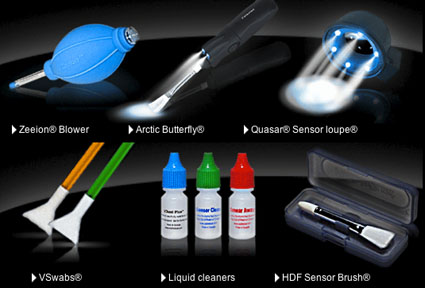
How do I clean my DSLR sensors in the field?
Get 10% off all Visible Dust products.
Just tell them I sent you.
Call 1-877-999-9404.
Visit Visible Dust today.
Category: Discounts Tags: brushes, dust, sensor cleaning, sensor dust, swabs, visible dust
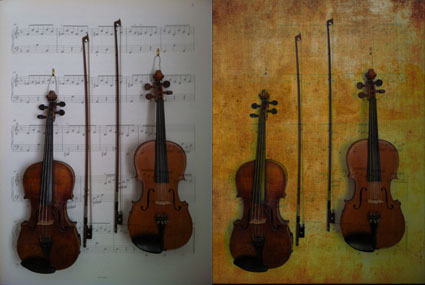
Flypaper Textures offers a variety of high quality easy-to-use downloadable texture files. (I use them all the time with my iPhone photographs.) You can get 15% off Flypaper Textures with this code – johnpaul .
Visit Flypaper Textures here.
Plus, mouse over images on their blog for before / after previews.
Read A Little Stress Can Be Good For Your Images on The Huffington Post.
“Stress can be good for your images. The analog materials used in painting and photography, often add rich textures that can enliven images. Throughout the history of art, drips, scratches, cracks stains, grain, vignetting, light leaks, fading, erasure and other analog artifacts have all been successfully used to add a compelling character to many images. Far from being something to be avoided, these effects can become a creative wellspring you can draw from time and time again.
Distress your photographs a little and you can make contemporary photographs look antique. Distress your photographs a lot and you can make photographs seem like they were made with other media – pencil, ink, paint, etc. The same effects and sensibilities can also be applied to and enhance images made by hand, with paint or with painting software, or computer rendered, whether 2D or 3D.
Stress can do a lot for your images …”
Category: Discounts Tags: discount, flypaper textures, overlays, painting, stress
November 24, 2011 | Leave a Comment |
“Nature’s beauty can be easily missed — but not through Louie Schwartzberg’s lens. His stunning time-lapse photography, accompanied by powerful words from Benedictine monk David Steindl-Rast, serves as a meditation on being grateful for every day.”
Category: Video, Video - TED Tags: beauty, Louie Schwartzberg. gratitude, TED
November 23, 2011 | Leave a Comment |
Julieanne demonstrates how to update, rename and delete presets and templates in Lightroom.
Watch more videos on Lightroom here.
Learn more in my digital photography and digital printing workshops.
Category: Video - Adobe Lightroom Tags: adobe, julianne kost, presets, Software - Lightroom
November 22, 2011 | Leave a Comment |
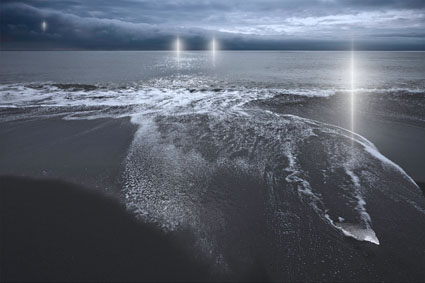
There are many reasons to use layers when sharpening your digital images.
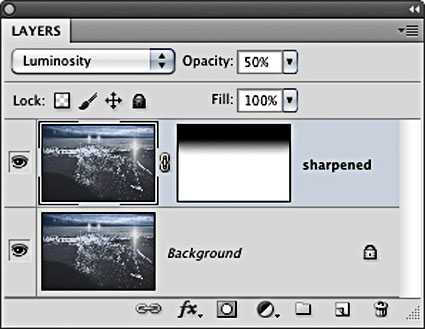
Layers can be used to eliminate saturation shifts. Change the Blend Mode of a sharpening layer from Normal to Luminosity. Color noise will be reduced this way.
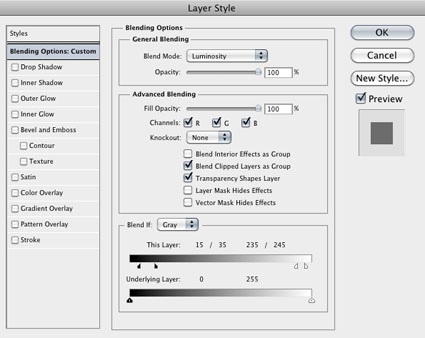
Layers can be used to prevent clipping in deep shadow detail (near-black) and bright highlight detail (near-white). As sharpening is a contrast effect, near-white and near-black values can be driven to pure white and pure black by it. There’s a cure. Double-click the layer to activate Layer Styles. Use the Blend If sliders to reveal the lost highlight and shadow detail in the background layer below the sharpening layer; zoom way into a highlight area, hold the Option/Alt key and drag the right arrow to restore highlights and the left arrow to restore shadows.
Layers can be masked for greater control over confined areas in an image. To begin, add a layer mask. Select an area from which you wish to remove a sharpening effect, like a sky or other area of even tone, and fill the area with black. You can use this strategy to remove unwanted texture or noise from selected areas of an image. Gray values can be created on a mask with the Gradient tool or with a Brush tool to gradually reduce a sharpening effect. This often can produce a more strongly felt impression of space within an image. In anticipation of selectively modifying an effect, you may decide to sharpen an image more aggressively.
One approach to gaining additional flexibility …
Read more on Digital Photo Pro.
Read more on sharpening here.
Category: Magazine - Digital Photo Pro, Software - Photoshop, Technique - Sharpening Tags: adobe, blend if sliders, blend modes, layers, masks, sharpening, Software - Photoshop
Subscribe by Email