Grand Canyon Night Photography With Smart Objects – Russell Brown
February 18, 2013 | Leave a Comment
“Learn some creative techniques for replacing the night sky with advanced masking, and Smart Objects. Also discover the best exposure settings for capturing the detail in the Milky Way galaxy.” Presented by the inimitable Russell Brown.
View more Photoshop videos here.
Learn more in my digital photography and digital printing workshops.
Zion Long Exposure Night Photography – Russell Brown
February 11, 2013 | Leave a Comment
“Learn to combine multiple exposures together into one composite shot with Adobe Photoshop CS6. Russell Brown demonstrates stacking images and using advanced blend modes to combine multiple images together.”
View more Photoshop videos here.
Learn more in my digital photography and digital printing workshops.
What You Know Changes What You See
January 23, 2013 | Leave a Comment
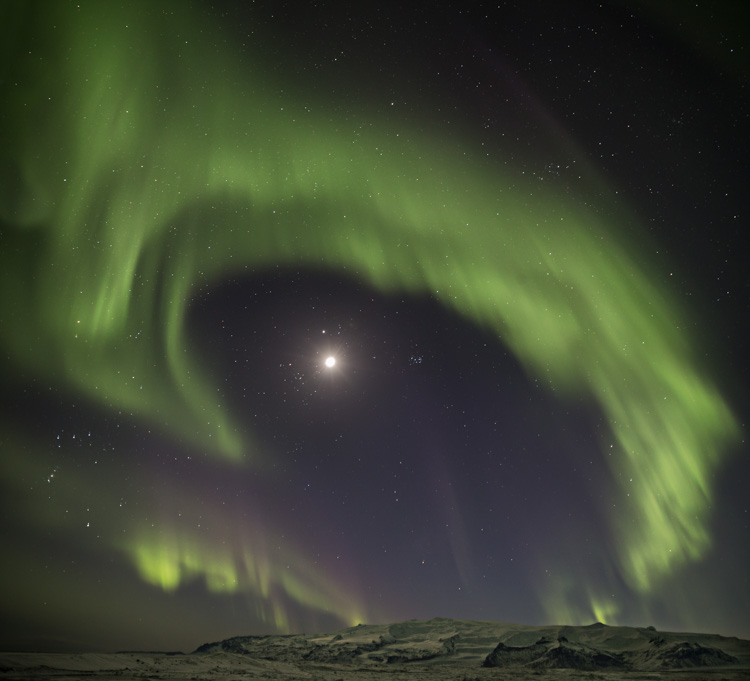
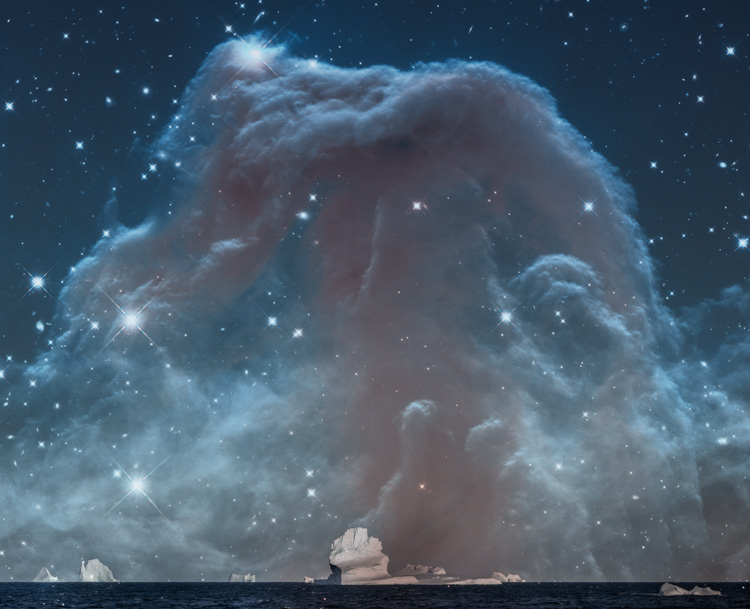
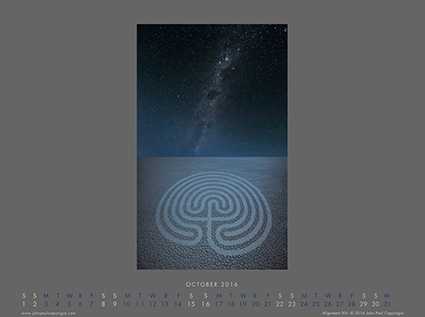
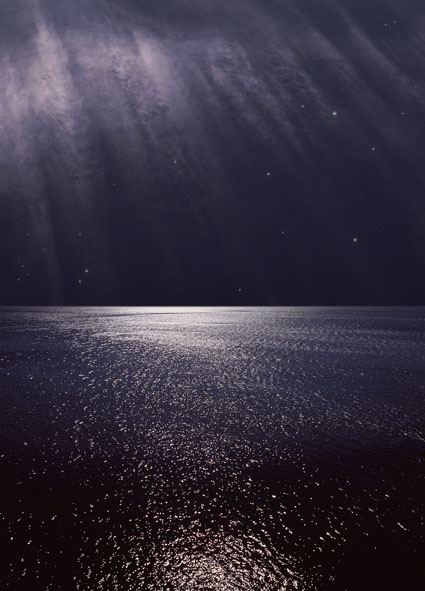
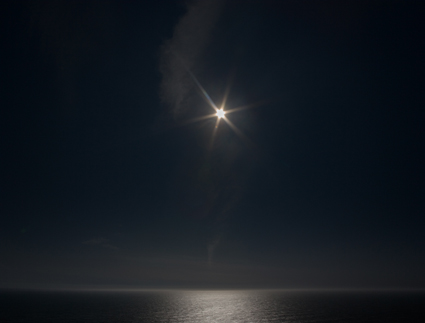
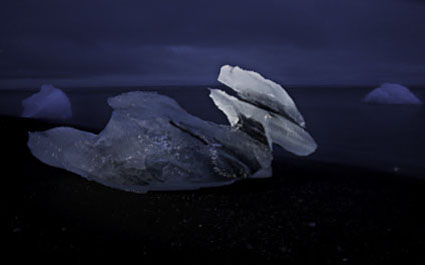
Nocturne / Correspondence XII, Newport, Rhode Island, 1999
While studying painting in college, I was given the assignment of painting night. After dark, I took my paint and canvas out into the night – and couldn’t see either. So I found a portable light source, which made them so bright that I couldn’t see beyond them. Next, I used a camera to make photographs to paint from and colors became distorted and moving objects blurred or disappeared altogether. I ultimately ended up painting from memory, drawing on all of my accumulated memories from these attempts to make the final images.
Much later, working with digital imagery, I returned to this challenge. Wanting to avoid the distortions I had encountered before I took a clue from Hollywood, shooting by day and color adjusting those images to look like night. Realizing that the hard multi-colored points of light rendered by the camera eye did not look like what I saw with my naked I, I began digitally drawing stars as I saw them.
I found other people’s reactions to these images fascinating. Knowing that long exposures were necessary to make photographs in low light, photographers would ask me, “How did you get these exposures?” Familiar with the relative relationship of specific stars in the sky, astronomers would ask me, “Where did you find these constellations?” What each viewer knew changed the way they saw, the questions they asked, and their final reaction.
In order to see more, to see more deeply, and to see in more ways, I find myself constantly challenging what I think I know and striving to learn more in as many ways as I can think of.
How many ways does what you know help you make stronger images?
How many ways does what you know get in the way of your making stronger images?
How many ways can you increase the positive and reduce the negative impacts of what you know on your image making?
Find out more about this image here.
View more related images here.
Read more The Stories Behind The Images here.
13 Essential Tips For Low Light & Night Photography
November 9, 2012 | Leave a Comment
What settings should you use when making exposures in low light or at night? Use a tripod and cable release, set ISO to 800 (or higher), open up f5.6 or wider, focus at infinity and keep exposures below 20 seconds. While this is a good starting point, that’s all it is, as you’ll need to modify settings based on the specific light(s) in a location, the equipment you’re using, and the effect you want to produce. Instead, ask, “What concerns do I need to be mindful of and what points of control do I have when making low light or night photographs?” Develop your sensitivity to these factors and you’ll know why and when to improvise and even what more you can explore. These twelve tips will give you a solid foundation from which to begin your explorations in low light and night photography.
1 Use A Tripod
Tripods are essential for long exposure techniques. The tripod head you use is as or more important. Use good ones.
That said, don’t feel like you have to make all of your low light exposures on a tripod. Today’s digital cameras offer exceptional high ISO performance that open up a whole new range of light for us all.
2 Use A Cable Release Or Intervalometer
Minimize camera motion by using a cable release to make exposures. (In a pinch, you can use the self-timer mode to delay exposure at least 2 seconds after you touch the shutter release.) Once you’ve composed an image, touch the camera / lens / tripod as little as possible.
If you’re stacking multiple exposures to create star trails, consider using an intervalometer to automate timed exposure sequences.
3 Use Bulb Mode
Bulb exposure mode is the only mode you can use to make very long exposures. Most other camera modes won’t exceed 30 seconds.
4 Use Mirror Lock Up
Further reduce motion blur by using the mirror lock up function on your camera.
5 Use A Fast Lens
Use a fast lens. Each fstop offers twice the amount of light as the previous one, which will translate into an exposure that lasts half as long (reducing motion artifacts) or one lower ISO rating (reducing noise).
If you can pick up the speed you need with high ISO (without noise becoming unacceptable) and image sharpness is a primary concern, consider using sharper apertures. The sharpest aperture on most lenses is either f8 or f11. Confirm if this is true with an individual lens by testing it, preferably before making exposures at night.
When you’re shooting on a tripod don’t use image stabilization, it will reduce rather than increase sharpness.
6 Find Infinity Focus Point
Test your lenses and find the most used point of focus - infinity.
When possible, use a flashlight to illuminate objects to focus on, focus, then immediately turn off auto-focus, if you haven’t already.
7 Use High ISO
New digital cameras offer extraordinary high ISO performance. Test your camera to find the upper limit when noise becomes unacceptable. Use this when long exposures are likely to cause unwanted motion artifacts.
8 Check Histograms
Monitor histograms after every exposure. An exposure’s histogram will tell you if the shadow or highlight detail has been lost, if underexposure is likely to produce noise, and if you need to make multiple exposures.
9 Consider HDR Techniques
Histograms will tell you if you need to bracket exposure. Remember, data in the lower half of the histogram tends to be noisy and gets noisier the closer to the black point it gets. To reduce noise, you’ll want to bracket exposures more frequently than you might think, even if you only use the additional exposure(s) for one part of an image (such as the parts without motion) and not another or even one small piece, like the moon. There’s a progression of HDR techniques that will help you with a majority of your exposures, not just your low light photography.
10 Use Long Exposure Noise Reduction
In camera long exposure noise reduction works by taking a second exposure of the same length with the shutter closed to map fixed sensor noise and then remove it from the first exposure. This is particularly useful with longer exposures when sensor noise becomes most pronounced. But doubling exposure times for every exposure may not always be advantageous, especially with shorter exposures at lower ISOs when noise is less pronounced – so learn how and when to turn this camera function on and off.
11 Master Noise Reduction Post-Processing
Learn what kind of noise and how much of it can be removed in post-processing and you can comfortably use even higher ISO settings.
Find my noise reduction resources here.
12 Consider Adding An Artificial Light Source
At a minimum bring a small flashlight to help you check camera settings and find equipment in the You don’t have to be in the dark to prepare to make exposures in the dark.
In addition, consider bringing a strong flashlight for light painting techniques. Light up an existing visual element or add a new one with the light itself. Some of today’s compact flashlights are surprisingly strong. Flash units can be another excellent source of artificial light.
You can blend multiple exposures, with and without artificial light sources to control where and how much to introduce light into a composition.
13 Test
Before you shoot, test, test, and retest. Test what you can ahead of time; familiarize yourself with camera functions, find infinity focus, identify acceptable ISO including post-processing, know at what exposure times you can expect motion artifacts like star trails, etc. The last time and place you want to be testing your equipment is while you’re trying to make finished exposures in exciting locations. Testing ahead of time will greatly reduce but not entirely eliminate on site testing. To optimize your exposures for each unique situation you’ll need to make minor modifications to the general practices you’ve previously established. On site you’ll most likely want to make two types of test shots. First, make a test shot at exceptionally high ISO to confirm composition – and possibly focus. Second make a test shot at acceptable ISO to confirm optimum exposure – if you’re lucky this may be your final exposure, but quite often you’ll find you need to make a slight modification to that exposure or a second or even third bracketed exposure to enhance the first. Optionally, you may want to test what motion artifacts are introduced by extended exposures and if they are pleasing.
There’s a lot left to be discovered in night photography. Use these tips to help guide your explorations.
Read more resources on exposure here.
Learn more about night photography in my digital photography workshops.
Upcoming workshops include Atacama Desert Argentina, Death Valley California, and Iceland Auroras.
Lighting Midnight At Iceland’s Glacial Lagoon
August 11, 2010 | Leave a Comment
Ragnar th Sigurdsson treated us to a midnight display of lighting techniques at Iceland’s glacial lagoon Jokullsarlon.
Multiple exposures for multiple Photoshop layers. Fantastic light. Glowing icebergs beached on black sand at tide line. Venus on horizon. Magic.
Taking artificial light into the field is just one thing we explore in our workshop. Have you ever tried it?
If you’re in Iceland, next Saturday is the annual firework display over the glacial lagoon.
Reserve your space in my 2011 Iceland workshop here.
Find out about my digital photography workshops here.
Iceland – Always Try New Things
August 10, 2009 | Leave a Comment

Photographer Ragnar th Sigurdsson loves to use studio lighting on location. It’s one of his trademarks. He showed me how he does his magic at midnight on Iceland’s Jokullsarlon or glacial lagoon, a 10 kilometer lagoon chock full of icebergs that pour out into the sea. With simple portable strobes and flashlights we lit up dozens of icebergs, painting light on incredible forms in the middle of the night at a truly fantastic location. It was truly exciting. And the company simply can’t be beat.
Ragi’s scheduled a repeat performance for all of the participants in my Focus on Nature workshop tonight at midnight. Hopefully none of them will check my blog before then because it’s a surprise. It’s just one of many we have in store for them this week.
Wow! I’m still saying wow! Because of one evening, I’m thinking about light differently now.
Get priority status in my 2010 Iceland workshop.
Email info@johnpaulcaponigro.com.
Subscribe
Get the RSS Feed-
- Adventures
- Alumni
- Antarctica
- Antarctica 2009
- Apps
- Audio
- Books
- Business
- Calendar
- Canon Cameras
- Causes
- Cell Phone
- climate change
- Collected
- Color
- Composition
- Contests
- Conversations
- Creativity
- Destination
- Disclosure
- Discount
- Drawing
- DVDs
- eBooks
- Editing
- Environment
- Epson Print Academy
- Equipment
- Event
- Exercises
- Exhibit
- Experiment
- Exposure
- Green Actions
- Greenland
- Guest Blog
- Huffington Post
- iceland
- Images
- Influences
- Inspiration
- Interviewed
- iPad
- iPhone
- Lecture
- Lighting
- Lightroom
- Magazine
- Map
- Masterworks In My Collection
- Media
- Meditation
- Multimedia
- Namibia
- News
- Optical Illusions
- Packing
- People
- Photographer's Favorite Quotes
- Photographers
- Photographers – Q&A
- Photographers On Photography
- Photographers Video Conversation
- photography
- Photoshop
- Postcards
- Printing
- Published
- Q&A
- Quotes
- R/Evolution
- Radio
- Reading
- Requests
- Review
- Reviewing
- Science
- Screensaver
- Sculpture
- Seminar
- Sharpening
- Slideshow
- Social Causes
- Social Networks
- Software
- Special Guest
- Special Offer
- Statements
- Storytelling
- Technique
- Technology
- The Making Of The Print
- The Stories Behind The Images
- Travel
- Uncategorized
- Video
- Video – Artists
- Video – Creativity
- Video – Lightroom
- Video – Photographers
- Video – Photography
- Video – Photoshop
- Video – Quick Tips
- Website
- Winners Of The Day
- Workshop Giveaways
- Workshops
- Writing
- X-Rite i1Photo Pro
Archives
-
- June 2013
- May 2013
- April 2013
- March 2013
- February 2013
- January 2013
- December 2012
- November 2012
- October 2012
- September 2012
- August 2012
- July 2012
- June 2012
- May 2012
- April 2012
- March 2012
- February 2012
- January 2012
- December 2011
- November 2011
- October 2011
- September 2011
- August 2011
- July 2011
- June 2011
- May 2011
- April 2011
- March 2011
- February 2011
- January 2011
- December 2010
- November 2010
- October 2010
- September 2010
- August 2010
- July 2010
- June 2010
- May 2010
- April 2010
- March 2010
- February 2010
- January 2010
- December 2009
- November 2009
- October 2009
- September 2009
- August 2009
- July 2009
- June 2009
- May 2009
- April 2009
- March 2009
- February 2009
- January 2009
- December 2008
- November 2008
- October 2008
- September 2008
- August 2008
- July 2008
- June 2008
- May 2008
- April 2008
- March 2008
- February 2008
- December 2007
- September 2007
- April 2007
- March 2007
- February 2007
- December 2006
- November 2006
- October 2006
- August 2006
Categories
Blogroll
Topics & Friends
WP Cumulus Flash tag cloud by Roy Tanck requires Flash Player 9 or better.


