5 Tools You Can Use To Make The Most Of Shadows & Highlights Without HDR

There are many things you can do in Photoshop to make the most of shadow and highlight detail in images, even if you didn’t bracket exposures for HDR.
Curves
Curves, the most precise tool for modifying brightness and contrast, allows you to target and adjust shadows and highlights independently of one another. You can use it to reduce contrast and render more detail in very bright highlights and/or very dark shadows. The Curves interface has a feature (The icon looks like a finger with up and down arrows.) that allows you to click on any area of an image to place a point and adjust those values. If you’re adjusting highlights and shadows, it’s quite likely that you will also have to adjust values in the other end of the tonal scale and possibly midtones to generate the best results. Keep it simple; it’s surprising what you can do with just two or three points. Keep it smooth; avoid posterization by not flattening areas of a curve. The Blend Mode Luminosity can be used to remove any unintended shifts in saturation; more contrasti increases saturation while less contrast decreases saturation.
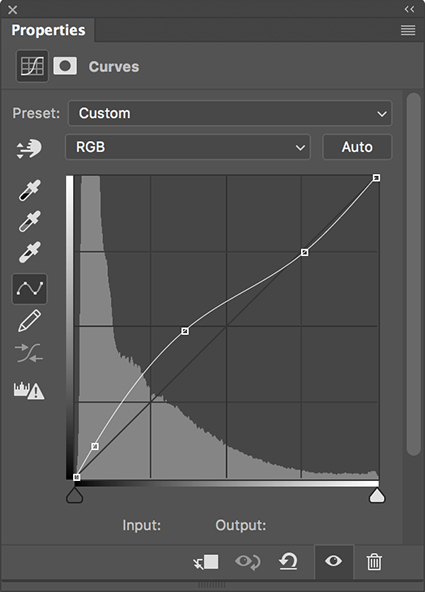
Curves can be used to lighten shadows and/or darken highlights

Before Curves

After Curves
No Comments