A New Way To Make Your Photographs Bigger – Photoshop 2026 Includes TOPAZ Generative Upscale
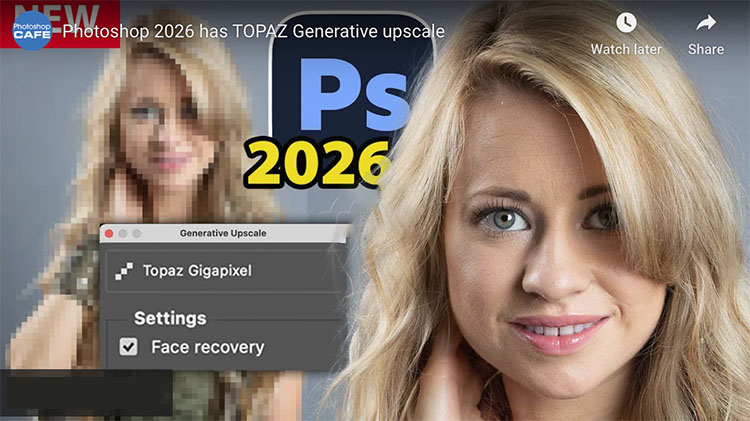
“Generative upscale in Photoshop 2026, now includes Topaz Gigapixel and Topaz Bloom.
Colin Smith walks you through how to use generative upscale and tests the Topaz Labs models.”
Find out more from Colin Smith at Photoshop Cafe.
Learn more in my digital photography and digital printing workshops.