Save 20% On Imagenomic's Noiseware Pro
Get 20% off Imagenomic products with this discount code JPC2007.
Noiseware is the most robust noise-reduction software available. Ironically, while it offers the most sophisticated feature set, very often the default settings when you first open an image are all you’re likely to need. In many cases, very little, if any, additional tweaking is necessary.
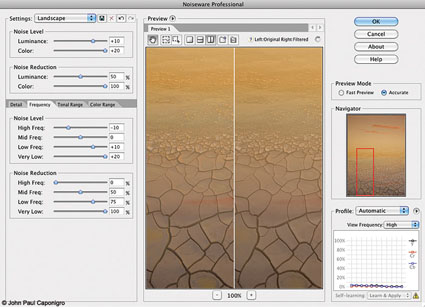
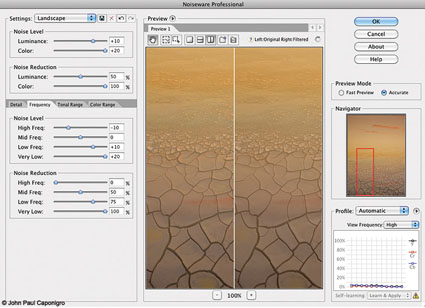
In part, this is because Noiseware analyzes the images you process and creates “profiles” or saved settings that it uses every time you open a new image. It intelligently learns your needs by tracking your past images and analyzing your new images. You can also use Noiseware’s tools to create your own profiles, which can be saved and reused. You can save your own Preferences for how you’d like Noiseware to behave and learn. Noiseware also offers 13 default settings (like Landscape, Night Scene, Portrait, Stronger Noise, etc.) and allows you to save your own custom settings, which can be created from scratch or by modifying the provided presets.
Noiseware’s ability to target noise reduction to specific aspects of an image is what makes it unparalleled. You can adjust Noise Reduction based on Luminance or Chrominance; higher settings produce stronger noise reduction. You can target Noise Level based on Luminance or Chrominance; higher settings tell the software there’s more noise. You can target Color Range; Noise Reduction and Noise Level can be customized by hue—reds, yellows, greens, cyans, blues, magentas, neutrals. You can target Tonal Range; Noise Reduction and Noise Level can be customized for shadows, midtones and highlights. You can target image areas based on Frequency (or amount of detail); Noise Reduction and Noise Level can be customized to High, Mid, Low and Very Low frequencies. Finally, you can enhance detail, first, by using Detail Protection to reduce the effect based on Luminance or Color, and second, by using Detail Enhancement, which provides Sharpening, Contrast and Edge Smoothening.
Noiseware’s ability to provide this level of selectivity is extraordinary. It allows you to easily customize noise reduction for separate areas of an image without making complex masks. You’ll want to do this. Here’s just one example, among many, of why you want to do this. Smooth image areas reveal noise much more readily and they support more noise reduction, while highly textured image areas hide noise, but don’t support as much noise reduction without compromising apparent image sharpness.
Read my full review on Digital Photo Pro.
Find Imagenomic’s Noiseware here.
Read more in my digital photography resources.
Learn more in my digital printing workshops.


