Advanced Color Adjustment – Blending Channels
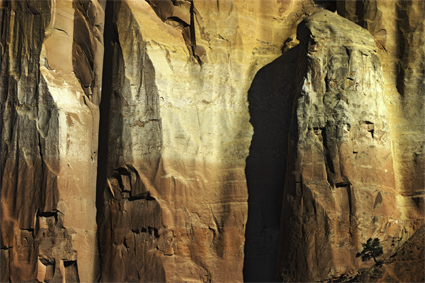
Before

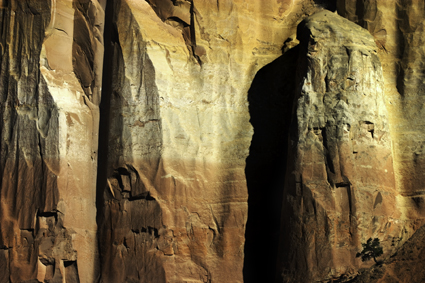
After
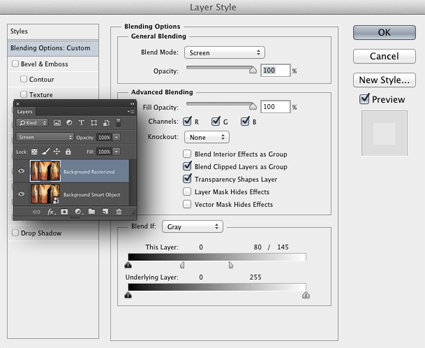
Layer Styles
Blending channels is a powerful color adjustment strategy that can handle even the biggest challenges. It takes information from one channel and combines it with information from another. It’s great for repairing clipping in one or even two but not three channels. Rather than simply enhancing existing tonal values, blending channels reshapes one channel’s tonal structure with another’s. Consequently, in most cases, blending channels calls for a substitution of information by percentage, not a wholesale replacement of the deficient channel. You usually blend channels from different versions of the same image because blending channels from different compositions produces a highly altered effect.
Blending channels is complex. It often produces additional unintended color effects that may require further correction, such as shifts in hue that aren’t uniform across the tonal scale. Blending channels is neither the simplest nor the most direct path to color adjustment, but in certain situations (files that are exceptionally problematic), it may be the best path. The resulting benefits can be dramatic.
There are several ways to blend channels: Channel Mixer, Apply Image, Calculations and the most robust using channels as layers.
How do you do it? Duplicate a layer. Double click on the layer to activate Layer Styles (rasterize copies of Smart Objects to get this). Then check the channel you want to use, select a Blend Mode (typically Darken or Lighten and sometimes Multiply or Screen), adjust the Opacity, and use the Blend If sliders to constrain the effect or alternately a mask.
Read all the details on Digital Photo Pro.
Part I
Part II
Learn more in my digital photography and digital printing workshops.
No Comments