.

Extend Depth Of Field With Focus Stacking


How deep would you like your depth of field? The choice is yours. Today, there are virtually no limits. You can extend depth of field beyond the physical limitations of any lens/camera system with multishot exposure practices and software that composites multiple exposures.


Insights Members can login to read the full article.
Email:
or Sign up

Discovery Can Happen At Any Point In A Creative Process

Illumination II, Sossusvlei, Namibia 2012.

In 2010, during my third trip to one of the oldest desert’s in the world, Namibia’s Sossusvlei dune field, I enjoyed one of the most sublime hours of my life, from a helicopter. Moments of grace like this fill you with reverence for the miracle world we live in and a deep abiding gratitude to be a part of it all. I was prepared for it, but nonetheless surprised.
Before arriving, to plan where to go and how to maximize my time this magnificent dune field, I had done a considerable amount of virtual aerial research with Google Earth, zooming and panning images made from the combination of thousands of satellite images at various magnifications, to familiarize myself with where it started and stopped, how it changed in character, and the relative location of landmarks such as the dunes Big Mama and Big Daddy and the famous clay playa Deadvlei.
None of that could have prepared me for the changing angle of light, we were on the second flight of the day, an hour after sunrise, and the atmospheric conditions, all week long, the air was filled with dust from far off sandstorms that scattered the rays of the sun, permeating the sky with a white gold light. On site, I had to assess the impact of current conditions.
Even at an altitude about 3,000 feet, twice the height of the largest dunes, I found I couldn’t fit the vast dune field into my viewfinder. So I improvised and started making multi-shot exposures for panoramic stitches. It seemed like a bold move, if the two or three shots did not merge successfully then both would be lost, until one of my companions, Paul Tornaquindici, made an even bolder move and requested we do a 360 stationary rotation so that he could make a panoramic image of the entire dune field. To my delight, this method worked.
The images lay simmering in my unconscious for more than a year before I found my final solution, to render an effect of light as if it were originating from within the land to complement the light that showered down outside it. Often, a period of gestation is necessary to distill the essence of rich experiences to their essentials and connect them to others.
New image processing features informed the final realization of this image. The body metaphors, latent in these images, were intensified with creative perspective adjustments, using lens profile corrections, designed to remove mechanical optical distortions, now used expressively. Quite different than a change of angle of view, which reveals and obscures information, these distortions offered complementary but distinctly different visual effects, changing relative proportions and spatial relationships within the image. This solidified my previous experiments to compare and contrast the two and so learn to fully utilize them in tandem with one another intuitively.
Unexpectedly, the dynamic explorations made during the creation of this image suggested an entirely new alternate solution – one not fit for print. Animations of progressive distortions made the images appear to pulse and breathe, an effect that is perfectly in sync with my view of land as a living thing with a spirit of its own.
Making this image required pre-planning and then allowing that plan to evolve while responding to new input at each step in the creative process.
How can planning help strengthen your creative efforts?
At what stages and in how many ways can you encourage the evolution of those plans?
When is it better to abandon an old plan for a new one?
What are the positive and negative effects of having no plan at all?
View more related images here.
Read more The Stories Behind The Images here.

8 Essentials To Achieve Perfectly Focused Exposures

Use these 8 essential practices to achieve optimally focused exposures.

1         Focus
Set focus in an image intentionally; placing focus in an image unintentionally is usually a deal breaker. Switch autofocus mode to AI Servo only for subjects that are moving predictably. Use manual focus for times when auto focus is likely to fail you, typically scenes with low contrast, including but not limited to low light and night photography.

2         Eliminate Camera Blur
Use a tripod whenever practical. Lacking a tripod, use a nearby prop to stabilize the camera during exposure. When shooting hand, held brace your body in a stable position. Whenever appropriate use the minimum shutter speed you can hand hold without motion blur; for most people this is 1 second divided by the focal length - i.e. 50mm + 1/50th of a second. Shoot in bursts of three or more; nine times out of ten one exposure will be sharper than the others.

3         Use Sharp Lenses
         Higher quality lenses not only deliver sharper images, they do so from center to edge and with minimal chromatic aberration (caused by a lenses inability to focus all wavelengths of light on the same plane). Compare lens MTF charts to see how sharp a lens is and when it is sharpest.

4         Use The Sharpest Aperture
The sharpest aperture, generally f8 or f11, varies from lens to lens. Test your lens to find out which aperture is sharpest. The smallest aperture (f22 or equivalent) delivers the greatest depth of field (acceptable lack of focus) but slightly compromises sharpness in image areas that are perfectly focused. It’s a trade off; make it only when it’s beneficial.


Insights Members can login to read the full article.
Email:
or Sign up

Impossible Photography – Erik Johansson


“Erik Johansson creates realistic photos of impossible scenes — capturing ideas, not moments. In this witty how-to, the Photoshop wizard describes the principles he uses to make these fantastical scenarios come to life, while keeping them visually plausible. Photographer Erik Johannson creates impossible but photorealistic images that capture an idea, not a moment.”

New Exhibit & Book – Faking It : Manipulated Photography Before Photoshop


This is one of the best exhibits I’ve seen in ages!
“While digital photography and image-editing software have brought about an increased awareness of the degree to which camera images can be manipulated, the practice of doctoring photographs has existed since the medium was invented. Faking It: Manipulated Photography Before Photoshop at The Metropolitan Museum of Art (NYC) is the first major exhibition devoted to the history of manipulated photography before the digital age. Featuring some 200 visually captivating photographs created between the 1840s and 1990s in the service of art, politics, news, entertainment, and commerce, the exhibition offers a provocative new perspective on the history of photography as it traces the medium’s complex and changing relationship to visual truth.
The photographs in the exhibition were altered using a variety of techniques, including multiple exposure (taking two or more pictures on a single negative), combination printing (producing a single print from elements of two or more negatives), photomontage, overpainting, and retouching on the negative or print. In every case, the meaning and content of the camera image was significantly transformed in the process of manipulation.
Faking It is divided into seven sections, each focusing on a different set of motivations for manipulating the camera image …  “Picture Perfect”, “Artifice in the Name of Art”, “Politics and Persuasion”m “Novelties and Amusements”, “Pictures in Print”, and “Protoshop.”
The exhibit runs from October 11, 2012 through January 27, 2013.
Find out more about the exhibit here.
Whether you can or can’t see the exhibit, get the book.
The exhibition is accompanied by a fully illustrated, 296-page catalogue written by Mia Fineman.
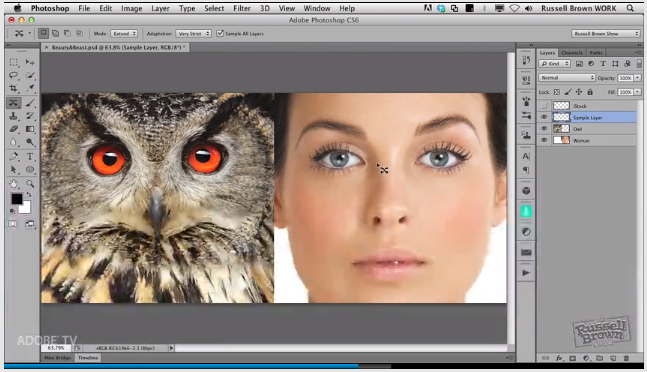
“Photographic manipulation is a familiar phenomenon in the digital era. What will come as a revelation to readers of this captivating, wide-ranging book is that nearly every type of manipulation we associate with Adobe’s now-ubiquitous Photoshop software was also part of photography’s predigital repertoire, from slimming waistlines and smoothing away wrinkles to adding people to (or removing them from) pictures, not to mention fabricating events that never took place. Indeed, the desire and determination to modify the camera image are as old as photography itself—only the methods have changed.
By tracing the history of manipulated photography from the earliest days of the medium to the release of Photoshop 1.0 in 1990, Mia Fineman offers a corrective to the dominant narrative of photography’s development, in which champions of photographic “purity,” such as Paul Strand, Edward Weston, and Henri Cartier-Bresson, get all the glory, while devotees of manipulation, including Henry Peach Robinson, Edward Steichen, and John Heartfield, are treated as conspicuous anomalies. Among the techniques discussed on these pages—abundantly illustrated with works from an international array of public and private collections—are multiple exposure, combination printing, photomontage, composite portraiture, over-painting, hand coloring, and retouching. The resulting images are as diverse in style and motivation as they are in technique. Taking her argument beyond fine art into the realms of politics, journalism, fashion, entertainment, and advertising, Fineman demonstrates that the old adage “the camera does not lie” is one of photography’s great fictions.”
Preview the book here.
 

How Many Thoughts A Day Do You Think ?


On average, we each think 60,000 thoughts a day.
Here’s the math.

One Day                        60,000 Thoughts
One Week                      420,000 Thoughts
One Month                     1,680,000 Thoughts
One Year                       21,840,000 Thoughts
One Decade                   218,400,000 Thoughts
One Life                         1,638,000,000 Thoughts

How many thoughts are significant thoughts or thoughts that led to significant thoughts?
Do you think it would help you to be more aware of your thoughts?
Do you think it would help you to think fewer thoughts?
Do you think it would help you to think in more focused ways?
If so, try meditating.

Find more on Mindfulness here.

New Book – The Color Of Light – Arthur Meyerson


This book is the product of a life’s work, a very rich life, keenly observed by a sensitive eye with a passion for looking. It’s a sensual pleasure you’re sure to want to savor.
“Since 1974, professional assignments have taken photographer Arthur Meyerson around the world to all 7 continents. Throughout it all, Meyerson’s fascination with light, color and the moment has never ceased and he has continued to produce a body of personal work that has grown into an impressive archive, The Color of Light. With essays by fellow photographers, Sam Abell, Jay Maisel and a conversation with John Paul Caponigro, The Color of Light not only details Meyerson’s photographic philosophy, but also discusses and illustrates many of the themes and ideas expressed in his renowned photographs. A selection of 113 of Meyerson’s iconic images are included and further reveal his mastery of the medium. At home and away, the subject matter is diverse as seen only through the eye of this photographer.”
A special edition slipcased book with print is available in limited quantities.
Preview the book here.
Find out more about Arthur with these resources – Conversation, Video, Q&A, Quotes.

How Auroras Work


The science behind the breathtakingly beautiful phenomenon of  the nocturnal light shows called auroras is fascinating.
The layers of the sun’s atmosphere (photosphere, chromosphere, corona) become increasingly cooler, moving away from its core at15 million degrees Celsius to its surface at 6,000 degrees Celsius. Sunspots, visibly dark areas within the sun, or areas of significantly lower temperature, 4000 degrees Celsius, occur continuously, ebbing and peaking in frequency in 11 year cycles. High sunspot counts correlate with high levels of solar activity. Unlike the bright loops of energy that can be seen on the sun’s surface as particles flow along lines within the sun’s magnetosphere, the darker areas or coronal holes exist where magnetic lines have only one anchor point in the sun’s magnetosphere, allowing plasma to escape.
This plasma carries part of the sun’s magnetic field with it; the interplanetary magnetic field or IMF. The density of the solar wind decreases with distance but its sphere of influence, the heliosphere, reaches past our solar system’s outer planets. The sun’s rotation causes this field to radiate in a spiral structure.
The speed of the solar wind averages 450 km/s but often varies significantly from 300 km/s to 1000 km/s. Large variances in the solar wind’s velocity, density, and magnetic can cause significant terrestrial disturbances.
The solar wind constantly distorts the earth’s magnetic field (caused by the rotating metallic fluids of its core) compressing it on the light side, into a half sphere, and elongating it on the dark side, in a tube, similar to the shape of a comet’s tail. As the supersonic solar wind approaches the obstacle of the earth’s magnetic field a shock front is formed; as the solar wind is directed around the earth, smaller magnetic waves occur between the earth and the sun slowing and changing the course of the streaming plasma.
Surrounding the axis of the magnetic field, offset 11 degrees from the geophysical axis, are weaker areas that give energy rich solar particles little resistance. The charged solar particles that do make it into the upper atmosphere (ionosphere) excite electrons causing them to jump to higher orbits temporarily before they return to their original orbits by giving off auroral radiation and producing visible light in the process.


Auroras (borealis in the north and australis in the south) are produced by the solar wind, fast-moving charged particles that escape the sun’s gravity, exciting gases in the earth’s upper atmosphere.
The color of auroral emissions is determined by the gases excited, primarily oxygen and nitrogen. Altitude also influences color; red is found above 200 km, yellow and green between 180 – 110 km, and blue and violet below that. These altitudes vary between dayside and nightside aurora; at night blue and green altitudes drop increasing in intensity, while red rises decreasing intensity.
Auroras appear most consistently, almost continuously, and intensely in an oval band that rings the magnetic poles; in the north 67 degrees magnetic latitude at magnetic noon and 76 degrees magnetic latitude at magnetic midnight. Additionally a thinner weaker band of increased occurrence bisects this oval along a straight line between the sun and the earth.
Auroras occur by night and by day. The difference between night and day auroras is the number of particles (greater in the day), the amount of energy the particles carry (less by day), and the dominant color (green by night, red by day). Dayside aurora only occur inside the auroral oval at high polar latitudes and are only visible when it is dark during the day.
Auroras are extremely dynamic. Their zone of maximum occurrence can change by several hundred kilometers in minutes. And they can vary in orders of magnitude within seconds.
It’s small wonder that these fantastic colored lights that dance in mesmerizing patterns filling the heavens above have held a never-ending fascination for those who are lucky enough to witness them, whether first or second hand. They’re divine.
Learn more about night photography in my digital photography workshops.
Find out about my Iceland Auroras workshop here.

13 Essential Tips For Low Light & Night Photography

What settings should you use when making exposures in low light or at night? Use a tripod and cable release, set ISO to 800 (or higher), open up f5.6 or wider, focus at infinity and keep exposures below 20 seconds. While this is a good starting point, that’s all it is, as you’ll need to modify settings based on the specific light(s) in a location, the equipment you’re using, and the effect you want to produce. Instead, ask, “What concerns do I need to be mindful of and what points of control do I have when making low light or night photographs?” Develop your sensitivity to these factors and you’ll know why and when to improvise and even what more you can explore. These twelve tips will give you a solid foundation from which to begin your explorations in low light and night photography.


Insights Members can login to read the full article.
Email:
or Sign up