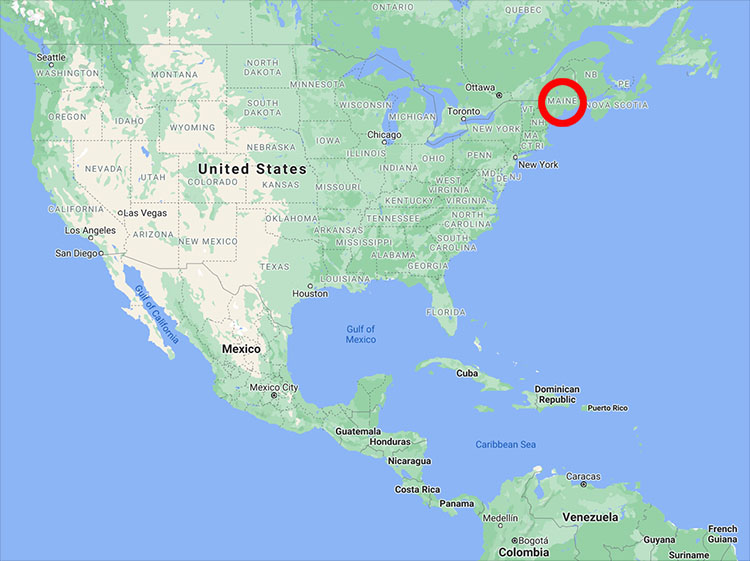
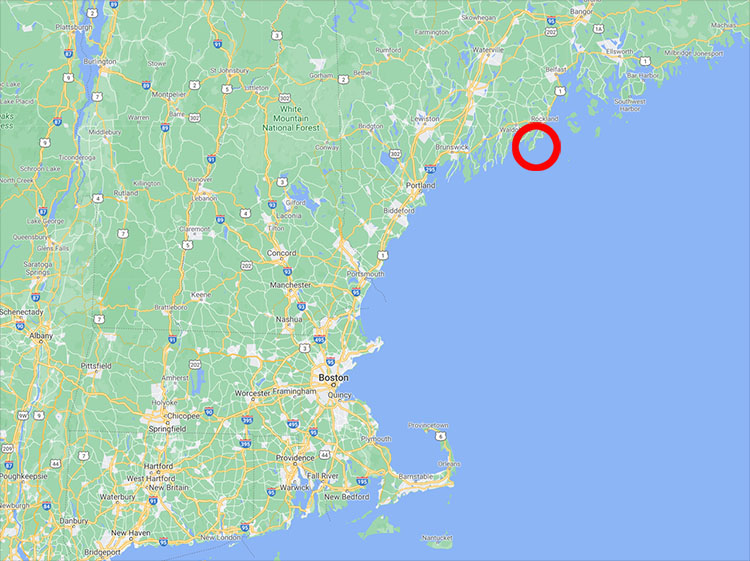
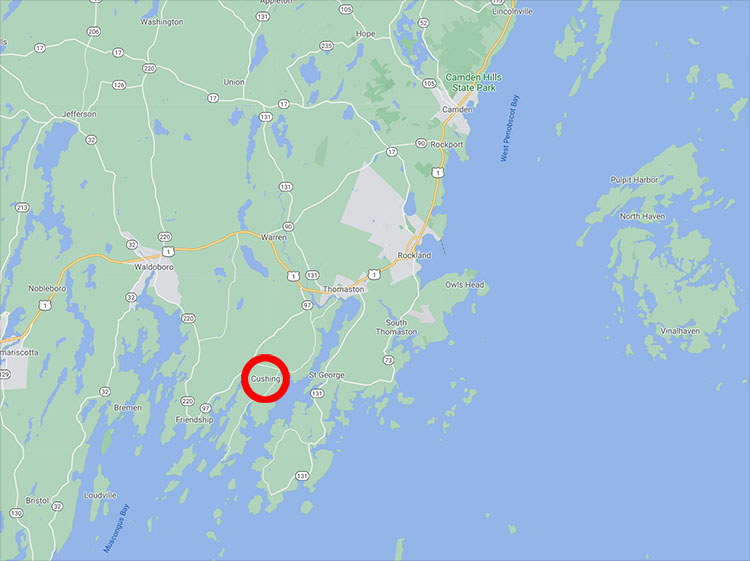
.

15 Great Quotes By Photographer Sean Kernan

nestwitheggs_000
Enjoy this collection of quotes by photographer Sean Kernan.
“Somehow the pictures that work out just the way I wanted them to are the ones I lose interest in soonest. The expectation has become the limit. And I think that the way to take something beyond your own expectations is to leave what you see unnamed and beyond concept for as long as you can. I want to work as far beyond what I know as I can get, and the gate to that beyond lies exactly between seeing and naming.” – Sean Kernan
“I have to say that what is revealed to me lies beyond any ideas I had for the pictures.” – Sean Kernan
“I think that I began by wanting to see what kind of pictures this intense way of working might produce, and honestly I didn’t have any idea beyond that. There was no planned outcome, none of what I recently heard a composer call “The Fallacy of Intention.” – Sean Kernan
“The benefits of chance are enormous, but you have to watch out for them too. Chance gets me beyond whatever I had in mind when I started to work. It comes into play when I let things happen and then chase alongside them and grasp them on the fly. It’s like two acrobats, one of whom doesn’t know that he’s an acrobat. But the artist is responsible to what chance gives him, and just setting it down without taking it in and manifesting it again in the heuristic process is not enough. Maybe it’s that chance is happening all the damn time, and it’s the artist’s intentional work with it that strains artworks out of the soup.” – Sean Kernan
“I’d love to say something more intelligent about this, but I don’t know that the process had much intelligence in it.” – Sean Kernan
“I’m inclining toward the idea that the working process of art is a lot more thoughtless than I once imagined – thoughtless but not stupid.” – Sean Kernan
The process is in the elimination of conceptions and cleansing the mind, then in claiming the awareness and manifesting it in a work.” – Sean Kernan
“So you want to float in that space of awareness as long as you can, keeping all possibilities alive so they can become clearer, then you pull down one that is BOTH unexpected and makes perfect sense.” – Sean Kernan
“It is the unexpectedness of the image that wakes us up so we really see something, and the rightness of the image that affirms what we have seen in the mind’s eye.” – Sean Kernan
“So if every thing looks right and it still feels wrong, or lacks resonance, or if it refers mainly to other photography and not to seeing, to awareness itself, you should sniff elsewhere.
“The first question I tell students to ask in the first critique of a class is not is the work good, but is it alive ?” – Sean Kernan
“You can see it in a great actors work – look at De Niro, or Streep, or Arkin. They can just stare into the air and you’ll sit and watch them, watch their intensity. And I realized that some of the best photographers I know have that same kind of intensity. It shows in their work. Their intense staring generates its own power, and we respond by staring with them.” – Sean Kernan
“I have a real appreciation these days for work that abrades me into awareness.” – Sean Kernan
Learn more about Sean Kernan here.

View 12 Great Photographs By Sean Kernan here.

Read our Quick Q&A here.

Read our Conversation here.

View video by Sean Kernan here.

View 12 Photographs Celebrated By Sean Kernan here.

Read more Great Quotes By Photographers here.


Photographer Richard Benson – In Memoriam

27BENSON-obit-01-master768

Lee Friedlander’s “Richard Benson, 1984.”

Photographer Richard Benson died of heart failure June 22, 2017 at the age of 73. The photographic community lost a brilliant mind that advanced print making.
“Mr. Benson, known as Chip, believed in the painterly impact of reproducing the work of photographers like Irving Penn, Lee Friedlander and Helen Levitt on an offset printing press. A photographer himself — as well as a longtime teacher at Yale and for 10 years the dean of its school of art — Mr. Benson was no stranger to the darkroom. But the offset press — and, later, inkjet printers — fueled his fascination with using new mechanical forms to recreate photographic images …”
Read the full article on the NY Times.
Find his book North South East West here.
Find his book The Printed Picture here.
Read our conversation here.
Read quotes by Richard Benson here.
View video with Richard Benson here.

12 Photographs Celebrated By Sean Kernan

71DMCEV76DL._SY354_BO1,204,203,200_

Sean Kernan’s The Secret Books

Sean Kernan makes insightful comments on twelve photographs.
“At this point I most respond to things that stir me to a kind of seeing that I didn’t think I could do. They make me want to try, even though I have no idea where or how to begin. This group contains work from major artists and workshop students, proving that anyone can break through.” – Sean Kernan
Anselm Keifer
Anselm Keifer. I love this artist’s work, and in particular his books, of which this is one. The distressing of the photographic image and its inclusion in a book makes me think it’s a history of the end of the world…that has been left out in the atomic rain.
Arno Minkinnen
Arno Minkinnen. Arno’s “subject” has been his body for so long that he has found the deepest caves of the mind. They are not only what he thinks but of what they make me think. In this case I see some Finnish shamanistic ritual that takes place at the threshold of life/death, with passage going either way.
Diane Arbus
Diane Arbus. This seems to sum up all the mystery of her seeing. The more you think and say about this image, the further afield you drift. Just look at it and shut up.
Duane Michals
Duane Michals. So often we look at a photograph. Here we start to read it and realize that we are being drawn in as a player, as a subject of the…picture. And so is anyone else who looks at it. Fantastic!
Irving Penn
Irving Penn. This photo knocked me out when I saw it. It is not documentary. Instead Penn has bridged the world of the highland Quechuan Indians of Peru and the formality of Brozino, the great Rennaisance portraitist.
Larry Clark
Larry Clark. Photographers love to visit other worlds (see Penn, above), but Larry lived in the drug world and he had a camera. Tough, tough pictures. To learn more, read Dennis Johnson’s book, Jesus’ Son.
MichelleElloway
Michelle Elloway. This picture started as a workshop assignment to photograph a place where something had happened. I said nothing about writing down what it was that had happened, but the photographer blew the class away by writing the results of the event, turning the whole thing into a chilling Shirley-Jackson moment. (If you don’t know Shirley Jackson, read The Lottery.
Ralph Gibson
Ralph Gibson. Ralph’s work is sui generis, very simple, graphic and pregnant. This photo isn’t really like that, thanks to that wavering curtain, I think.
Rebecca biddle Mossman
Rebecca Biddle Mossman. I love pictures that get beyond thinking. I am sure that the photographer just started off the situation, then saw something and pushed it, then just let it happen. (That’s my guess.) It’s the best way of working, and it leads to photos that you can’t believe you took.
Saul leiter 1
Saul Leiter. I’m giving him three, because he is new to me and because he has a freedom that I wish I had! The first is just saucy, impudent, sexy and innocent. I look at this woman and I just want to give her a shirt and take her out for coffee. She’s young in the picture, but I’d still love to meet her and say “So, tell me about your life.”
Or maybe not. Maybe it’s better to just suspend in the moment.
Saul Leiter 2
Saul Leiter. The second Leiter is just…ah…like watching a juggler make a perfect catch from completely off center.
Saul Leiter 3
Saul Leiter. The third Leiter brings together three entirely different kind of images and resolves them while somehow leaving them intact.
Learn more about Sean Kernan here.

View 12 Great Photographs By Sean Kernan here.

Read our Quick Q&A here.

Read our Conversation here.

View video by Sean Kernan here.

View more Photographers Celebrate Photography here.

12 Photographs Celebrated By John Paul Caponigro

12PhotographsCelebrated_JohnPaulCaponigro_01

Alfred Stieglitz’ extended portrait of Georgia O’Keeffe is a penetratingly honest act of love.

12PhotographsCelebrated_JohnPaulCaponigro_02

Christopher Burkett’s makes accurate representation an extension of his spirituality; he celebrates Creation by faithfully transcribing “The Book Of Nature”.

12PhotographsCelebrated_JohnPaulCaponigro_03

Paul Caponigro’s “Galaxy Apple” reveals a macrocosm within a microcosm, demonstrating the power of metaphor; ordinary things are seen as extraordinary.

 12PhotographsCelebrated_JohnPaulCaponigro_04

Eliot Porter’s photography intuited more complex realtionships in nature before the field of chaos science was popularized.

12PhotographsCelebrated_JohnPaulCaponigro_05

Pollution or blood? A tense mystery is created by Edward Burtyinsky’s beautiful images of distressed landscapes.

12PhotographsCelebrated_JohnPaulCaponigro_06

Richard Misrach’s Desert Cantos examines a single subject (the American desert southwest) in many different ways over a long period of time, creating a dense web of interconnections.

12PhotographsCelebrated_JohnPaulCaponigro_07

Adam Fuss’ photograms, as much about shadow as light, share a stance similar to many abstract painters who point to the object created more than what it refers, while at the same time highlighting the distortions that lenses can bring to representation. The questions his work raise are generative.

12PhotographsCelebrated_JohnPaulCaponigro_08

Walter Chappelle’s Metaflora series creates images with plants, electricity, and photosensitive paper in complete darkness. What else can’t we see? What would we see if we could?

12PhotographsCelebrated_JohnPaulCaponigro_09

Jerry Uelsmann bring’s images in the mind’s eye into sharp focus with the most directly representational medium.

12PhotographsCelebrated_JohnPaulCaponigro_10

Robert and Shana Parke-Harrison’s post-apocalyptic poems perform acts of care for the natural world despite their odds of success.

12PhotographsCelebrated_JohnPaulCaponigro_11

Courageous and honest or perverse and self-indulgent? The complex mix of beauty and taboo, infused with death and sexuality, and guilded with art historical references and fine craft is extremely provocative. It’s honest but is it Truthful? Is it wise?

12PhotographsCelebrated_JohnPaulCaponigro_12

Andy Goldsworthy’s photographs are all most of us see of his ephemeral earth works often made in remote locations. So what’s the real art? The performance? The object created? The photographic record? The books that collects those records? All of it?

………………..

Photographers look at and understand photographs differently than the average viewer. Their years of unique personal experience with the medium is special. For me, their insights open new windows into the medium, the world, and myself. I hope they do the same for you.

In this series of posts, each photographer selects 12 if their favorite photographs and provides a short insight into why these images are so moving to them.

I’m kicking off a series of photographer’s celebrating photographs.

View more Photographers Celebrate Photography here.

Stay tuned for upcoming additions.

View 12 Great Photographs By John Paul Caponigro here.

Read more quotes by John Paul Caponigro here.

Read our Quick Q&A here.

Read our Conversation here.

View video by John Paul Caponigro here.

Smooth Moves With Photoshop’s Gradient Masks

15.A1_3073
16.A2_3073

Image adjusted selectively with a gradient

17.B1_V2V4167

Warm exposure

18.B2_V2V4167

Cool exposure

19.B3_V2V4167

Two exposures blended with a gradient mask

Smooth transitions. They’re the essence of continuous tone images. In most cases, you want to preserve them. On occasion, you want to modify them. Sometimes, you want to create them.

While gradients can be used as image layers, they are more frequently used as layer masks. Gradient masks can be used in two central ways, ways that differ from one another significantly. First, gradient masks can be used to selectively reduce the effects of any correction made as an adjustment layer. Second, gradient masks can be used to selectively reduce the opacity of any image layer.

Digital correction with gradient mask techniques replace and surpass using traditional graduated filters. Not only can you make more precise corrections digitally, with gradients you can control the placement of the gradient and transitions within it more precisely. The gradient is uncoupled from the exposure and is indefinitely and infinitely modifiable.
You can do much, much more with gradients. Here are a few of the things you can accomplish using gradient masks.

Transition between stronger and weaker settings of a correction – enhance contrast and color balance selectively, reduce fall off, neutral density filtration, color filtration, add or remove vignetting, etc.

Transition between dark and light exposures – extending dynamic range.

Apply filtration selectively – sharpening, blurring, noise, etc.

Transition between exposures with different points of focus – increasing depth of field.

Transition between adjacent exposures of the same subject – increasing format.

Transition between more saturated and less saturated renditions of an image – accentuating atmospheric perspective.

Transition between the same image with two different white point settings – accentuating or creating the appearance of mixed light sources.

Believe it or not, this is only the beginning of the possibilities gradients offer. Mastering gradients is an essential digital skill.

Although gradients can be extremely complex and can yield extremely sophisticated results, once the basic principle behind them is firmly grasped, they are actually quite simple to create and use.

Gradients are easy to create. You’ll find the Gradient tool (essentially a brush) midway down the Toolbar, below the Eraser and above the Blur tool. With the Gradient tool active click hold and drag a vector across an image, either on a layer mask or less frequently on a new blank layer. A gradient will be created between the start (where you click first) and endpoints (where you drag to). The start and endpoints may be placed anywhere on the canvas. Gradients can be drawn for any length at any angle. The shorter the distance between the two points, the tighter the gradient will be with more abrupt tonal transitions. The longer the distance between the points the softer the gradient will be with smoother tonal transitions. Favor longer gradients with smoother transitions. They can always be tightened and repositioned by adjusting contrast. (Reducing contrast will not produce the opposite effect; it will posterize the gradient.) There may be times when you want to place a start or endpoint outside the border of an image. You can do this by expanding the window around the image. Click and drag on the lower right-hand corner of the window. Gray will be seen surrounding the image but inside the window. A start point, endpoint, or both may be placed anywhere within the window.

3.graddarkened

Linear gradient

6.refl.gradinv

Reflected gradient

7.radialgrad

Radial gradient

8.stargrad

Star gradient

9.anglegrad

Angle gradient

There are five types of gradients to choose from. Two, Angle and Diamond are of limited use. Three, Linear, Radial, and Reflected are very useful. Linear uses the start and endpoints to define a gradient along a line. Radial uses the start and endpoints to define the radius of a circle. Reflected uses the start and endpoints to define the center (foreground color) and outsides (background color).
Of the sixty-six gradient presets you can choose from, the first two serve most purposes – Foreground to Background and Foreground to Transparent. (Most people can pretty much forget about the other sixty-four presets.) Classically, black and white or shades of gray are most frequently used.

Curves_425

Curves gives you more control

Gradients can be extraordinarily flexible. You can alter the characteristics of a gradient by checking the Edit button under the gradient Options palette. If you don’t get precisely the effect you’re looking for, you can try again. Or, if you’re fine-tuning a monochromatic gradient there’s an easier way. After creating a gradient, slightly longer than you think you need, apply a Curves adjustment to the gradient (Image > Adjustments > Curves). Move the midtones; shift the midpoint. Move the highlights left and/or shadows right; shift the endpoints – quickening the transitions in between. Move the white point down and/or the black point up; change the endpoints to gray. Move the white point down to the black point and the black point up to the white point; invert the gradient. That’s control!

10.2gradcomboforetotrans

Linear and Reflected gradients combined

You can combine multiple gradients with one another in a variety of ways. Here are two. One, start with one gradient and use the Foreground to Transparent option to add a second. Two, start with one gradient and change the Gradient Tool’s blend mode to Darken or Lighten to add a second. The two methods sometimes yield different results.

Blend modes can be used to modify how a gradient interacts with the image it is drawn on in a variety of ways. For the most control, don’t use the blend mode with the brush; instead, draw the gradient on a separate layer and use the blend mode of the layer to achieve the same effect with more flexibility and control.
You can reposition any gradient using the Move tool. Moving a gradient mask on an adjustment layer presents few problems. You can easily tell if you are working on the image or the mask – its icon will be highlighted. Because and image layer and its mask are linked, to move a mask separately you must first unlink the two by checking off the link icon between them and then targeting the mask to move it separately. It’s likely you will want to relink the two when you are done.

Gradients can be transformed substantially (Edit > Free Transform).

Gradients can be created within active selections to affect only selected areas.

Some gradients suffer from banding. To reduce the effects of banding, add a small amount of noise (Filter > Noise > Add Noise); this will often break up the effect of banding. Be careful not to overdo it or you’ll simply trade one distracting artifact (lines) for another (dots).
But wait, there’s more! Here are three more ways to create extremely useful gradients.

13.paintedgrad

Use a soft-edged brush to create a gradient

One, use a soft-edged brush; the feathered edge automatically creates a gradient.
Two, make a selection, then make an adjustment layer, double click on the mask to activate it’s properties, and use the Feather slider. I don’t like automatically feathering selections. I prefer this method over automatically feathering selections: you get a better preview; you get more precision; and you can modify the gradient by reactivating a masks’ properties.

12.selectionblurred

Blur a shape to create a gradient

Three, blur a hard-edged shape and you can create a gradient. By the same token, if a gradient does not have sufficiently smooth transitions it may be blurred, in whole or in part; watch for posterization if you do this.

Remember, masks are black and white images. Anything you can do to a Grayscale image you can do to a mask – adjust its contrast, filter it, transform it, Liquify it, clone it, paint it, etc.

Learning to make good gradient masks is an indispensable skill for adjusting digital images. Their power and versatility are simply unrivaled.

Read more about Selections & Masks.
Learn more in my digital photography and digital printing workshops.

Useful Ways To View Masks In Photoshop

1_image
It helps to be able to see what you’re doing while you’re doing it. When you’re refining masks in Photoshop, if you can see them better, you can make them better. There are a number of useful ways you can see masks in Photoshop.

2_mask
In the Layers palette, Option click the mask to display it in black and white.

3_maskandimage copy
Option Shift click the mask to display the mask and the image at the same time in the same window.

LayerMaskDisplayOptions

The overlay’s default color and opacity are red and 50%, but you can change these defaults by double-clicking on the mask in the Channels palette or by double-clicking on the mask icon in the Layers palette and using the mask’s Properties.

You can see an image and a mask at the same time.This is ideal for checking the placement and quality of contours carefully. Go to the Window menu and navigate to Arrange > New Window. (This creates a new window for the same document not a duplicate document.) While you’re on the new window, Option click on the icon of the mask you’d like to view; you’ll find this in the Layers palette. The first window will still display the image. The second window will display the mask. You can also choose Window > Arrange > Match Zoom and Location to have both windows zoomed into the same location at the same magnification.
Sometimes seeing a mask gets in your way. Shift-click a mask to disable it.

Once these moves become second nature to you, you’ll work more freely and have more mental energy for your images.

Read more about Selections & Masks.
Learn more in my digital photography and digital printing workshops.