One of the keys to making a great print is great shadow detail.
Shadow detail is something to be mindful of during exposure, processing, and printing. Curiously, even if you see shadow detail in your file on a calibrated monitor you may not see all of the details in your print. What can you do about this? Many things!
First Check Your Color Management
Before you start editing your files based on your proofs, check your color management system.
Recalibrate Your Monitor
Make sure you’ve calibrated your monitor with hardware. Set a brightness value of 90-100 lux, instead of using the default brightness target of 120 lux. If your monitor is too bright, your prints will look dark overall, especially in your shadows.
Read more on Profiling Your Monitor here.
Give Your Prints Enough Time To Dry
Inkjet prints come out of the printer almost dry, but not quite fully dry. When they’re fully dry, they’ll appear slightly lighter, especially in the shadows where there’s a lot of ink. So before you evaluate prints critically, give them a few minutes to dry. This affects absorbent matte surfaces even more than glossy surfaces.
Find my resource on Outgassing here.
Look At Your Prints In Good Light
Look at your prints in good light. You need the right amount of light (at least 500 lumens), the right color temperature light (5000K is the standard but many viewers prefer the warmer 3600K), and it helps to use full-spectrum light (a CRI of 90 or higher). (Many manufacturers now make full spectrum bulbs, like Solux and Soraa.)
Read more on Controlling Your Environment here.
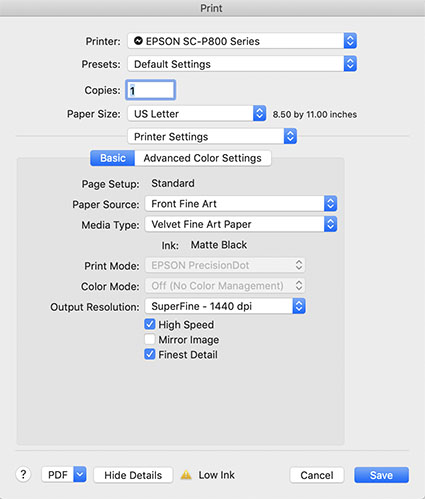
Media Type sets the amount of ink that's used.
Set Your Media Type Correctly
Your printer driver will allow you to set your media type, which controls ink the amount of ink that is sprayed on your paper. Use too much ink and you’ll lose shadow detail. Use too little and your blacks and midtones will appear weak. If you’re using a paper not made by the manufacturer, choose the nearest media type and then adjust its settings with the printer driver’s advanced utilities. (You’ll find this under Advanced Media Control with Epson printers.)
Find my resource on Ink Limit here.

Print test patches to determine when maximum black is achieved and when separation is lost.
Print A Target To Determine How Much To Lighten Shadows
Before you adjust your files for printing precisely determine how much you need to lighten your deep shadows by printing a target. While they vary a little, most media settings lose shadow detail around a value of 96% on a grayscale. If you print patches of values between 100% and 90% you’ll see exactly where you lose shadow detail. Printed results will vary slightly with each different media setting, so you’ll need to adjust files slightly differently for different media.
You can download my targets here.
Next Adjust Your File