How To Choose Which Photoshop Mask Color To Start With

Image before selective adjustment.

Image after selective adjustment (dodging).

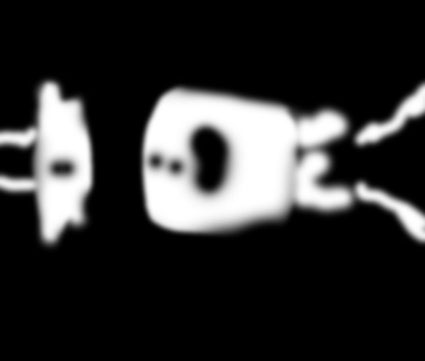
It takes fewer white strokes than black strokes to make this mask.

So, instead of starting with a white mask, start with a black mask.

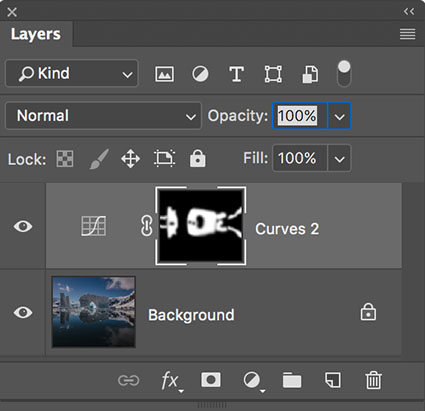
The layer stack.
When you’re making masks in Photoshop, you can get the job done more quickly and easily by starting with the right color mask. When you make a mask, you can start with one of two colors – white or black. What’s the difference? A white mask shows everything on a layer as if it were at 100% opacity. A black mask hides everything on a layer as if it were at 0% opacity.
So use this simple strategy when you’re brushing in image adjustments with masks.
If you want to affect most of the image, start with a white mask and add a few black brush strokes to reduce the effect in smaller areas.
If you want to affect just a few areas of an image, start with a black mask and add a few white brush strokes to show the effect in only the areas you paint on.
For even more control, you can vary the opacity of the brush strokes you make to reveal or reduce effects partially. (Keep the Opacity of the layer being masked at 100% and then you can make the opacity of different areas vary based on the brush strokes you make.)
How do you make choose the color of the mask when you make it?
You can get a white mask when you target a layer and go to the menu Layer > Layer Mask > Reveal All. Or, simply click the mask icon at the bottom of the layers palette.
Alternately, you can get a black mask when you target a layer and go to the menu Layer > Layer Mask > Hide All. Or, hold the option/alt key before you click the mask icon at the bottom of the layers palette.
A mask is automatically created when you make an adjustment layer. By default an adjustment layer mask is white. If you want to start with at black mask instead, hold the option/alt key before you make an adjustment layer.
To make masking even more efficient, you can start with a simple selection (made with any selection tool, including the Lasso, Marquee, Magic Wand, or Quick Selection tools) and then, while the selection is still active, make a mask. If you do this, the selected areas will appear in white and everything else will be blacked out on the mask. You can then brush the mask to refine it further.
But wait, there’s more! Remember, you can always invert a mask (making black white and vice versa) by going to the menu Image > Adjustments > Invert or pressing the keys Command I. So if you forget to start with the right color mask, just invert it.
These simple techniques will save you a great deal of time.
Read more about masking here.
View more in my DVD Drawing With Light.
Learn more in my digital photography and digital printing workshops.


Bill Zinck
18.08.2018 at 14:51A good primer on one the most empowering tools in PS. Once you learn layer masking the windows of possibilities to what direction you can go with your creativity is endless
John Paul Caponigro
19.08.2018 at 08:25“Allow”
John Paul Caponigro
19.08.2018 at 08:37I’m glad you think it’s useful Bill!
John Ledford
28.12.2020 at 06:43Your article impressed me a lot. You explained it so clearly. This is helpful especially to beginners and those who are willing to master their craft.
Thanks From
Clippingworld