How To Use Adobe’s AI Noise Reduction
It’s a game-changer – and it will modify your workflow.
When processing image files, noise reduction used to be one of the last things I did; now, it’s the first thing I do, if I plan to use Adobe’s AI Noise Reduction.
When don’t I use it? When I’m processing files with only a little noise and Adobe’s Manual Noise Reduction has no problem getting the task done.
Whenever I encounter substantial image noise, Adobe’s AI Noise Reduction is the best solution currently available, bar none.
It’s really easy to use; that’s an understatement.
1
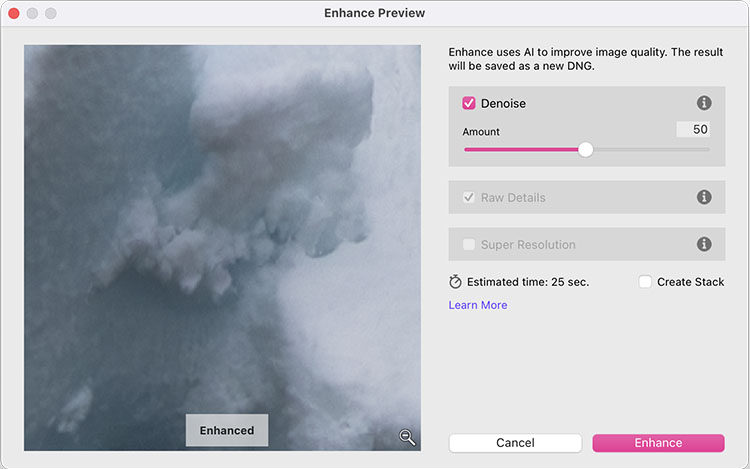
Click Denoise and in the new Enhance window set Amount.
Start at 100 and lower the value until edges look crisp and realistic texture is restored.
Applying Denoise will automatically apply Raw Details.
2
If, and only if, you want to upres an image (4X larger) check Super Resolution.
In many cases it’s unnecessary, but when it’s needed it’s exceptional.
3
Click Enhance.
The results will be saved in a new DNG file.
When you continue processing the new DNG file, Manual Noise Reduction sliders will be set to zero, but still available, though no longer needed in the vast majority of cases.
You’d think something this sophisticated would be more complicated. It’s not. Welcome to the new world of AI.
Read Eric Chan’s detailed explanation here.
Read more about noise here.
Learn more in my digital photography and digital printing workshops.
No Comments