Look For The Element Of Surprise

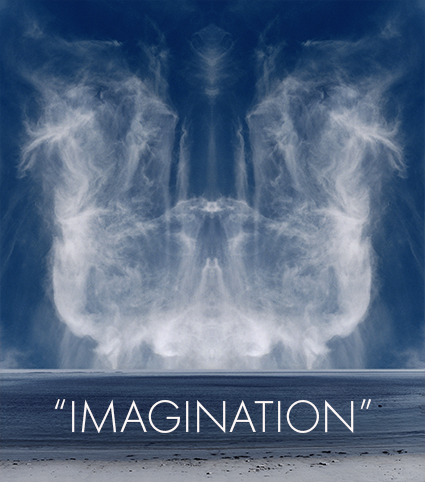
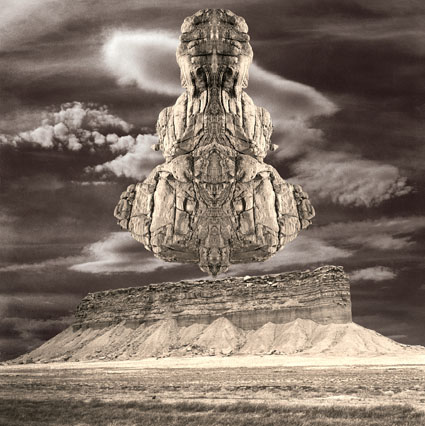
Budh, Goblin Valley, Utah, 1996
I knew instantly that something new had happened when I saw Budh appear on screen. A clear outline had been introduced to the symmetries I was creating, which were previously unbounded, changing planes into volumes. While many of my images have qualities similar to environmental sculpture, this image and the series of images that it started create sculptural forms made from the environment. I didn’t know it then, but it was the beginning of a whole new series. I was working on another series when this happened. This could be a distraction or a breakthrough. So I was faced with an important decision to make, stay the course and finish what I had started, based on previous successes, or pursue a new direction, one I didn’t fully understand but might lead to new successes. Which would be the most rewarding course of action?
I walked away. I weighed my options. Though it might take some time, I could return to the other series later. This new work was unexpectedly fresh and exciting. I had a feeling that if I ignored this call I would not have been able to return to it later with the same intensity. I gave the decision some time. I slept on it. The excitement hadn’t faded. The mystery was still there. So I trusted my instincts. I moved forward and made new images. I continued to hold the question of how long to pursue this line of inquiry, until I had enough repeated successes to know it had legs. After six successes following similar lines, I knew I had made the right choice.
What I didn’t know then is that doing this new work would help me better understand the work I was developing; and much of the work I had already done; and the reason I work at all. Doing this work clarified ways of thinking and feeling that are essential to what I do and why I do it.
The landscape this image was drawn from had a presence. The symmetry more strongly suggested a presence – a living presence, perhaps one with a unique kind of consciousness. Many people see this image and feel as if the landscape is looking back at them – I do too. The working title for this piece Unseen Watcher lead to the final title Budh, the root of the word buddha, which means awake. Treating all of nature as something that is alive is my basic impulse and perhaps primary message of my life’s work. The sacred mindset this attitude brings with it increased awareness of, respect for, gratitude about, and wonder by being a part of it all.
It happens to me time and time again. I find that if I’m open to surprises and trust the process, I discover new things – properly guided, important new things. This is part of what it takes to move beyond conventional thinking and uncover new things about the world around us and as yet unclaimed inner resources.
One of the things I hear repeatedly from other artists is that the work that surprises them most is often the work that satisfies them most and the work that is most highly celebrated. The French writer Andre Gide remarked, “Man cannot discover new oceans unless he has the courage to lose sight of the shore.” The creative process is a process of discovery. You can’t have discovery without the element of surprise. As a defense mechanism we often resist surprise and try to reduce the number of times we are surprised; some surprises can be both unpleasant and unfortunate. Instead, we need to embrace surprise – and the changes it can bring. Surprises can be magical and transformative.
Questions
When is it best to pursue a new direction?
When is it best to stay with your current plan?
What can you do to evaluate the merits of both old and new directions to help you make the best choice?
Find out more about this image here.
View more related images here.
Read more The Stories Behind The Images here.