My Top 12 Photographs

01RefractionX_2005_501_johnpaulcaponigro

Refraction X, 2002

02ExhalationIV_2006_47402_johnpaulcaponigro

Exhalation IV, 2005

03inhalation103_johnpaulcaponigro

Inhalation I, 1998

04nocturne1204_johnpaulcaponigro

Correspondence XII, 1999

05oriens105_johnpaulcaponigro

Oriens

06correspondence306_johnpaulcaponigro

Correspondence III, 1999

07path107_johnpaulcaponigro

Alignment I, 1999

08procession108_johnpaulcaponigro

Alignment II, 1999

10ReflectionXVIII_2008_510_johnpaulcaponigro

Reflection XVIII, 2008

11SuffusionVIII_2007_511_johnpaulcaponigro

Suffusion VIII, 2007

12Constellation_VI12_johnpaulcaponigro

Constellation VI, 2013

093_Illumination_VI_2012_47409_johnpaulcaponigro

Illumination VI, 2012

Updated 2013

This is a selection of my top 12 images of all time. This selection doesn’t reflect sales, publication, or activities on the world wide web. It simply reflects my opinion. Click on the titles to find out more about each image.
Geography
Read The Most Sublime Landscape Experiences Of My Life here.
Process
20% straight. 80% composites.
Poetry, by any means necessary.
Experiment to find out what’s possible.
Concepts
A profound shift in consciousness arises when we relate to the world (all of it) as parts of a living thing into whose fibers we are deeply woven before birth and after death. Just as every individual has a unique spirit, every location has its own unique spirit (Genius loci is the latin translation of what the Greeks called this.), which fits into the larger world spirit (Anima mundi is the latin translation of what the Greeks called this.) We are not apart from nature, we are a part of Nature.
Magnificent Moment
Read about the most Sublime Moments of my life here.
 

View more of my Annual Top 12 Selections here.

View more images in my ebooks here.

View my full Works here.

View my Series videos here.

View new images in my newsletter Collectors Alert.

Try New Things – The Story Behind The Image

IlluminationII_425

Illumination II, Sossusvlei, Namibia 2012

 In 2010, during my third trip to one of the oldest desert’s in the world, Namibia’s Sossusvlei dune field, I enjoyed one of the most sublime hours of my life, from a helicopter. Moments of grace like this fill you with reverence for the miracle world we live in and a deep abiding gratitude to be a part of it all. I was prepared for it, but nonetheless surprised.
Before arriving, to plan where to go and how to maximize my time this magnificent dune field, I had done a considerable amount of virtual aerial research with Google Earth, zooming and panning images made from the combination of thousands of satellite images at various magnifications, to familiarize myself with where it started and stopped, how it changed in character, and the relative location of landmarks such as the dunes Big Mama and Big Daddy and the famous clay playa Deadvlei. This was a new way of scouting a location for me and it paid dividends making the limited time I had there more efficient and productive.
None of that could have prepared me for the changing angle of light or weather. On site, I had to assess the impact of current conditions. We were on the second flight of the day, an hour after sunrise. All week long, the air was filled with dust from far off sandstorms that scattered the rays of the sun, permeating the sky with a white gold light. Was this a liability or an asset? How could I make it one and not another?
Even at an altitude of 3,000 feet, twice the height of the largest dunes, I found I couldn’t fit the vast dune field into my viewfinder. So I improvised and started making multi-shot exposures for panoramic stitches while moving. It seemed like a bold move, if the two or three shots did not merge successfully then both would be lost. Then, one of my companions, made an even bolder move, requesting we do a 360-degree stationary rotation so that he could make a panoramic image of the entire dune field. Would it work? To my delight both methods worked.
Neither experiment would have been successful were it not for new image processing software that provided better image stitching capabilities. (Not long ago, it wouldn’t even have been possible to convincingly combine two separate exposures.) More new image processing features aided the final realization of this image. I used new lens profile corrections, designed to remove optical distortions, to expressively distort the image. Quite different than a change in angle of view, which reveals and obscures information, these distortions offered complementary but distinctly different visual effects, changing relative proportions and spatial relationships within the image. This furthered my ongoing experiments to compare and contrast the two and so learn to fully utilize them in tandem with one another intuitively.
Ever since that day, I don’t see things in the same ways. Now I also see in new ways. It’s important to try new things. Trying new things stimulates new growth.
Questions
How do new developments change your experience?
How do new developments change your thinking?
How do new developments change your actions?
How can you use new developments to innovate?
Which new developments are likely to impact your creations most?
Find out more about this image here.
View more related images here.
Read more The Stories Behind The Images here.

The Art of Packing

ArtOfTravel
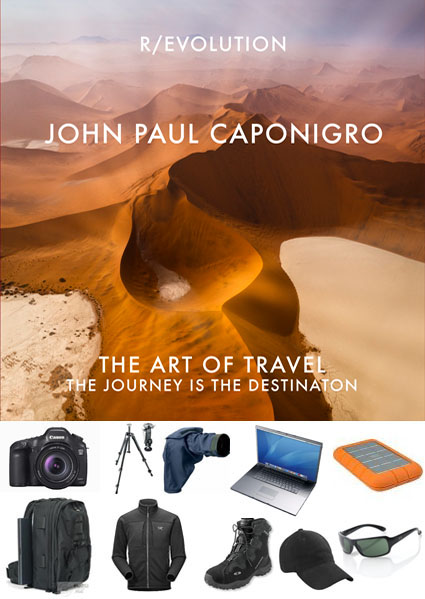
There’s an art to packing. Practice it with care. You’ll get better every time you do it. Learning this art will help you make the most of any photographic expedition and enjoy it more.
Do pack the essentials. Don’t pack too much. Traveling with too much is hard to handle, tiring, and can be costly. Less is more – up to a point.
Clothing
It’s tempting to bring too much clothing. Bring only versatile essentials. Find light, washable, quick-drying, versatile clothing you can walk or go to a casual dinner in. Find out ahead of time what kinds of laundry services will be available during your trip and plan to use them – frequently. Bring a good pair of light waterproof hiking boots. Dress shoes don’t work when you’re walking in the wilderness. Bring sun protection; sunscreen, hat, and sunglasses. Unless you’re traveling in a desert, bring waterproof rain shells (jacket and pants). If you’re likely to be in cold situations (early mornings or snow), bring light gloves, hat, long underwear, and a warm light sweater or pullover. If you’re going to be in an arctic or alpine environment bring two pairs; staying dry is key. Leave the big ski parkas and pants home. Layers rule.
Bags
The right bags can make journeys easier. Wheels save you an enormous amount of wear and tear. Make sure your camera and/or computer bag fits under an airplane seat or in overhead compartments. (I use LowePro MiniTrekker and Roadrunner bags.) If you’re flying on small airplanes to more remote regions, check weight limits and take them seriously. Check your clothes; carry your gear. Avoid checking your gear; it can get damaged or stolen. If you’re ever forced to check your gear, carry on one camera and lens around your neck. I travel with one larger camera bag and one small backpack. I carry on the camera bag and pack the backpack in my checked baggage. Once I’m in the field, I walk with my small backpack carrying only the things I need for that location – camera, cards, extra battery, two lenses, water, power bar. (I always pack power bars, for morning when breakfast is light or late or mid afternoon when my fuel reserves can get low.) I also pack an extra duffle bag, just in case I need to check an extra bag – it comes in handy for laundry too.
Cameras and Lenses
Always carry a backup camera. If one is damaged or stolen, you’ll still be able to shoot with the other. It’s convenient (but not necessary) if the two cameras you carry are the same. That way you’ll only need to carry one set of accessories, like batteries, chargers, cords, etc.
Your choice of lenses is important. Lenses help you make the most of many situations. I travel with lenses for three ranges – wide, medium, and long. I rarely walk with all three lenses. To decide which lenses to take, I first look at the location and decide whether I’m most likely to work wide (close environments) or long (wide open spaces), take the appropriate lens, and a medium lens for versatility. All of my lenses are zooms, providing extra versatility. (Canon 16-35mm, 28-135mm, and 100-400mm) Lens shades are important. Polarizing filters are the most useful filters.
Dust and Moisture
Protecting your equipment from moisture and dust is a significant concern. I pack all of my lenses and cameras in sealable plastic bags. (I use Ziplocs.) I store them in them, whenever I’m not using them. I never put my gear away wet. Pack a small cloth to wipe down equipment that does get damp. If you’re likely to shoot in rain or snow consider using a rain cover for your camera. (I use  Aquatech’s.) Bring a sensor cleaning system. (I use Visible Dust products.) Dust happens. It’s a lot more efficient to remove it in the field than in post-processing.
Storage
Having the right media to store your images is important. It’s worth investing in a few large media cards so you don’t run out of storage to shoot with in the field. (I use SanDisk 32GB CF cards). At the end of each day, I download onto one portable hard drive and backup to a second.. (I use LaCie 1TB Rugged drives.) When I fly, I pack one in my suitcase and carry one with me at all times. You might also consider carrying a large capacity thumb (32GB plus) drive with you at all times. Put your 5 star images on it. What if your hard drives were lost or stolen? You can replace equipment, but you’ll never be able to replace your images.
Customs
Getting all your gear through security and customs is rarely a problem. That said, in any security situation where my equipment is being screened I take as many precautions as practical to ensure equipment doesn’t fall out of a bag or bin and isn’t dropped when it’s handled. Clearing customs can be more problematic in some countries than others. Do a little research on the web and determine if a carnet (an official government document proving ownership) is recommended. Even if it’s not, I always travel with a copy of my insurance policy that lists my equipment and the serial numbers of each piece.
Before you travel, take the time to get organized and be prepared. You’ll make better photographs and enjoy traveling more too.
Learn more in my digital photography workshops.
View my webinar The Art Of Travel here.

View my Equipment Packing List here.

View my Clothes Packing List here.

Find out about the tools I use here.
Gear_Guide_425

Crop or Retouch ?


As visual communicators, we’re responsible for everything that’s in the frame; we’re also responsible for everything that’s not in the frame. Deciding what’s in the frame and what’s out is a critical decision that can make or break an image. Here are two essential framing strategies.
1.?Use the frame to eliminate distracting information around a subject.
Take extra care with image information that touches the frame, as it will draw extra attention. Do this with significant compositional elements.
2.?Eliminate space around a subject to focus a viewer’s attention.
A lot of space between the subject and the frame can be used to call on psychological associations with space, such as freedom or isolation. Some space between the subject and the frame can give the appearance of the subject resting gracefully within the frame. Touching the subject with the frame strongly focuses the attention of the viewer and may seem claustrophobic. Cropping the subject with the frame can focus the attention of the viewer on specific aspects of the subject and/or give an image a tense quality, evoking evasion and incompleteness—this often seems accidental if less than half the subject is revealed.
There’s more than one way to apply these strategies. While cropping techniques are simple to practice, the reasons for their application and the choices made about how to apply them, as well as the final effects, may be exceptionally complex. You have two choices ..
1. Reposition the frame before exposure.
2. Contract the position of the borders of an image after exposure
If you plan to retouch, you’ll frame and crop differently …
Read more at Digital Photo Pro.
Find more digital photography techniques here.
Learn more in my digital photography worskhops.

Enter Now to Win South Africa Photo Safari Sweepstakes


“Enter to win a complete South African Photo Safari Experience and thousands of dollars worth of best-of-breed products and services from the biggest names in the photography business!
Led by famed photographer John Paul Caponigro (Sept 26 – Oct 5, 2011), this private photo safari will take you on a wide-ranging exploration of South Africa. The safari will focus on photographing wildlife in the world-famous Sabi Sand Game Reserve and the many landscapes of the Cape Town region (world class vineyards, botanical gardens, and seascapes) by land and by air.
Sponsored by Artsy Coutre, Blurb, Datacolor, Graphic Authority, Lowepro, Nik Software, and Professional Photographers of America (PPA) and organized by renowned tour operator Eyes on Africa, you’ll experience some of Africa’s finest wildlife photography opportunities, great accommodations, and expert guiding. These two locations have been selected to create a private safari geared specifically toward serious wildlife, landscape and scenic photography.”
Plus runners up win fabulous prizes too!
Enter the sweepstakes today!
Only 9 spaces are available in this unique workshop. Register today!
Plus, you can be one of only 5 people to join a special workshop extension to Sossusvlei, Namibia.

Aerial Photography – Sossusvlei, Namibia


I recommend you seize every opportunity to photograph a location in the air.
When you go , take two cameras with different focal lengths. Use high shutter speeds (1000 plus). Ask your pilot to circle the most interesting areas and vary altitude. If possible, go doors off to reduce reflections. If it’s not, wear a black long sleeve shirt. Keep your lens/shade out of the wind. Shoot fast. As you fly, so will time.
Photographing the Sossusvlei dune fields by helicopter was a highlight for all of us during my recent workshop in Namibia. The views were simply divine. These images are all panoramic merges. We did a full 360 degree pano from the helicopter, just for fun.
Learn more in my digital photography workshops.