Adjust Depth Of Field With Lens Blur In Adobe Camera Raw & Lightroom (Early Access)

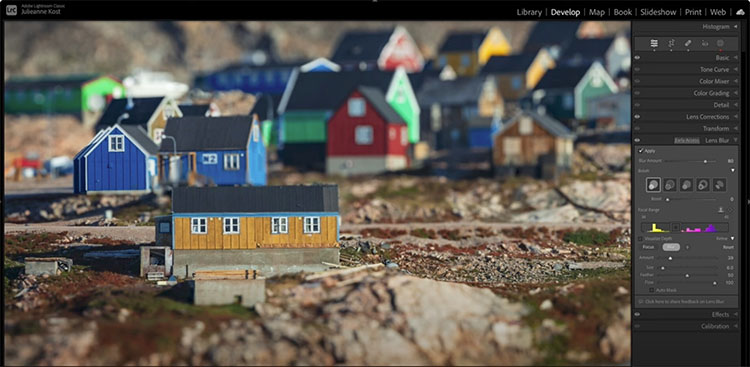
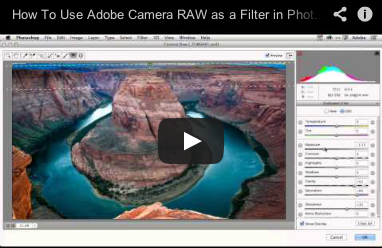
“With the help of artificial intelligence, Adobe Camera Raw & Lightroom Classic can automatically generate a synthetic depth map based on the content of an image, enabling photographers to change the focus plane and quickly create a “narrow” or “shallow” depth of field in an image. The video below demonstrates how to use Lens Blur, apply a Bokeh effect, visualize and customize the Depth Map, and use the Refinement brush.”

Find more from Julianne Kost here.

Learn more in my digital photography and digital printing workshops.

Reducing Noise with Adobe Camera Raw and Lightroom

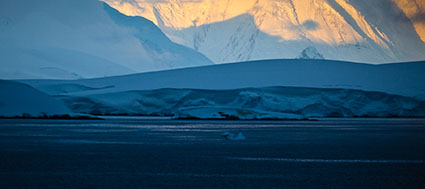
1_Antarctica_2009-XC
2_LRACRnoise

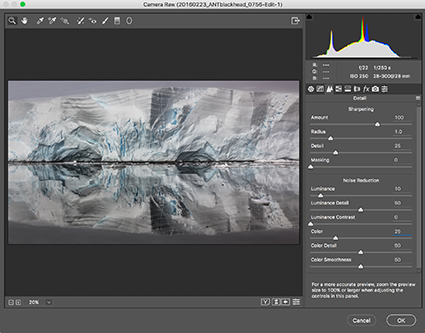
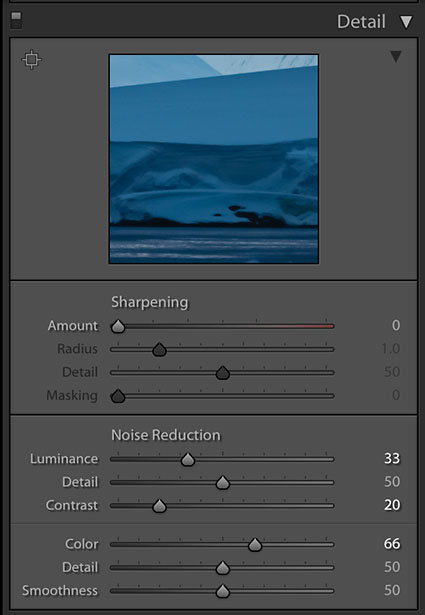
Lightroom’s Detail panel

Reducing noise in Adobe Camera Raw and Lightroom (the controls and results are identical) is easy.

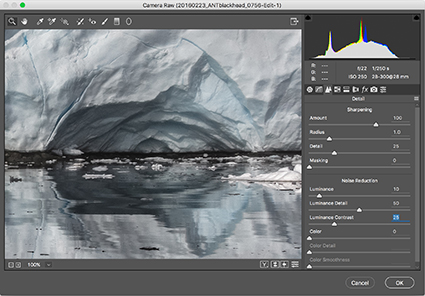
The Detail panel provides tools to reduce two kinds of noise – Luminance (light and dark) and Color. Results can be targeted with the Detail slider into smoother (low setting) or more textured (high setting) areas. The effects for luminance noise reduction can be further modified by adjusting the Contrast slider; a higher setting affects only high contrast noise, while a lower setting affects even closely matched values. And finally, the effects for color noise an be further modified with the Smoothness slider, a higher setting creates a more aggressive effect.
Zoom into an image at 100% magnification and move the sliders until noise is reduced, but image quality isn’t compromised. Use restraint. In a majority of situations, it’s better to preserve a little noise than to blur the image substantially.

All noise reduction blurs images. Sharpening after noise reduction during RAW conversion is recommended. Knowing that you’ll sharpen an image after noise reduction, you may reduce noise slightly more aggressively initially.
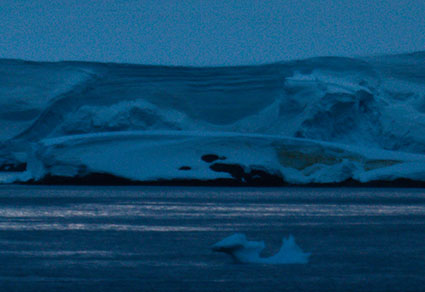
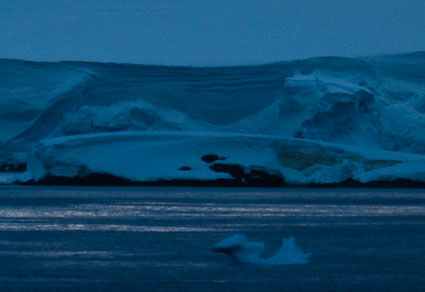
3_noNRorsharp

no noise reduction

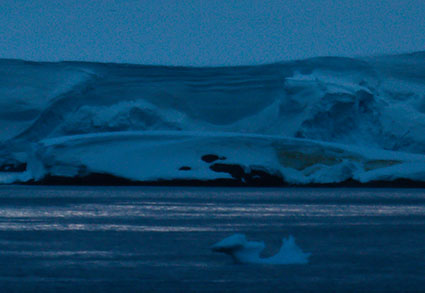
5_appropriateNR

appropriate noise reduction

7_excessluminanceNR

excessive noise reduction

There are limits to how far you’ll want to go. Noise can be so aggressively reduced that surfaces within images become textureless and begin to seem synthetically rendered with software rather than optically captured photographically. This effect may become more pronounced if contours are strongly exaggerated during sharpening. While sharpening, take care not to accentuate noise further. Develop a sensitivity to texture and contour, and use your best judgment. You know what things look like. Make your images look convincing to you, and you’ll quickly convince others.

RAW converter tools have limits. RAW converter tools do a good job with moderate amounts of color noise. Even high settings don’t tend to compromise image quality; sharpness, saturation and hue variety are all preserved. But sometimes they don’t go far enough. For aggressive noise reduction, especially for larger noise produced by Bayer pattern demosaicing, turn to Photoshop and possibly third-party noise-reduction software.

RAW converter tools do a reasonable job with luminance noise, but aggressive applications may compromise sharpness (some, but not all of this can be compensated for with RAW converter sharpening tools), and at times they don’t go far enough. When you encounter situations like this, turn to Photoshop and third-party noise-reduction software.

Most images can benefit from a little noise reduction and sharpening during RAW conversion. For many situations, this is all the noise reduction you’ll need. Many exposures don’t require substantial post-processing. However, some exposures require more power and finesse than these tools can deliver. When you encounter these, move to more sophisticated tools found in Photoshop and third-party plug-ins. But always start here.

Capture Sharpening With Lightroom & Adobe Camera Raw 

01_CaptureSharpen

02_CaptureSharpen
Adobe Camera Raw's Detail panel

Optimal image sharpening is best done in three stages – capture (Do it during Raw conversion.), creative (Do it in Photoshop.), and output (Automate it.).

This article covers the first stage of sharpening – capture sharpening.

Capture sharpening benefits all images. Capture sharpening compensates for inherent deficiencies in optical and capture systems. All lenses and sensors have specific characteristics and deficiencies. They do not all have the same characteristics or deficiencies.

To speed your workflow, default settings for the best starting point for capture sharpening can be determined for all images created with the same lens/chip combination and saved for subsequent use. To optimally sharpen an image, you’ll need to modify these settings to factor in additional considerations – variances in noise (ISO, exposure duration, temperature), noise reduction settings, and the frequencies of detail (low/smooth to high/fine texture) in an image.


Insights Members can login to read the full article.
Email:
or Sign up

Setting Digital Camera Color Space


Here are five commonly asked questions that, once answered, will demystify camera color spaces.

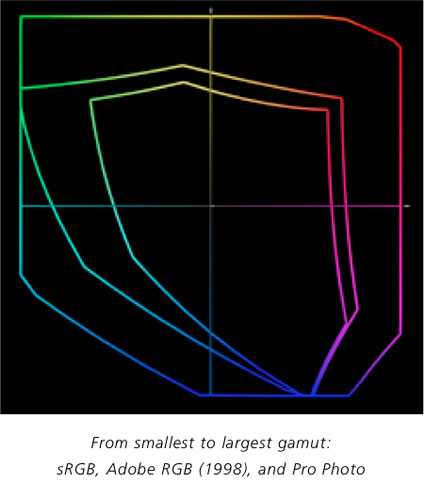
“Why do my digital camera files have an sRGB profile?”sRGB is the default color space for most digital cameras today. Most camera interfaces will allow you to change this default. Interfaces and options will vary. The widest gamut default color space most digital cameras support is Adobe RGB (1998). The profile for the camera’s default color space is attached to JPEG files but not to Raw files.

“Is Adobe RGB (1998) the widest gamut I can get with my camera?”
No. The camera sensor is capable of quite a lot more. To access color spaces with a wider gamut than Adobe RGB (1998) you typically need to shoot in a Raw file format. This also allows you to acquire a high bit file – 16-bit instead of 8-bit.

“Where do Raw files get their profiles?”

Raw files don’t have profiles until they are converted into a standard editing space, either with the manufacturer’s software or another Raw file converter like Adobe Camera Raw or Lightroom. Most Raw converters offer a choice of editing spaces including sRGB, ColorMatch, Adobe RGB (1998), or ProPhoto RGB.

“Which color space do you recommend using?”
Use ProPhoto RGB for digital output. It’s the only editing space that can encompass the full gamut of both your camera and your inkjet printer. Use ProPhoto RGB for master files. Make all output specific derivatives from them.
Use sRGB for the web. If a browser isn’t color management compliant, colors won’t be distorted as much as wider gamut color spaces. Use sRGB for derivative files.

“How do I set color space on a digital camera?”
Camera interfaces and terminology vary widely. On the Canon 1Ds Mark II, you can toggle between sRGB and Adobe RGB (1998) by pressing the Menu button and going to the Recording menu (the first icon, a camera), then dialing down to Color matrix and continuing within that to Set up.

Read more Printing Tips.
Learn more in my Fine Art Digital Printing Workshops.

One One – Camera Raw & Lightroom Presets

OnOnePresets
Get over 140 free Camera Raw or Lightroom presets designed by Photoshop guru Jack Davis.
•    Over 140 free Presets to simply and speed up your workflow.
•    Quickly correct color and tone.
•    Easily add creative effects.
•    Save time by streamlining your workflow.
PhotoPresets for ACR and Lightroom now includes two dynamite collections of development presets. The first collection, PhotoPresets with One-Click WOW! includes 85 presets for quick and easy image optimization such as color and tonal correction.
The second collection, PhotoPresets WOW Effects (released in Feb ’09), includes 55 additional presets for adding special effects to your images, taking advantage of the new features in the latest versions of ACR and Lightroom.
The best part is the price – you can download all of these presets for free!
Get the Adobe Camera Raw Presets here.
Get the Adobe Lightroom Presets here.

Adobe's New Innovation in Raw Technology – Camera Profiles

This new Raw technology gives photographers access to flexible camera profiles. Camera profiles provide a visual starting point for a raw processing workflow. Adobe is supplying default camera profiles that closely emulate the look that photographers are used to seeing from their favorite camera, while also providing the ability to customize profiles to an individual’s taste. Camera profiles  for use with Lightroom 2 and Camera Raw 4.5, are available for immediate download on Adobe Labs.