Compare & Contrast Contemplative & Active Modes

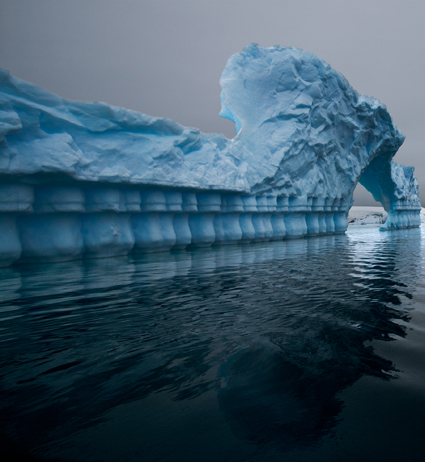
Antarctica LIV, Plenneau Bay 2007

In 2007 I visited Plenneau Bay, Antarctica, which lies just past the famous La Mer Channel. This was the only Zodiac cruise where all the workshop leaders (Michael Reichmann, Jeff Schewe, Stephen Johnson, Bill Atkinson, Ian Lyons, Seth Resnick and I) rode together while Chris Sanderson recorded the event on video for Luminous Landscape. Locked out of this area by ice in 2005, we were delighted to have access to the area many people call ‘The Iceberg Graveyard” because the shallow bay frequently traps ice.
We found a floating sculpture garden made of ice in a stunning array of forms. We found frozen sea creatures, both real and mythical. We found Viking ships and space ships. We found pyramids and grottos. One iceberg impressed us above all the others. We first approached it from one side hoping to glide across the pool of water in its center and through an arch on the far side, but we discovered the arch was too shallow to pass through. Double backing, we then approached it from the opposite side. We gasped collectively when we saw what another angle had to offer. The ice had been sculpted in what appeared to be a Grecco-Roman façade complete with a central arch and accompanying rhythmically repeating columns. To this day we still have a hard time believing that this was a naturally occurring form and not man-made. This was one of those unforgettable moments that changes the way you see and think about the world as you become aware of possibilities you hadn’t previously dreamed of.
Despite the rich subject matter, it was challenging photographically, as we had hours in an area we could have spent days and consequently moved through it rapidly, which forced us to work like action photographers. At one point in our magical voyage, I teased Michael that he was encouraging very bad habits – shoot first, ask questions later. But I made the best of it knowing that I would never see this again and while I was doing so I realized that this push outside of my contemplative comfort zone would encourage me to acquire skills that would prove useful in other situations. They have been useful in many other unforgettable moments.
Which mode are you most comfortable in?
How can switching between contemplative to active modes help you?
Find out more related images here.
Read more The Stories Behind The Images here.
Learn more about Antarctica here.
Discover my Antarctica workshops here.

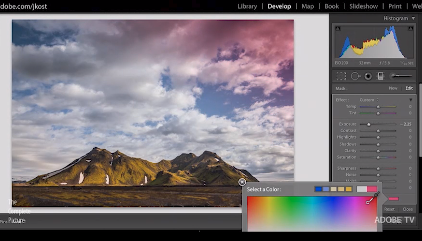
Converting Images to Black and White in Lightroom 4 – Julianne Kost


“In this episode of The Complete Picture Julieanne demonstrates the best way to convert images to Black and White in Lightroom as well as how to save presets to increase your productivity.  Click here to download the presets discussed in the video. Note: although this video was recorded in Lightroom, the same techniques are available in Adobe Camera Raw in Photoshop CS6.”
Read more with my B&W ebooks.
View more in my DVD B&W Mastery.
Learn more in my B&W Digital Printing workshop.

Science Is For Everyone, Kids Too – Beau Loto + Amy O’Toole


“What do science and play have in common? Neuroscientist Beau Lotto thinks all people (kids included) should participate in science and, through the process of discovery, change perceptions. He’s seconded by 12-year-old Amy O’Toole, who, along with 25 of her classmates, published the first peer-reviewed article by schoolchildren, about the Blackawton bees project. It starts: “Once upon a time … ”
While you’re watching the video you may have an uncanny feeling that science and art aren’t as different as you were once led to believe.
Watch more creativity videos here.

PDN PhotoPlus Conference + Expo


“The PDN PhotoPlus Conference + Expo is the largest photography and imaging show in North America, attended by over 24,000 professional photographers and enthusiasts. This year the show will be held Oct. 24-27 at the Javits Center in New York City. Don’t miss your chance to explore over 250 exhibits, see thousands of new products, attend conference seminars, keynote presentations, special events & much more. Register by October 24th for a FREE 3-day expo pass.”
My seminars at PhotoPlus include …
Thu, Oct 25, 2012 – 8:45 AM to 11:45 AM
Fine-Art Digital Printing
Fri, Oct 26, 2012 – 8:45 AM to 11:45 AM
Black & White Mastery
Sat, Oct 27, 2012 – 4:00 PM to 6:00 PM
Game Changers – 12 New Things Every 21st Century Photographer Needs To Know
Find out more about PhotoPlus here,

Beyond ETTR & HDR Tonemapping – 32 Bit In Lightroom

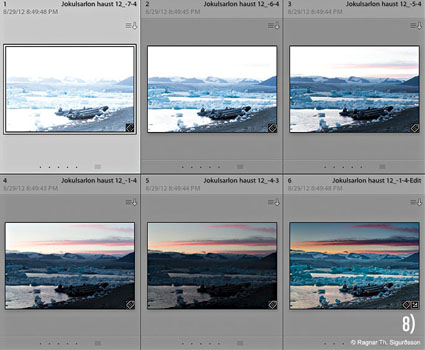
Image by Ragnar th Sigurdsson.

To one degree or another, we’ve all been underexposing our digital photographs, even if we’ve been exposing to the right (ETTR). Imagine a day when every ƒ-stop had as much data as the lightest ƒ-stop. It’s here now. Here’s how.

Make a series of bracketed exposures where each ƒ-stop in a scene is placed in the far right of the histogram or recorded with half the data in a single digital file. Combine all the exposures into a single 32-bit file using either the Merge To HDR Pro feature in Adobe Bridge/Photoshop or Lightroom. Save or import this 32-bit file into Lightroom (4 or higher) and apply adjustments with its Develop module to avoid many common tone-mapping artifacts.

You may be surprised to find that you’ll benefit from using this technique even for images with significantly more restrained dynamic ranges.

Read more on Digital Photo Pro.
Learn more in my digital photography and digital printing workshops.

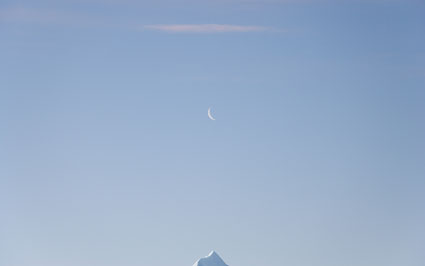
Images That "Sizzle & Fizzle" Versus "Sleepers That Are Keepers"

Keeper

Our strongest images combine immediate impact and staying power.


Sizzles & Fizzles

While color immediately grabs attention, other aspects of this image could be stronger and clearer, making its impact less durable than others.

Sleeper

Subtlety makes this image easily overlooked at first, but its appeal grows stronger over time and in context with other images.


It happens to me all the time. I’m excited by what I see on location and hopeful about the images I’m making. Afterward, the final results aren’t as exciting as I had hoped they would be. I rarely leave a location with confidence that I have truly excellent images. I can phone-in competent and even good most of the time, but getting to great is another matter entirely.

It’s important to know the difference between good and great. I measure my current successes against my past success – I’m always trying to raise the bar. If the images you’re making aren’t making the cut for you, I’d take that as a sign that you’re being more discriminating and based on that I would bet that means you’ve got many more images in your portfolio that are better. That’s excellent! Plus, the world doesn’t need more mediocre images, but it does need more discerning eyes.

While this syndrome of “sizzling and then fizzling” is common. The opposite dynamic is often at work too. You’ll make images that don’t catch your attention immediately but you find yourself doing a double or triple take and your appreciation of these images grows with each viewing. These “sleepers” are very interesting; they tend to be smarter and/or more deeply felt. Because they don’t grab your attention quickly, it’s easy to pass these types of images by. That’s one of the reasons it’s important to look back through your images again, often after some time has passed so that you can see them from a refreshed perspective.

Sometimes when you present the two together, one type of image makes the other type of image more interesting. The attention getter does just that – it gets attention. It can draw viewers in to seeing related work that might not be as eye-catching but has more substance and depth. Similarly, if it’s related to the attention getter, in some way beyond proximity, the strong silent type can reveal hidden depths within its flashier counterpart and even transfer some of its own depth. Both can “rub off” on each other in a beneficial way. Their relationship can be mutualistic.

When you find the rare few images that achieve both immediate high impact and extended durability you’ve got real “keepers”. These are the images that should be celebrated most. These images set the course for many others, both current and future works. All the other images, the ones that come close but fall short, which are collected with the great images, should in some way support, amplify, and expand that greatness. Keep these fires burning and fan the flames. Carry this vital energy forward. Keep this energy flowing with new moves. Find out how long you can stay in the zone or what it takes to return to it or something similar. See how far you can run with it and where it will lead you. Work of this quality often gets beyond you; which doesn’t mean you can’t sustain it, or return to it, but instead means you probably won’t fully understand it until long after you’ve done it – if ever. Work like this expands you. It raises your bar and calls you to new heights. Answer these calls.


Learn more in my Storytelling resources.

Learn more in my creativity and digital photography workshops.

The Graduated Filter and Adjustment Brush In Lightroom 4 – Julianne Kost


Julianne Kost demonstrates the power of making selective adjustments like dodging and burning, color corrections and noise removal using the Graduated Filter and Adjustment Brush in Lightroom 4. Note: although this video was recorded in Lightroom, the same techniques are available in Adobe Camera Raw in Photoshop CS6.
View more Lightroom videos here.
Learn more from Julianne Kost on her blog.
Learn more in my digital photography and digital printing workshops.

Photoshop Masking Key Commands

.
The following key commands do not require clicking on the mask.

X                                               reverses Foreground and Background colors
Numbers                               number keys change the Opacity of a brush
[ and ]                                     makes a brush smaller and  larger
Shift [ and Shift ]               makes a brush softer and  harder
Opt Delete                             fills a mask with the Foreground color
Command I                           inverts a mask

The following key commands require clicking on the mask.

Control Click                        displays mask options
Opt Click                                 displays a mask in black and white
Shift Opt Click                      displays a mask as a red overlay

Command Click                   loads the mask as a selection
Shift Command Click        adds the mask to a selection
Option Command Click    subtracts the mask from a selection
Shift Option Command     loads the intersection of two masks
Shift Command I                  inverses a selection

Drag & drop                           to move a mask from one layer to another
Option drag & drop            to copy a mask from one layer to another

Read more about Selections & Masks.
Learn more in my digital photography and digital printing workshops.