Ken Carl – Extreme Low Light Shooting


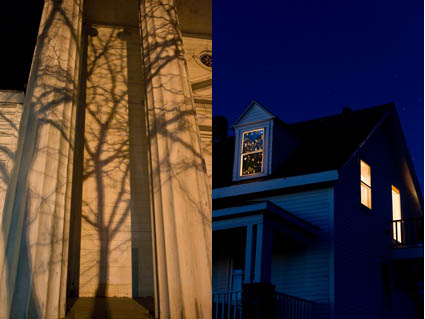
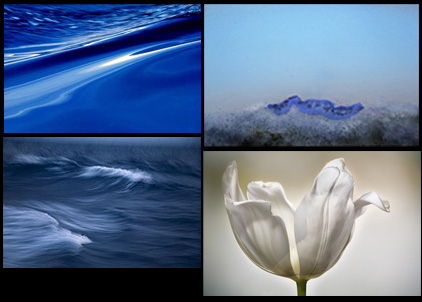
Ken Carl has attended every one of my Fall Foliage workshops. Over the years, he’s turned pro. Just when I think he’s done, he keeps coming back for more. After a long day of shooting past sunset at Pemaquid Point, Ken walked up the streets of Damariscotta while the rest of the group was being seated for dinner – and got some great shots. After dark? Hand held? ISO 8000? Really? And it’s actually useful, with surprisingly little noise by traditional standards. You’ve got to try it to believe it. The LCD on the back of the camera actually shows you more than you can see at that moment. Add a tripod to the equation and you’ll see even more. Today’s cameras can capture more than you can see at any one moment in time. With a little experimentation, you’ll find hours of new possibilities at the beginning and ends of the day. This weekend we tested shooting in many extreme lighting situations. Participants are seeing in new ways. I’m seeing in new ways. I recommend frequently testing new techniques to expand your repetoire and your vision.
Check out Ken Carl’s work here.
Check out my workshops here.

Kevin Ames – Perfectly Imperfect


Kevin Ames found that perfect wasn’t and imperfect was, while he was a special guest during a special session of my Fine Digital Print workshops this week. After years of doing top notch commercial photography, to get the most expressive results from a developing body of work, he first had to follow the lead of a very happy accident. Replicating the look and feel of a color crossed, soft focus, grainy original from pristine originals challenged him to be clear about every move he made. Ultimately, he found that rather than going back to lesser tools to distress his images he had much more flexibility and freedom when simulating the look using high quality originals. The results became perfectly imperfect. In the end, given the subject matter and his treatment of it, a perfectly lit, perfectly processed original was just too perfect – and far less emotive. It wasn’t easy to go in the opposite direction years of good habits had taken him. He had to give himself permission to do so – and was encouraged unanimously by the other participants to pursue his unconventional results. Even then, it took repeating the results with several images to get the final confirmation he needed. The results were undeniably strong.
Here’s what Kevin shared about his experience. “Breaking rules is part of being artistic. This odalisk was made during the very early days of digital portraiture with a three chip camera the when given enough light was really quite good. I broke the flash sync socket at the beginning of the shoot forcing me to use the
modeling lights in the soft box as the sole and dim source of illumination. That camera shot at ISO 40 and the exposures were quite long adding a lot of noise to the image.  During portfolio reviews at
John Paul’s Digital Print II workshop last spring it was the pick of my work by the group. I added it to my print portfolio for last week’s workshop and again it was the unanimous favorite of my submissions.
Understand that at the beginning of the workshop it was not the direction that I thought I wanted to follow. The breakthrough came when it was printed out to a large scale–forty by forty inches. Up
close it looks impressionistic. From ten feet it becomes painterly. Using the odalisque as a touchstone I am adding grain, noise and color washes to current high resolution work that is very sharp and well
lit. Printed larger than life the figures take on a whole new aspect. I can control the size of the grain in the subsequent photographs as part of the visual vocabulary. When the body of work is finished this
touchstone image will be the one that doesn’t truly fit. Breaking the rule of “noise free is better” has led me to seeing my work in a whole new way–all due to collaborating with the participants of the
workshop and of course John Paul’s guidance.”
Tell him what you think! Comment here!
Check out Kevin’s website here.
Check out my Fine Digital Print workshops here.

Justin Hartford – Distinctive Printing Style


Justin Hartford perfected his black and white palette during a special session of my Fine Digital Print workshops this week. He’s printing his high contrast landscapes right to the ragged edge. Deep blacks with very faint traces of detail and very bright highlights with only traces of detail. He’s using those in localized planes not in the same object. This makes extreme dynamic range a visual code for space (recession/progression). This distinctive palette combined with a larger than classic scale gives his work a very contemporary look to a classic subject (the American southwest).
Tell him what you think! Comment here!
Check out my Fine Digital Print workshops here.

Charlotte Rush Bailey – Appropriate Scale


Charlotte Rush Bailey printed her African portraits at a variety of scales in a special session of my Fine Digital Print workshops this week. It took physically experiencing them with her own body to find out how they were working. She held them up to her face. When the portraits are larger than life they take on a more graphic quality evoking mass media presentations. When they’re life size the representational quality of them is heightened. When they’re small the intimate quality of them is emphasized. Scale had a big impact on her subject. Only certain subjects function this way. Making life-size or larger than life-sized representations of vistas (landscape, cityscape, seascape) is often impractical if not impossible.
To a limited degree you can preview scale by projecting an image before printing. But nothing is a substitute for actually experiencing the final print. In addition to evaluating technical aspects of a print, it’s important to identify associative qualities as well. They can make a big difference.
Tell her what you think! Comment here!
Check out my Fine Digital Print workshops here.

Don Ross – Little Things Can Make a Big Difference


Don Ross knows that little things can make a big difference.  He brought many beautiful prints to a special session of my Fine Digital Print workshops this week. He was looking for “that extra something”. We identified one of the strongest images/prints that would give us a lot of information relevant to the rest of his body of work. Further resolving this one image would unlock the keys to how most of the other images need to be handled. How much saturation? How much contrast? How much sharpening? What kind of sharpening? Applied selectively? What paper? How big? He spent the better part of two days fine-tuning the image. At the end of it, he turned a good print into a great print. It was time well spent. “It’s a strange thing. When it comes to making really good work. It’s almost as if, little things make all the difference.”
Now that he knows how to resolve this one image, he knows how to resolve similar images. I’ll bet the next great print comes in a matter of hours. It was time really well spent.
Tell him what you think! Comment here!
Check out my Fine Digital Print workshops here.

Make Time to Review Your Work


Images (left to right, top to bottom) – Jim Graham, Andree Laliberte, Ginette Vachon, Barbara Myriam.
This week’s workshop participants are all longtime alumni of my workshops. It’s a small intimate group – Ginette Vachon (Swiss based veteran world travel photographer), Andree Laliberte (Canadian installation artist), Barbara DeAngelu (Columbian mystic and Photoshop beta tester), and Jim Graham (Maryland based Pulitzer nominated photojournalist). They know each other before they arrived, either directly or from online exchanges.
After two days of being overstimulated by dramatic environments (continental rifts, volcanic coastlines, geothermal lagoons, steam vents, and paint pots, moss covered valleys) and working in challenging weather (wind and rain) this group had the wisdom to slow down. Recharge, Regroup. And focus. We reviewed (shared images and feedback) each other’s work. We reviewed the work we’ve done so far in Iceland. We identified what’s working and what’s not. We made an action plan for the coming days with a list of things to watch, things to try, and specific work to concentrate on to ensure that the images we come away with are not only technically good but also advance our individual visions and bodies of work. Now that’s focus. That’s time well spent. In a stimulating environment, few have the discipline to take this time. But taking this time helps you make quantum leaps.
At the end of the day, we went back to one of the first locations more informed and more focussed.
Find out more about Focus on Nature here.
Get Priority Status for all 2009 workshops now by emailing einar@focusonnature.is.

Ollie Treadway – Simplifying Workflow


For Ollie it all came together on the final day of our workshop The Fine Art of Digital Printing (this time at the Hallmark Institute for Photography). He was able to untangle his workflow and his file structure and produce better results in less time.
Here are a few core concepts he absorbed. Keep it simple; amid multiple methods that offer equal quality, the simplest way is best. Work globally first, then regionally. Don’t fix problems created during the editing process, fix the adjustments that created the problems. Organize and label your layers.
Now that the technical issues have been answered and simplified, Ollie’s freer to direct his energies in more important areas of his creative growth – finding and developing his own authentic voice.
These are the kinds of dialogs Mac Holbert and I have every day with participants in our the Fine Art of Digital Printing workshop during our extensive One on One and Review sessions.
Look for future workflow sessions from Mac and I at PhotoPlus East and the Epson Print Academy.
Check out my workflow PDFs here.
Check out Ollie’s website here.
Find out about the Hallmark Institute of Photography here.
Find out more about The Fine Art of Digital Printing workshop here.
Find out about my The Fine Digital Print workshop series here.

Marc Siegner – Testing Sharpness


Marc creates multimedia prints and installations. He uses a wide variety of media for their material characteristics. So naturally he’s particularly sensitive to the look and feel of his images. We tested sharpness (low, medium, and high) with one of his images. Then the whole class had the opportunity to see the results side-by-side. Consensus wasn’t instant. Some like it sharp. Some like it soft.
One thing became clear, sharpness influences spatial relationships – especially when applied selectively. Typically, sharper image areas appear closer to the viewer, while softer areas appear further away.
So sharpness not only involves aesthetic choices, it can also be used to control spatial relationships within an image. Texture and contour are essential elements in visual vocabulary that you can use to further your personal expression.
Test it for yourself! On your images! Do it! While you can imagine the results, there’s nothing like experiencing it.
How important is sharpness in your images? Do you like your images sharp or soft? Comment here.
Find out about the Hallmark Institute of Photography here.
Find out more about The Fine Art of Digital Printing workshop here.
Find out about my The Fine Digital Print workshop series here.

Christine Carr – Testing Substrates


Christine’s been working on images of projected light and screens. So she decided to explore presenting her images as screens with projected light. She found some alternate substrates – transparency, transparent material with a translucent backing, tissue paper, glossy film. We did a little brainstorming about presentation. We played with light and shadow. The light and shadow itself took on a presence in the presentation. Essential elements of photography, light and shadow, what photography represents and uses to represent, are beginning to be incorporated into the presentation – sometimes abstractly and dynamically. A whole new set of doors opened up. It’s important to explore the potential of new materials. After all, this is what has propelled photography all along, including fueling the digital revolution.
How many ways can you think of extending printmaking for your work?
These are the kinds of dialogs Mac Holbert and I have every day with participants in our the Fine Art of Digital Printing workshop during our extensive One on One and Review sessions.
Find out about the Hallmark Institute of Photography here.
Find out more about The Fine Art of Digital Printing workshop here.
Find out about my The Fine Digital Printing workshop series here.

Jay Strojnowksi – Testing Substrates


Jay took a risk. He brought in large scale photographs printed on canvas for review. They were different. This triggered a long dialog on mixed media and installations. Now he’s no longer thinking in conventional terms about making prints. In 30 minutes we listed dozens of ideas for expanding the possibilities of printmaking and presentation; multiple media – silk, mylar, metal, transfers; multiple picture languages – photographs, blueprints, text, code; and multiple installations – hung on walls, becoming the walls, drapes, projections. This is one of the things that’s so stimulating about teaching. It’s inspiring to see diverse perspectives. And it’s a privilege to be able to help others realize their visions. I highly recommend you take time to explore your options. Think of the possibilities! You might surprise yourself … and us!
How many ways can you think of enhancing your images with media? Make a list. Then rank the list and try the most promising options.
These are the kinds of dialogs Mac Holbert and I have every day with participants in our the Fine Art of Digital Printing workshop during our extensive One on One and Review sessions. This week we’re at the Hallmark Institute of Photography.
Check out Jay’s website here.
Find out about the Hallmark Institute of Photography here.
Find out more about The Fine Art of Digital Printing workshop here.
Find out about my The Fine Digital Printing workshop series here.