Use Presets To Quickly Reveal The Extraordinary Possibilities Hidden In One Image

Rushing towards perfect, you might miss it. Previsualization (seeing with your mind) is a fine start, but I recommend you use Lightroom to go further and visualize (see with your eyes). After exploring your options fully, you can perfect those results.

You can level up and speed up your game by using Lightroom’s Presets.

(Note, Camera Raw offers Presets that are identical to Lightroom.)

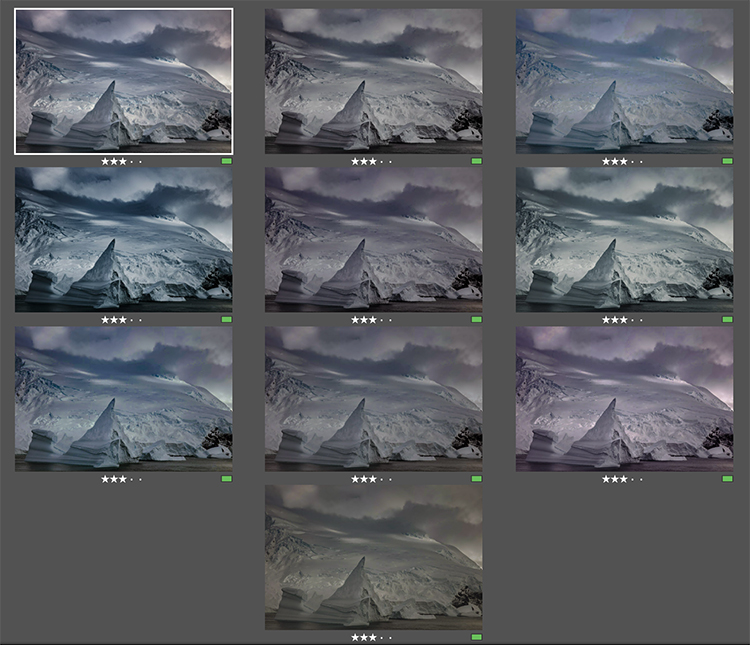
Virtual copies are the easiest way to make side-by-side comparisons.

Presets are the easiest way to preview the many possibilities one image contains.

Presets are also a great way to create a consistent look for two or more images. Once applied, you can tweak settings to optimize individual images while still preserving a unified style.

Presets can record any Edit setting(s) (one, many, or all) and apply them to any other image. A single click can produce results as subtle or dramatic as you like.

The many presets Adobe provides are a great starting point. You can make your own presets by customizing the defaults, by applying someone else’s, or by creating your own from scratch.


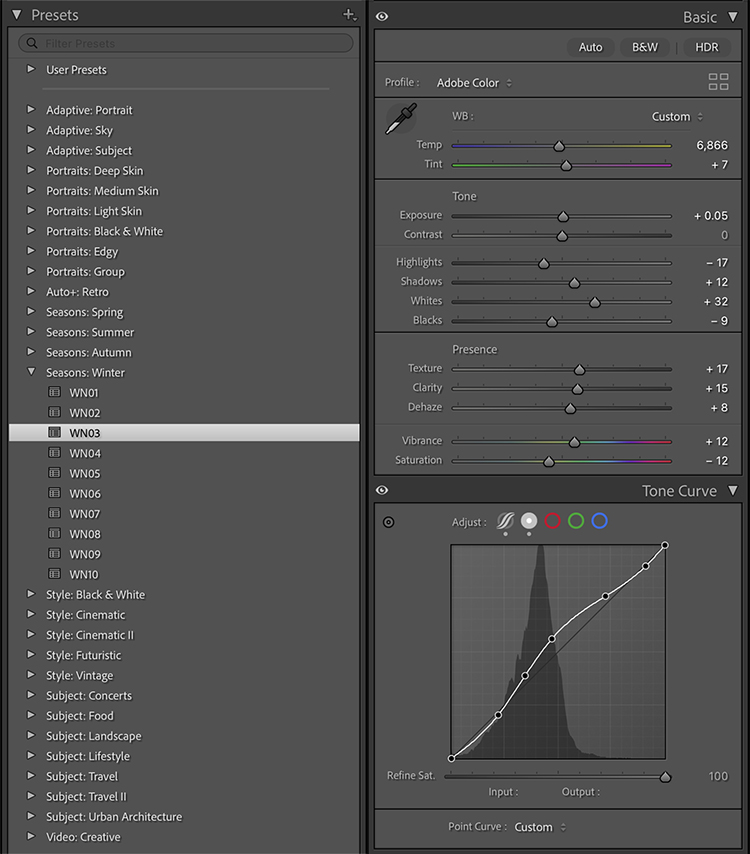
The Presets panel and the slider settings one preset produces.

How To Use Presets


Insights Members can login to read the full article.
Email:
or Sign up

5 Reasons to use Smart Filters in Adobe Photoshop

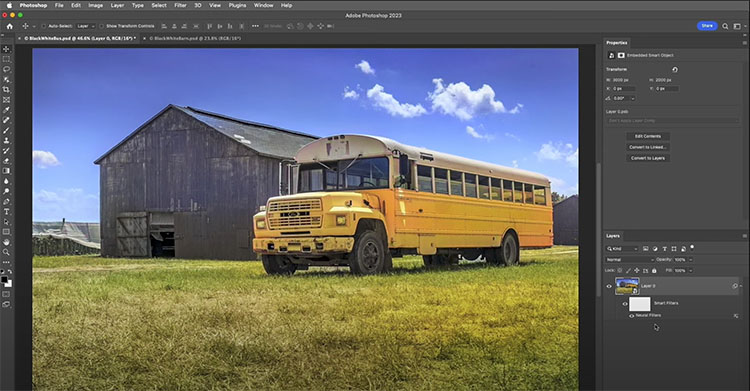
“In this video, Julieanne demonstrates five reasons to use Smart Filters in Photoshop, including how to edit, mask, stack, move, duplicate, and change blend mode and opacity of Smart Filters in Photoshop.”

View more of Julieanne’s videos.
Learn more in my digital photography and digital printing workshops.

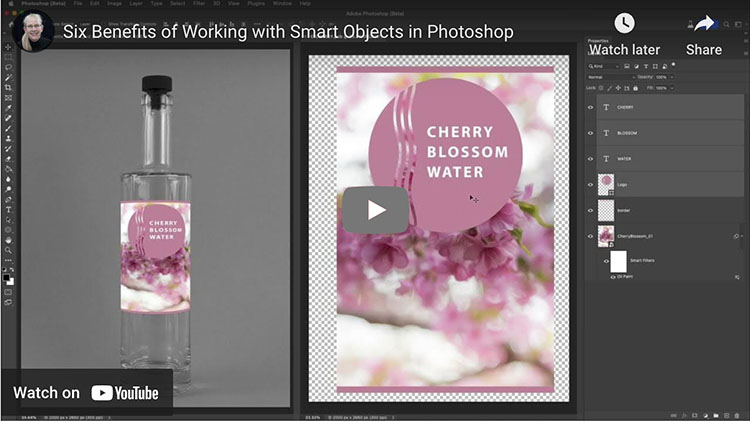
6 Benefits Of Using Smart Objects In Adobe Photoshop

In this video, Julieanne will walk through six benefits of working with Smart Objects in Photoshop, including transforming and distorting Smart Objects, editing and replacing the contents of Smart Objects, creating duplicated instances, and more!”

View more of Julieanne’s videos.
Learn more in my digital photography and digital printing workshops.

What’s Your Creative Process? 1 Habit That Will Change Your Life

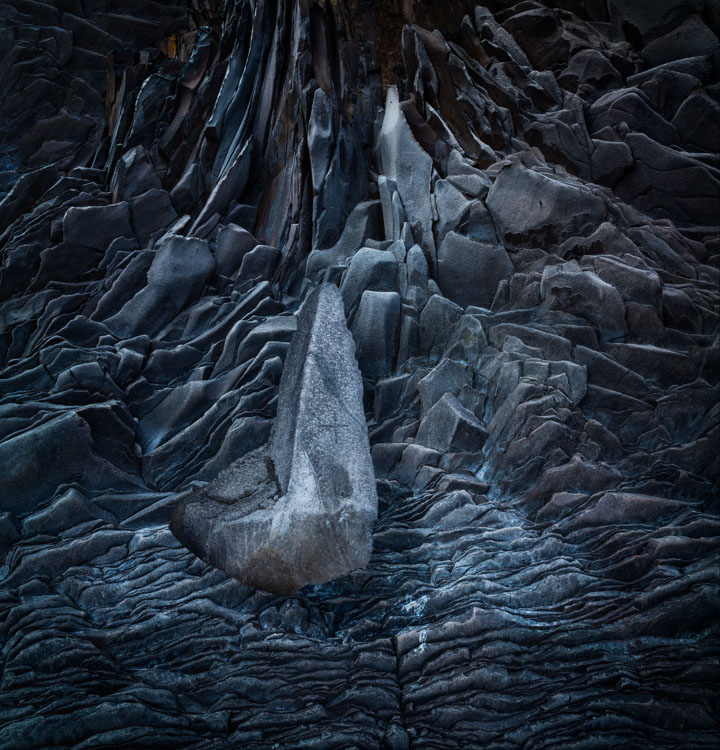
Alignment IV

Do this one thing and you will transform your creative life.

Watch your process.

If you make this a habit, you’ll develop a better understanding of not only what but also where, when, how, and why do the things you do.

Noting what you don’t do can be an equally powerful practice.

You’ll quickly find yourself flooded with new information and ideas, which you can turn into a creative advantage by taking notes.

When you notice what when where how you do the things you do, after every observation ask, “Why?” Don’t think of the question as a challenge but rather as an opportunity to gain greater clarity about your motivations and what does and doesn’t drive you to action.

First, note what you do and don’t do.

When you watch your process carefully you become aware of every step in your process and everything involved in it. Actions and things that went unnoticed before will become clear to you. Find out if your habits are serving you well by doing what you do in a different order or by adding or subtracting one thing systematically. Make a little time to observe your process like a scientist might and find out what positive benefits that perspective has to offer you.

Second, note where you do and don’t do it.

Do you like quiet places to work without distractions or do you prefer a lot of external stimulation to get your juices flowing? Do you like clean orderly spaces to foster calm efficiency or do you like to spread out and use chaos creatively? Do you need a space away from home or work or do the other people and activities that take place there feed your creativity? Maybe your answer will change depending on a given project or a particular stage of any project you’re in. If you don’t know, mix it up and find out.

Third, note when you do and don’t do it.

Are you a morning person or an evening person? Are there times of the day you find it easier to be creative because you have fewer commitments? Do you work in bursts or do you prefer to do a little bit at a time? Do some things require bigger blocks of time to do? Can some other things be done in smaller chunks of time? Answering these questions will help you make the most of the time you have as well as plan to make the time you need.

Fourth, note how you do it and don’t do it.

It’s likely that you have a choice to do the same thing in many different ways. You may be used to doing things in certain ways, without realizing it. Maybe you’ve made a few assumptions based on what other people do. Are those assumptions helping you? Maybe you’ve developed habits. Which good habits help you get consistent results efficiently? Which bad habits prevent you from getting the results you want? Are you taking shortcuts? Sometimes what works in one situation doesn’t work in another. Do your habits serve or hinder you when things change? Take stock of your habits and you’ll find areas for improvement but don’t forget to give yourself credit for everything you do that works well along the way. You’ve worked long and hard, you deserve it. Keep going.

Fifth, ask why you do what you do.

Behind every action, there’s a goal. You eat, drink, breathe, sleep to stay alive. You photograph to … ? Your most basic motivations may be fairly simple. Some of your other motivations may be much more complex – and it’s likely you do many things for unconsciously for reasons that your conscious mind has a lot to learn about. Realizing this can often be the key to finding out what is most authentic about and fulfilling in your creative life. If you really want to get to the core motivations behind the things you do it can be helpful to ask “Why?” five times in a row. Ask the first question. Then ask “Why?” Respond to that answer with “Why?” and repeat this a few more times. Often our deepest motivations don’t reveal themselves until the third, fourth, or fifth time you ask “Why?” If you find asking “Why?” is getting in the way of your observations while you’re practicing your process, ask it when you’ve finished and while you’re reviewing your notes.

Watch your process. It seems simple. It is. But like meditation, it’s not easy. We quickly fall back into our habits, which is exactly what we’re trying to notice more carefully – and potentially change (whether a little or a lot or sometimes or always).

There are many more benefits to taking notes about your process. Because I write …

I constantly generate new ideas.
I’m rarely blocked.
I’m more productive.
I’ve streamlined my systems.
My technique is better.
I recognize the ideas and practices I’ve inherited from others.
I’m aware of what’s influencing me, when, for how long, and why.
I’m clearer about what works and what doesn’t, for me.
I’m aware of my self-talk.
I’ve identified my goals.
I understand more about the personal reasons behind the things I do and the ways I do them.
My work has more purpose.
I enjoy my process more.

I find I write the same things down time and time again. This has lead me to create a master process list, which I can add to or subtract. (I keep it in the Notes app on my iPhone. I make a lot of notes there about a lot of different things.) Because I’m so curious I rarely get bored. I find there are always new things to observe. Are there new things because I noticed more? Why? Are there new things because I’m in a new environment? Why? Are there new things because I decided to try something new? Why? Are there new things because I’m more emotionally receptive? Why? These are important questions that can unlock new ways of looking, thinking, and working, now and in the future. Keep asking them. Ask a lot of questions!

Watching your process is really a matter of becoming aware of your choices (what you choose to do and not to do) and what you may have missed. With greater awareness, you can choose to do the same things or make other choices. With more choices available to you, you can make better choices. Better according to who? You! Be mindful of your creative process. Make this a habit and you’ll transform your life.

I could write a book about the many benefits watching your process brings. But don’t take my word for it. Try it!

Read my Mindfulness resources here.
Read more in my Writing Resources.
Learn more in my Creativity Workshops.

6 Ways To Get Better Shadow & Highlight Detail In Your Photographs

You want your photographs to glow - right? So what’s better than one kind of glow? How about three?

You can get there by not succumbing to the classic temptations to clip shadows and/or highlights to produce a more obviously dramatic but a less lively, nuanced, and expressive tonal scale. Instead, hold the full dynamic range with a real black and white and also create gorgeous separation in the values nearest to them.

So many times we give the lion’s share of the contrast to the midtones. Midtone contrast is really important. But that doesn’t mean we have to sacrifice the light in highlights by making them too hot to look at comfortably or in shadows making them so dark they turn to murky mud. You can hold separation in these extreme ends of the tonal scale and produce beautiful qualities of light that complement not just contrast. Here’s how.


Insights Members can login to read the full article.
Email:
or Sign up

5 Reasons Why You Still Need Photoshop


Let’s say you’re not interested in compositing or adding FX or inserting text or painting on your photographs. Do you still need Photoshop? Short answer – yes. If so, why?

One Big Reason, Look No Further

One reason alone ends the discussion for me. The single biggest reason is precise localized tone control or dodging and burning with Curves. Nothing but Curves offers as precise control. It can add a special glow into all areas of an image, any one area, and treat different areas differently. I can’t think of anything more useful than that.

But can’t you do something similar in Lightroom (LR) or Adobe Camera Raw’s (ACR) using the six Basics sliders (Exposure, Contrast, Highlights, Shadows, Whites, Blacks), in combination with the Adjustment Brush, Graduated Filter, or Radial Filter, even in combination with Color, Luminance, or Depth Range Masks? If close is good enough, yes. If you want to make your images really shine, no.

Is it hard to do in Photoshop? No. It’s easy.


1  Open your image in Photoshop.

2  Make a selection.

3  Make a Curves adjustment layer.

4  Double click on the layer mask and slide Feather to the right.

5  Repeat if you want to make a different adjustment to another area of an image.

6  Save your file, when you’re done.


If you only use Photoshop to do this one thing, most of your images will improve. I can’t say I use this with every image I process, but it’s close. I can say the number of images I don’t want to do this for is very small. It’s a simple thing really, and I look forward to the day we can do it in Lightroom and Camera Raw.

Go Ahead, Look Further, And Find More Reasons

Want to go a little further? Let’s revisit the question, “Why do you need Photoshop?” Every time Adobe’s Raw processor(s) become more fully featured it is worth asking. Or, you might rephrase it as, “What can Photoshop help me do that Lightroom / Camera Raw can’t do as well?”

Here are five reasons.


1  Fine Retouching

2  Precise Masking

3   Advanced Color Adjustment

4  Creative Sharpening

5  Plug-Ins


Let me go into a little more detail for each one.


Insights Members can login to read the full article.
Email:
or Sign up

How To Find The Infinite Possibilities One Image Contains

Incubation XV

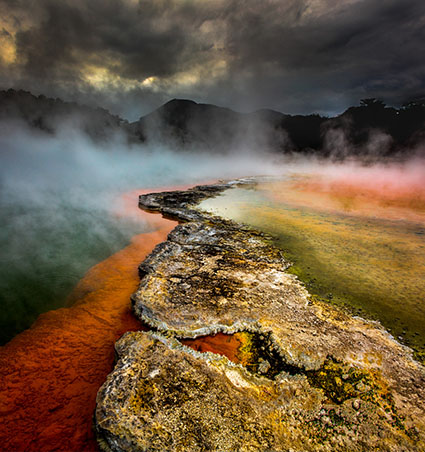
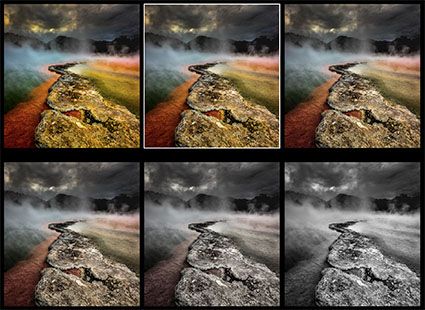
Variations_Saturation_425

Any image can support an unimaginable number of color variations. So how do you find them? Systematically make many variations. Will it take a great deal of time? It will take a little time but not a lot (maybe five or ten minutes) – and it will take less time and you’ll more thoroughly explore the possibilities if you do this systematically. You’ll find this exploration will be time very well spent. Illuminating more possibilities than you imagined will help you find more creative and personally fulfilling solutions for your images. You’ll deepen your understanding of and personal relationship with color thus your images and by extension yourself. Those who view your works will feel the difference. I can tell you from many years of personal experience that it has made all the difference in the world to me. It will do the same for you.

Before you begin …

Start With Your Strongest Image(s)

When you’re processing a number of related images it’s likely that you’ll find the solutions you choose for the strongest image in the set will apply to the others, with minor modifications. It’s rare to have images in a series with widely divergent color palettes.

Plan To Make Many Copies

Don’t try and remember all of these possibilities; there will be too many to remember.

Instead make copies that you can make side-by-side comparisons with. (In Lightroom make virtual copies. Alternately, in Photoshop duplicate files.) It will help if you organize these copies into Collections in Lightroom or organize them (possibly with folders) in Bridge/Photoshop.

Find The Big Picture, Sweat The Details Later

Ditch your perfectionist tendencies – for now. Worry more about the moves you’re making in color that the tools you’re using to make them with. Don’t get lost in the details, instead focus on the big picture. Avoid getting distracted by one exciting possibility.  Instead of rushing to finished results and committing to the most obvious solution too quickly, spend a few minutes exploring more possibilities hoping to find better solutions. More often than not, you will.

So what’s the best way to do this?

Proceed In This Order – Saturation, Luminosity, Hue

With only three elements of color, you wouldn’t think there could be so many possibilities, but the very things that generate them also make finding them manageable. You’ll quickly find the major moves that can be made if you make changes in these three elements in this order – saturation, luminosity, and hue.

Read More

The Art Of Workflow


An optimum workflow will ensure you produce the best quality images possible.


1. Fine Art Workflow | Download
Create the highest quality master file with this fine art printing workflow.

2. Creating a Master File | Download
How to perform global, local corrections and soft proof your files.

3. File Editing Strategy | Download
How to adjust an image file.

4. Preflight Checklist | Download
Designed to help you avoid common mistakes before committing to final output.

5. Flexibility | Download
Keep your options open and preserve the flexibilty of your files.

6. Size | Download
Measuring your digital Image

7. Use Screenshots For Notes In Photoshop
Adopt a non-destructive workflow. When you can’t, take notes.

8. 5 Reasons You Still Need Photoshop

1  Fine Retouching, 2  Precise Masking, 3   Advanced Color Adjustment, 4  Creative Sharpening, 5  Plug-Ins


When & How To Sharpen – The Creative Image Sharpening Workflow

X_20100810_0257-Edit
When To Sharpen

The vast majority of photographic images benefit from sharpening.

Before you decide how and when to sharpen images, you need to decide why you’re sharpening them.

The goal of sharpening is to enhance detail rendition without producing distracting visual artifacts.

You’ll find many conflicting philosophies and their accompanying strategies for sharpening images. The seemingly conflicting advice can be hard to reconcile.

Should you sharpen once or multiple times? Should you sharpen differently for different subjects? Should you sharpen differently for different sizes? Should you sharpen differently for different presentation materials or supplies? Should you view your files at 100% or 50% screen magnification?

Capture source, output device, substrate or presentation device, presentation size, subject, and artistic intention all play a role in sharpening. The characteristics and solutions for many of these factors can be objectively defined for everyone; at least one of these factors, perhaps the most important, your artistic vision, can only be decided individually.

So, if sharpening is a complex subject, how do you simplify your sharpening workflow to one that’s practical without compromising quality?
Bruce Fraser and Jeff Schewe offer the best advice in their definitive volume on sharpening, Real World Image Sharpening, which I highly recommend you read. Instead of sharpening your images for you, they teach you how to sharpen.

Their philosophy of sharpening is the soundest in the industry, which is why it has been adopted by so many in the industry. They recommend that images be sharpened in a progression of three stages; once for capture sharpening, a second time for creative sharpening, and a third and final time for output sharpening. The objectives and methods of each of these stages vary considerably. When mastered, the whole process can be streamlined to achieve sophisticated results with a minimum investment of time.
Here's a quick synopsis ...


Insights Members can login to read the full article.
Email:
or Sign up

Many Ways To Convert Color To Black & White

color
lightondark
darkonlight
 There are at many ways to convert an image from color to black and white. Here's a roundup and evaluation of the top seven plus a set of considerations to help you choose the best one for your needs.
1          Desaturate
Desaturate or use the Saturation slider to make all the channels the same without control over the mix. Desaturaton is useful for near neutral images, otherwise it produces compressed tonal structure.
2          Convert Mode To Grayscale
Grayscale conversions eliminate all channels but one. The default mix is 59% Green, 29% Red, 11% Blue. This can be customized by targeting a single channel before conversion, to get 100% of any channel in any color space, including Lab. Quick and direct, this method eliminates future flexibility; its limited use is to create Grayscale images for reproduction but it's not the best way to make a conversion from color to black and white.
3          Channel Mixer
The Channel Mixer set to Monochrome allows you to customize the mix of channels and can be used as an adjustment layer, which allows you to change the mix at any time in the future.


Insights Members can login to read the full article.
Email:
or Sign up