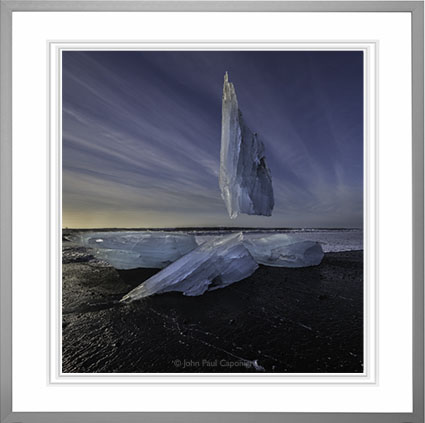
Colorbyte’s ImagePrint RIP’s isn’t for everyone. It costs roughly half the cost of a printer. But for many it’s a trusted ally that helps them achieve great print quality with a minimum of effort. ImagePrint simplifies printer color management without sacrificing quality for those who aren’t experts and increases productivity for high volume printers, like service bureaus.

Here are 10 reasons to use ImagePrint.

1 – Easier color management (auto sets media type with selection of profile, auto resamples)

2 - Custom profiles and ink recipes for third party substrates

3 – Consistent color (no System, Adobe, Epson variances) – particularly important for service bureaus

4 – True postscript for sharper vector graphics and text

5 – No upper length limit

6 – Light temperature specific profiles

7 – Useful Saturation rendering intent

8 – Cross toning for black and white images with improved separation routines for better dmax, greater longevity, lower metamerism

9 – Auto device dependent resampling to get to perfect resolution (360) without additional sharpening

10 – Better shadow detail control

11 – Drive multiple printers simultaneously

12 – Print from multiple networked computers

13 – Page layouts (but you could use Lightroom)

Is ImagePrint right for you?

If these 10 reasons justify the cost for you.

If you’re tempted to use it try it in its free demo mode or purchase it with their 30 day money back guarantee.

Learn more about ImagePrint here.

Bambi Cantrell, Douglas Dubler, Greg Gorman, Jay Maisel, Steve McCurry, and Jeff Schewe share their thoughts and feelings on their work and how they relate to it when it’s printed.

View my Epson video interview here.

Find out more about Epson Focal Points here.

In this video, I share my thoughts and feelings on photography and printing.

Find out more about printing here.

Read other interviews here.

Read my artists statements here.

Profile Your Printer

December 21, 2011 | 2 Comments

Prints made with default (left) and custom (right) profiles compared.

Good printer profiles help make good prints. Better printer profiles help make better prints. So, logically, you’ll want to use the best printer profiles to help you make the best prints.

How do high quality printer profiles contribute to print quality? A good printer profile helps render optimum shadow and highlight detail, gradation, neutrality and graybalance, as well as color rendition and saturation. (Remember, printer profiles characterize the combination of a printer’s hardware, ink, media setting, and the substrate you choose. You’ll need different profiles for different substrates on the same printer.)

How can you get good printer profiles? Look to three primary sources. One, use profiles provided by printer manufacturers; they’re free. Two, hire a printer profiling service; profiles cost approximately $100 each. Three, make printer profiles yourself; printer profiling systems run between $400 and $1000. (Profiles supplied by substrate manufacturers are of uneven quality; a few are good, many are bad.)

Which solution is right for you? It depends on both your printing conditions and needs.

If you’re using substrates supported by the manufacturer of your printer, try using the profiles they provide first; they’re often quite good. Years ago, Epson raised the bar on the quality of printer profiles provided by manufacturers. The highly sophisticated routines they use to produce their printer profiles processed by supercomputers are truly state-of-the-art. It’s arguable that you can produce better profiles, even with the most sophisticated profiling solutions available. Their profiling routines factor in subtleties like dot structure or screening frequency. One of the reasons a solution like this works is because the technologies and manufacturing standards they use are so consistent that the unit to unit variation between individual printers of the same model is extremely low. (It’s less than a Delta E of 1 or the minimum variation the human eye can detect.) Some, printer manufacturers, like Canon, provide a large number of profiles for substrates made by other companies; their quality is generally quite high with only a few exceptions. Other printer manufacturers, like HP, produce self-profiling printers. They need to be self-profiling, as the state of the printer is constantly changing; when nozzles clog, new nozzles come on line; when ink cartridges are swapped nozzles are replaced. One advantage to a system like this is you can quickly profile a new substrate on a printer with no additional equipment. The quality of the profiles is often good, but there will be times where you’ll want to improve upon it.

No manufacturer provides a comprehensive set of profiles that will cover the entire spectrum of fast-evolving substrate industry. A little experimentation with new media is advised, sometimes a lot. If you experiment with many medias or use more exotic substrates, you’d be well advised to have someone make custom profiles for you or do it yourself.

Read more

Softproofing

October 19, 2011 | Leave a Comment


As a rule, always softproof an image to determine a rendering intent and make printer/substrate specific adjustments to a image file before printing it.

You can get Photoshop to display an image the way it will appear when it’s printed, before you print it, by softproofing an image. If you softproof before you print, you’ll get your best first proof or maybe even a finished print.  Not to be confused with a hard proof or physically printed piece, a softproof uses an ICC profile to create an onscreen simulation of an image as it will appear when printed.

Wait. Haven’t you already done this by calibrating and characterizing your monitor with a colorimeter, choosing an editing space along with color management policies in Photoshop, and specifying the right profile for a printer/paper combination with your printer driver? Almost. Doing these things ensures that all of the different color behaviors of the devices you’re using are accurately described and that color conversions are handled precisely, but it doesn’t ensure that you will see exactly how an image will look when printed. Without softproofing, you see how an image looks on a monitor. To see an image on a monitor with the appearance of how it will look when printed, before you print it, you need to take the final step of softproofing the image. This simulation won’t change your file, just it’s appearance. Once softproofed, if you choose to, you can make output specific adjustments to your file before printing to get a better first print. Read more

Epson recently announced a new addition to it’s line of photo printers.

It’s a smaller version of the Epson R3880.
Epson Ultrachrome K3 with Vivid Magenta Ink Technology
13″ wide
It lists for $849.99.
Find it at B&H for $834.95 here.

Industry-leading pigment ink technology

Epson UltraChrome K3 with Vivid Magenta Ink Technology for stunning color and black-and-white prints with intense blues and violets and improved skin tones

Individual high-capacity ink cartridges

Change cartridges less often with nine 25.9 ml individual ink cartridges

Advanced Media Handling

Offers consistent, reliable performance with front-in, front-out paper path; accommodates cut-sheet and roll paper in sizes up to 13″ wide; supports photographic and fine art paper, canvas, art boards and CD/DVDs

Unparalleled connectivity

Hi-Speed USB 2.0, wireless 802.11n and 100 Mbit Ethernet support

Auto-switching Black inks

achieve the highest black density and superior contrast on glossy, matte or fine art papers from either Matte or Photo Black ink

Leading-edge image-quality architecture

Smoother color transitions and outstanding highlight and shadow detail with AccuPhoto™ HD2 imaging technology

Precision 9-color, 8-channel print head technology

Innovative MicroPiezo® AMC™, one-inch wide print head with ink-repelling coating for more accurate dot placement and reduced maintenance

Professional control

Advanced Black-and-White Photo Mode to easily create neutral or toned black-and-white prints from color or monochrome images

Learn more about the Epson R3000 here.
Find the tools I use here.
Read more in my digital printing lessons.
Learn more in my digital printing workshops.

There’s a print spray that anyone making inkjet prints needs to know about – Premier Art’s Print Shield. It’s a UV water resistant lacquer that comes in a variety of finishes – matte, semi-gloss, and glossy. It offers protection from light, water, moisture, airborne contaminants, and fingerprints. It doesn’t produce any visible changes in the print, either in color or density or surface.  It dries fast and doesn’t have a strong odor. It reduces burnishing and scuffing somewhat. Most importantly, it greatly increases longevity, in some cases by as much as 200%

Each $15 400ml can covers approximately 75 8×10” prints.

Henry Wilhelm has tested prints sprayed with Print Shield. Visit wilhelm_research.com for his most current data on longevity.

I spray all of my prints with Print Shield now.

Just like spraying a pastel, apply the fixative carefully. If the substrate gets soaked the surface may darken permanently. Instead of spraying the print directly, spray the air above the print and let the mist fall onto the print surface. Let the print dry for a few minutes. Then reapply.

Find PrintShield here.

Read more about the tools I use here.

Learn more in my digital photography and digital printing workshops here.

Black and white printing presents several significant challenges; the ability to produce a neutral color, the ability to maintain that neutral appearance under different light sources (reduced metamerism), the ability to attain graybalance (consistent color throughout the entire tonal scale); the ability to achieve a very dark black (high dmax) without sacrificing shadow detail (low dot gain), and longevity. All of these things are now easily attainable.

Black and white inkjet printing has come of age. In past years, there have been many compelling solutions for making black and white prints with inkjet technology; some have been fraught with problems (third party quadtone ink sets clog easily) and others have been expensive (ColorByte’s ImagePrint RIP). Today, superior quality inkjet printing is both affordable and easily achieved.

Epson has addressed these issues by reformulating their inkset to include not one, not two, but three black inks. You now have a choice of using either Matte Black ink or Photo Black ink with Light Black ink and Light Light Black ink. These inks are used with the other color inks (Cyan, Light Cyan, Magenta, Light Magenta, and Yellow) for a total of eight inks.

Manufacturer’s have reformulated their inksets, adding multiple black inks to highly saturated color inks. To produce the best black and white prints, you want to use all the inks because printing with Black ink only produces a visible dot structure and a lighter black.

Manufacturers have also introduced their own software solutions to separate digital files differently, using more black ink and less color ink. Using more black ink to make a print does several things. It makes it easier to achieve a truly neutral color; it uses more neutral ink and less highly saturated ink. It makes it easier to achieve graybalance (consistent hue throughout the entire tonal scale); graybalance has also been improved by advances in software in both the driver and with improved profiles. It increases the density of the black; dmax ratings for Epson’s UltraChrome II inkset on glossy papers (3.65) now exceeds the dmax of silver gelatin prints (3.2). It reduces metamerism; black ink is the least metameric ink and using a Light Light Black ink makes it possible to carry very subtle highlight detail with gray instead of yellow, the most metameric and fugitive ink. It increases longevity (up to 326 years before visible fading depending on paper type and inkiest); black ink is the least light sensitive so using more of it makes prints last longer.

Epson offers an Advanced B&W Photo feature in their driver software. While you can make a black and white print using either the Epson route or the Photoshop route, for the best graybalance, dmax, and longevity, choose the Epson route and the Advanced B&W Photo feature.

Take these steps.

1    Choose Print. Select Printer Manages Color. Click Print Settings.
2    Under Printer select the printer of your choice.
3    Change Copies & Pages to Print Settings. Select the appropriate or nearest Media Type. Select Advanced B&W Photo under Color. Check Advanced. Choose the highest printer resolution available under Print Quality.
4    Change Print Settings to Color Management and under Tone choose Dark. Optionally, use the color wheel to tint the image.

Read more


Successfully managing color for digital printing requires that the color in an image file be converted from its device neutral color space to a device specific color space. (Typically this occurs by converting from Adobe RGB 1998 or Pro Photo RGB  to a device specific color space defined by an ICC profile characterizing a specific combination of printer, ink, paper, and driver.)

Using Photoshop, you can either convert color in an image before you send it to a printer driver or after you send it to a printer driver.

Choose one method of color management – not two. Easily made, a classic mistake is using both. Double color management typically results in a print that is too light and magenta.

The Epson printer driver provides many ways to manage color conversions and get reasonably good color. Two methods offer the best results; the Photoshop route and the Epson route.

How do you do you choose either of these methods?

Let Photoshop’s Print window (under Color Handling) guide you – Let Photoshop Determine Colors and Let Printer Determine Colors. (While the principle is the same for most printers, interfaces will vary. Here’s information for the most current Epson interface.)

If you choose Let Photoshop Determine Colors under Color Handling, select a profile for Photoshop to make the conversion with (a paper/ink/driver specific profile not the interface default of Working RGB) under Printer Profile, choose a Rendering Intent of either Relative Colorimetric or Perceptual, and then click Print Settings. In the Print window choose the correct Printer and then change Copies and Pages to Print Settings. Select the correct Media Type, uncheck High Speed, and choose the highest printer resolution available. Finally change Print Settings to Color Management and select Off (No Color Adjustment). The Photoshop route turns Photoshop’s color conversion on and turns the printer’s color conversion off.

The Photoshop route tends to hold slightly more saturation but it’s rendition of neutral colors and gray balance is usually not as good as the Epson route. The Photoshop route is the route to take when you want to use a custom profile. Use it if you are printing with either third party inks or papers which require the use a custom profile to accurately describe the behavior of the alternate media.

If you choose Let Printer Determine Colors under Color Handling, choose a Rendering Intent of either Relative Colorimetric or Perceptual, and then click Print Settings. In the Print window choose the correct Printer. Change Copies and Pages to Print Settings to select the correct Media Type, uncheck High Speed, and choose the highest printer resolution available. Finally change Print Settings to Color Management , choose EPSON Standard (sRGB) under Mode, and select Color Controls. The Epson route turns Photoshop’s color conversion off and turns the printer’s color conversion on.

The Epson route tends to deliver significantly improved rendition of neutral colors and gray balance with slightly less saturation. Try it when printing neutral colors. Use the Epson driver’s Advanced B&W Photo feature for black and white images.

Each route works well. Each route yields slightly different results. Test them to see the differences. (Note that you cannot see the differences between printing routes when softproofing; you have to make physical proofs to see these differences. They can significant.)

Read more


Get This – Correct Color Management

Avoid This Double Color Managed

Is your print too light and magenta? Double color management. It’s a classic mistake. I sometimes make it myself when I’m working too fast. So that you know what to look for, I recommend that you make the mistake deliberately, once, and only once, if possible.

Don’t do this …

And this …

What’s the right solution?

Check your software (Photoshop or Lightroom) and printer software (Epson driver) settings, reset them, and print again. Choose one method of color management – not two.

Read more in my online resources.

Learn more in my digital printing workshops.

Jon Cone’s Inkjet Mall recently introduced Firefly Invisible Ink, an inkiest designed for viewing prints under black light only.

“Firefly™ ink is a sophisticated encapsulated dye ink that is invisible in ordinary daylight. Turn off the lights and expose with a black light and the color is vibrant and life-like. We make Firefly inks in cyan, lt cyan, magenta, lt magenta, yellow and white. Because the inks are invisible and require UV light in order to be seen, images must be printed in a false color in order to appear normal under black light. We produced Firefly™ ink Image Converter software so you do not need to experiment. You can open an image, convert it and save it as jpg or png file to print in any software of your choosing. We also put in some expert tools for those who wish to experiment.”

Kudos for innovation.
All bets are off on longevity.

Learn more about Firefly Invisible Ink here.

Learn more with my online digital printing resources.

Learn more in my digital printing workshops.

Epson Pro Profiles

December 6, 2010 | Leave a Comment

Looking for ICC profiles for Epson’s Signature Series of papers for their Pro level printers?

Find them here.

Find more digital printing resources here.

Learn more in my digital printing workshops.


The option to print without color management is missing in Photoshop CS5. This makes it impossible to print IT8 targets to make custom profiles with. Adobe has released the Adobe Color Printer Utility to help you do this.

Find the utility and instructions on how to use it here.


Mac Holbert and I concentrate on Fine Art Workflow in our Epson sponsored seminar today (10 am – 4 pm) in Minneapolis for ASMP.

Minneapolis Photo Center 2400 North Second Street

$10 – ASMP Members / $20 – Non Members

Free giveaways include Adobe CS5, NIK HDR Efex Pro, Pixel Genius Photo Kit Sharpener Pro, OnOne Plug In Suite, X-Rite Color Passport, and more.

Find out more about the event here.

View our DVD content here.
Read more in my digital printing lessons.
Learn more in my digital printing workshops.


300 million are photos taken each day generating over 100 billion a year. While 20 years ago 10% of photographs made were printed, today less than 1/10 of 1% are ever printed! Historically, what’s printed lasts; what’s not, doesn’t. Has this changed?

Find out about my digital prints here.

Find out more about printing in my free Digital Printing Lessons.

Learn more about printing in my Digital Printing Workshops.

Find out about Epson’s two new fast printers.

Epson Stylus Pro 7890 and 9890.

24″ and 44″ loaded with Epson UltraChrome K3 with Vivid Magenta ink.

You can save on Epson pro printers …

3880        $300
4880        $500
7900        $1000
9900        $1000
11880      $2000
GS6000    $4000

Rebates are good through November 30th.

Find them at B&H.

antarctica_gullet

Find printing tips is my latest interview with Ron Martinsen.

Find more tips in my Lessons.

Find out about my fine art digital printing workshops here.

booksmart_fineartmetals

“Booksmart Studio’s inkjet printable fine art metal allows you to print directly on metal surfaces, the metal has a coating applied to accept most popular inkjet printer inks. These fine art printable metals are offered in aluminum and gold and provide a very durable & luminous print. Users must print with a printer that allows direct pass through for paper. The fine art metal series has an adhesive backing to make mounting an easier process, this adhesive backing is optional in certain sizes. The inkjet printable gold and aluminum allow users to create prints that are unlike any print produced on paper.

Users must overcoat the metal after printing due to then nature of ink sitting on metal, one can coat with Clearstar Coatings for a matte, semi-gloss, or gloss finish. One can also laminate the fine art metals, which is often more accurate and reliable but expensive for initial setup. Waterproof ink will run because the ink sitting on the inkjet coating, please remember to overcoat or laminate your prints.”

Prepared metals come in Satin White, Brushed Silver, Matte Silver, Satin Silver, Satin Gold.

Find out more here.

Learn more about digital printing with my online Lessons.
Learn still more in my DVD Fine Art Digital Printing.
Learn even more in my Fine Art Digital Printing Workshops.

epsonsignatureworthy

“Only the highest quality Epson papers receive the designation of Signature Worthy. Watch the introduction and view the complete interviews to see why these industry leaders choose Epson Signature Worthy Papers.”

Lois Greenfield, David Lynch, Matthew Jordan Smith, Vincent Versace, Art Wolfe tell you what they like best about Epson papers.

Learn more about digital printing with my online Lessons.
Learn still more in my DVD Fine Art Digital Printing.
Learn even more in my Fine Art Digital Printing Workshops.

keep looking »

Subscribe

Get the RSS Feed  

Subscribe by Email


    Categories

  • Archives

  • Blogroll

    Topics & Friends