Advanced Creative Image Sharpening Techniques – Double Pass & Hybrid

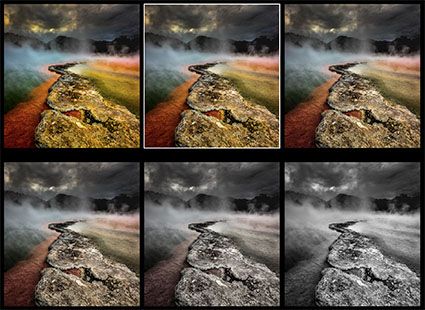
1_Sharpen_No

No sharpening.

2_Double_USM

Double pass Unsharp Mask sharpening.

4_Hybrid_HighPass

Hybrid Unsharp Mask and High Pass sharpening.

Different sharpening techniques make the world look different. A world of difference can be seen between the thin hard line of Unsharp Mask and the broad feathered line of High Pass Sharpening.
Can you choose a combination of both? Yes you can! You can choose the texture of one, the halo of another, and the line of yet another, applying them either globally or selectively. You can customize the look and feel of detail in any image or image area with astonishing precision and flexibility.
2_Double_USM
2b_Sharpen_DoublePass


Insights Members can login to read the full article.
Email:
or Sign up

Creative Sharpening With Photoshop’s High Pass Filter

2_LowRadiusHighPass_

A low High Pass filter setting.

3_HighRadiusHighPass

A high High Pass filter setting.

There are three methods of sharpening in Photoshop that we should all be aware of – luminance, edge, and High Pass sharpening. In this order, the three methods become progressively more complex and go to greater lengths to reduce the accentuation of noise.

To minimize the accentuation of noise, luminance sharpening requires that the filter Unsharp Mask’s Threshold setting be set precisely. When this is not enough, edge sharpening adds a mask that targets the contours of an image, allowing more aggressive sharpening with fewer side effects. Like, edge sharpening, High Pass sharpening (named after the filter used to produce the effect) targets contours in an image, but it does so without the need for a mask; a mask which is more complex to produce. Unlike edge sharpening, the contour accentuation it produces is soft, feathered, and wide. The effect is substantially different and can be used for many creative effects. High Pass sharpening is very similar to the effects of ACR and Lightroom’s Clarity slider, but it offers more control and more varied effects.


Insights Members can login to read the full article.
Email:
or Sign up

Creative Sharpening With Photoshop’s Unsharp Mask

3b_usm_lowradius
Precise sharpening can improve almost any image. It helps to know when to apply it, what type of sharpening to apply, how to apply it, and where to apply it.

Forget the filters Sharpen, Sharpen More, and Sharpen Edges. They’re just default settings of Unsharp Mask. Even Smart Sharpen offers few advantages over Unsharp Mask; it’s particularly useful for compensating for trace, but not substantial, amounts of motion blur. My advice? Start with the classic and master it.

Why is a filter that makes images appear sharper called Unsharp Mask? In analog chemical photography, unsharp masks are made with out-of-focus negatives that are registered with an original positive image. During exposure, the blurring adds contrast around contours, making images appear sharper. Digital unsharp mask works the same way, it uses blurring algorithms to add contrast to contours, again making images appear sharper.

What are the ideal settings for Photoshop’s Unsharp Mask filter? There are no ideal settings that will accommodate all images – or image-makers. Settings will be influenced by resolution, ISO, subject, and practitioner. As creative sharpening is primarily an aesthetic decision, individuals are likely to prefer different amounts and types of image sharpness. When it comes to the effects Unsharp Mask generates, there is a general range of believability most viewers share, but whether you play it safe or push the envelope is entirely up to you. You can craft your own sharpening style. To do this, you have to know how the tool works and what to look for.

What are the controls Unsharp Mask offers? Unsharp Mask offers only three controls – Amount, Radius, and Threshold.
What do they do? Amount controls contrast; a higher setting will create a brighter halo, darker line, and contrastier texture. Radius controls how thick halos and lines get. Threshold suppresses the effect in adjacent pixels, base on their relative luminosity; with a very low setting only adjacent pixels that are very close in color will be affected; with a very high setting, many more color values will be affected.


Insights Members can login to read the full article.
Email:
or Sign up

Using The Power of Photoshop’s Color Blend Modes

BlendModes_B4After
 Contrast added – Normal and Luminosity blend modes compared.

BlendMode_Hue

Hue adjusted – Normal and Hue blend modes compared.

BlendMode_Color

Hue adjusted – Normal and Color blend modes compared.

BlendMode_Saturation

Saturation added – Normal and Saturation blend modes compared.

When you adjust color in digital images, several common unintended byproducts arise. Increase or decrease contrast and saturation will rise or fall. Increase or decrease saturation and lightness will change. Make a hue adjustment with Curves (or Levels) by targeting specific channels, and an image will either lighten or darken. Make a hue adjustment with Hue/Saturation, and both saturation and luminosity are likely to shift, sometimes lightening and other times darkening. Correct one problem, and you may create another. Sometimes these byproducts are desirable; usually, they are not. While these changes may be minor, sometimes insignificant, when making subtle adjustments, they can become major when making more dramatic adjustments.

Is there a cure? There are several!

You can make additional adjustments to correct the byproducts of one adjustment. For instance, to compensate for value shifts when making color adjustments by targeting individual channels with Levels or Curves, many return to the Master channel to correct the accompanying shifts in value. To correct saturation shifts when contrast has been increased or decreased, a second adjustment is often made with Hue/Saturation. Some of these moves bring new problems with them, which will, in turn, need additional adjustment. If the problems are minor, usually, the byproducts are accepted. This is appropriate only when the byproducts are desirable and far less than ideal when they are not.

Most of these moves are made in an attempt to stabilize one component of color while another shifts.

Color can be broken down into three essential elements; hue (a spectrum around the color wheel from red through yellow, green, blue, cyan, magenta, and back to red), saturation (a gradient from intense to dull), and luminosity (a gradient from dark to light). These problematic byproducts, typically found in standard methods of color adjustment, arise because only a few exotic color spaces treat the three distinct qualities of color separately. To control only one quality in RGB and CMYK, you typically have to make adjustments to more than one channel. In LAB, luminosity has its own separate channel, and you can make adjustments to it alone, but saturation and hue are still wrapped into two channels, A and B. The color spaces that treat all three elements separately, HSB, HSL, and HSV, are not supported by Photoshop (or Lightroom).

Some adjustment tools allow you to make adjustments to one component of color without affecting the others. Favor them whenever practical. For instance, you can check Preserve Luminosity when using Color Balance to stabilize brightness when making adjustments to hue. This works well when adjustments are made to the midtones. But, when targeting highlights and/or shadows, brightness or contrast may shift. Tools like these build the solution for the problem directly into their interface. But these tools are not always the tools we need to accomplish a given task, nor are they the most precise.

Some tools even produce problems that are not curable. For example, increasing or decreasing value using the Lightness slider with Hue/Saturation will reduce an image’s dynamic range, making white or black gray while darkening or lightening. The best policy is to avoid using these tools altogether. You can do more and do it with greater precision using other tools. (In this specific case, use Curves.)

Wouldn’t it be nice if you could target one specific component of color without affecting the others with any color adjustment tool? When you use Photoshop, you can. You can use the blending mode of adjustment layers to constrain the effects of an adjustment to one or more components of a color. If you are making an adjustment directly to an image without using adjustment layers, you can Fade (Edit: Fade) the problem away immediately after applying the adjustment. Unfortunately, you cannot do this during Raw conversion with either Lightroom or ACR. Many of these side effects are built into the behavior of the sliders, and no additional blend mode feature exists.

You’ll find all of the blend modes in Photoshop’s Layers palette. All layers, including adjustment layers, have a blending mode. A layer can only have one blending mode, but a layer’s blending mode may be changed at any time. The default is Normal. But there are many other modes to choose from. The long list of options you will find under the blending mode pull-down menu, offering seventeen choices in all, may seem overwhelming at first and deter you from using them altogether. While some experimentation with all of the blending modes may prove fruitful, start with the four that are most useful for color adjustment – the four that target specific components of color; Hue, Saturation, Color, and Luminosity.

You can use the adjustment layer blending modes of Hue, Saturation, Color, and Luminosity, to target single color components, regardless of which space you are editing in. The blending mode of an adjustment layer constrains the effects of an adjustment to the component of the color specified in its title. Hue allows an adjustment layer to affect only hue, eliminating shifts in luminosity. Saturation allows an adjustment layer to affect only saturation, eliminating shifts in luminosity. (Use this for most saturation adjustments, for instance, when you use Hue/Saturation.) Color allows an adjustment layer to affect both hue and saturation, eliminating shifts in luminosity. (Use this for most hue adjustments, for instance, when you use a single channel in Curves.) Luminosity allows an adjustment layer to affect only value or brightness, eliminating shifts in saturation. (Use this for most contrast adjustments, for instance, when you use the master channel in Curves. This functions just like adjusting the L channel in LAB without having to make a color mode conversion, possibly forcing you to flatten a file.)

You can specify the blending mode of an adjustment layer when you first create it. Or, you can change the blending mode of an adjustment layer after its creation. Either way, it’s more than likely that you will want to compare the effects of both the alternate blending mode and the Normal blending mode. Sometimes, you may find you like the side effects and don’t want to remove them. In these cases, leave the blend mode on its default Normal. As a rule, with exceptions, I recommend you use the blend mode that targets the element of color you are adjusting.

You cannot reduce a blending mode by a percentage; it’s an all-or-nothing proposition. If, for instance, you want to remove most, but not all, of the additional saturation introduced by a shift, in contrast, you will need to choose a blending mode, either blending mode – Normal or Luminosity and then make an additional Hue/Saturation adjustment. Pick the mode that gets you closest to the result you desire, and then fine-tune the final effect with a subsequent adjustment.

The precision and degree of control over color you can acquire today is nothing short of astonishing. It is responsible for producing a dramatic r/evolution in color photography. We now have near total control of color’s three primary elements – hue, saturation, and luminosity. Add to this nonlinear color adjustment (even color transformation) the ability to affect specific hues without affecting others. Add to this the ability to make adjustments to specific ranges within each of those components, for instance, the saturation of highlights and/or shadows, rather than the component in its entirety. And there are many other possibilities. You can do virtually anything. You need only imagine the possibilities and then find the right tool for the job.

Read more about Color Adjustment here.
Learn more in my digital photography and digital printing workshops.

How To Avoid Over Sharpening

Antarctica CLXXI
Identifying and developing a sensitivity for the artifacts digital sharpening produces will help you choose a sharpening method and what settings to use during any stage of your sharpening workflow. You can easily see the artifacts digital sharpening produces by overdoing it. Apply a filter like Unsharp Mask at maximum strength and look closely at what happens.
Following are the seven most common digital sharpening artifacts.
1. Noise
2. Exaggerated Texture
3. Visible Light Halos

4. Visible Dark Lines
5. Loss of Highlight Detail
6. Loss of Shadow Detail
7. Increased Saturation
These artifacts can be reduced in one or more ways.
Read more on Digital Photo Pro.
If you know what to look for, you’ll know what path to choose and how far down it to go. Training your eye for what to look for and understanding the upper limits of what other people find to be naturalistic, or at least not distracting, is the first step to developing your unique sharpening style. The second step is learning how to produce certain effects and avoid others with the tools at your disposal. Once you’ve taken these steps, you can take the third and final step, knowledgeably putting craft in the service of your vision to make compelling visual statements. Enhancing detail is one area of expertise that’s well worth mastering for all photographers.
Learn more in my digital photography and digital printing workshops.

How To Evaluate All Photoshop Color Adjustment Tools

PS_Curves_Full
1_LuminosityGraph
2_HueGraph
3_SaturationGraph

.

The Photoshop Color Adjustment Tool Survey – The Go To, The Exotic, And The Redundant

.

You can evaluate any color adjustment tool, in any software ­– past, current, or future –based on the control it offers over one or more of the three elements of color – Luminosity, Hue, and Saturation.
Use this as a strategy for quickly mastering the intricacies of color adjustment in Photoshop: own the six go to tools; familiarize yourself with the eight exotic tools; forget about the eleven redundant tools.

.

Go To Color Adjustments

.

There are a six color adjustment tools I shudder to think of living without; Curves, Hue/Saturation, Vibrance, Selective Color, Photo Filter, and Black & White

.

5a_Curves

.

Curves offers the ultimate control over luminosity; no other adjustment offers such precision over the relative darkness and lightness of shadows and highlights. Using the separate channels, Curves offers the same kind of precision when adjusting hue.

.

5b_HueSaturation
5c_Vibrance

.

Hue/Saturation and Vibrance are the two essential tools for adjusting saturation.

.
What’s the difference? Vibrance saturates less saturated colors more and prevents clipping in very saturated values, producing a heavier appearance. Hue/Saturation produces a lighter more intense effect, so use it cautiously; you can quickly clip values, producing an overly smooth, overly saturated synthetic appearance if used aggressively. Similarly, handle its Hue slider with care; it’s really more useful for color transformation than it is color enhancement. Unlike Vibrance, Hue/Saturation offers the ability to adjust individual hues without the need for masking. Neither has the ability to selectively adjust the saturation of highlights, midtones, and shadows; for this you’ll need a luminosity mask. Vibrance provides only a very limited ability to selectively adjust colors with different levels of saturation while Hue/Saturation provides none. (For a way to do this read my article Saturation Masking on DigitalPhotoPro.com.)

.

5d_PhotoFilter

.

Photo Filter offers the ability to adjust the hue and to a more limited degree saturation of an image much like an analog lens filter would do, only much more precisely and flexibly. Though less intense, it preserves hue variety better that a Color Fill layer set to a blend mode of Color.

.

5e_SelectiveColor

.

Selective Color trades in subtlety, referencing CMYK adjustments without leaving RGB working spaces. Its ability to adjust the hue of whites, neutrals, and blacks and its ability to mix white and black into other hues, producing reduced saturation tints and shades, makes it unique.

.

5f_BlackWhite

.

Black & White is the simplest and most powerful tool for converting color to black and white, first reducing saturation to zero and then adjusting luminosity based on original hues. It shines brightest when used in combination with Hue/Saturation and when applied selectively with masks in multiple passes.

.

Exotic Color Adjustments

.

You’ll see and think about color differently once you use Photoshop’s three most exotic color adjustment tools; Color Lookup Tables, Gradient Map, and Match Color. (For more detail on each of these adjustments read my previous articles on DigitalPhotoPro.com.) They affect luminosity, hue, and saturation in complex non-uniform ways.

.

6a_ColorLookUp

.

Color Lookup Tables combines multiple color routines or recipes into a single adjustment, making it easy to create consistent effects across multiple images; it’s most frequently but not exclusively used for color grading the many stills in a video.

.

6b_GradientMap

.

Gradient Map uses the luminosity values of an original to selectively distribute new colors into an image.

.

6c_MatchColor

.

Match Color applies the color values of one image to another, based on a complex statistical analysis of the color relationships in both; it has an added benefit of being able to neutralize strong color casts, such as those found in underwater exposures, without the use of a second image.

.

Five other exotic color adjustment tools are worth noting.

.

While preserving shadow and highlight detail is best done during exposure and Raw conversion, and while you can mask a Curves adjustment to the shadows or highlight, both the adjustment Shadows/Highlights and HDR Toning offer occasionally useful sharpening options that Curves doesn’t, in the form of Radius sliders, which potentially makes them more related to detail enhancement than color adjustment.
Cast Equalize (resets dynamic range), Posterize (reduces gradation), and Threshold (reduces all values to pure black or white) into the really exotic category. They have real uses for very graphic images and for analysis but offer little that is useful for photorealistic images.

.

Redundant Color Adjustments

.

Part of mastering a tool is learning what not to use. Many of Photoshop’s color adjustment tools are redundant, offering similar control over the same elements of color – with less power and precision. You can simplify your toolset by eliminating these eleven adjustment types from your workflow. Instead, use the tools that give you more control.

.

Brightness/Contrast (Use Curves instead.), Exposure (Use Curves instead.) Levels (Use Curves instead.), Color Balance, (Use Curves instead.), Invert (Use Curves instead.), Equalize (Use Curves instead.), Desaturate (Use Hue/Saturation instead.), Replace Color (Instead, use Select By Color Range and then Hue/Saturation.), and Channel Mixer, Apply Image, and Calculations (Instead, use Layer Styles to blend channels, with or without a mask. (For more on this technique see my previous article Blending Channels on DigitalPhotoPro.com.)

.

See the pattern(s)? Two adjustments, Curves and Hue/Saturation, and one layer technique can outperform all of these eleven adjustments.

.

Blend Modes

.

You can make any color adjustment in Photoshop more precisely target an element of color by using one of four Blend Modes – Luminosity, Hue, Saturation, and Color (a combination of Hue and Saturation). Simply change an adjustment layer’s blend mode from its default Normal. If, instead, you apply an adjustment directly to an image, immediately after applying it, select Edit: Fade (Command / Shift / F) to change the Mode. As a general guideline for all color adjustments, I recommend you make a standard practice of using the blend mode of the element of color you are adjusting, making exceptions when desired.

.

Lightroom & Camera Raw

.

Can the separate but related programs Lightroom and Camera Raw do things that Photoshop can’t? Yes. While the majority of these two interfaces, which differ in appearance but not in function, provide controls that are quite similar to but sometimes more limited than what you find in Photoshop, they can do three things that can’t be done in the same way in Photoshop: first, White Balance (Curves and Photo Filter are similar but different.); second, Clarity (High Pass filtration is similar but different); and third, the HSL panel is able to produce luminosity adjustments of individual hues without adverse side-effects on dynamic range.
While the precision of the adjustments provided in Lightroom and Camera Raw is often more limited, it’s usually best to do the basic heavy lifting during Raw conversion – it’s less destructive – and then either dramatic transformations and/or fine-tuning in Photoshop.

.

In the future, if we discover a single interface that allows us to precisely and without side-effects control the luminosity, hue and saturation of any range of brightness (L), colors (H), and intensities (S), then we’ll have found the Holy Grail of color adjustment. For now, the Photoshop interface, a product of more than 25 years of continual expansion, is more complicated than it needs to be, but it’s capable of producing magic – so much magic. When you clarify your thinking about color, you’ll find it becomes much easier to navigate interfaces and master color adjustment. Keep it simple. Remember, color only has three elements – Luminosity, Hue, and Saturation – so color adjustment is all about controlling the relationships between them … nothing more and nothing less.

.

Read more color theory resources here.

Read more color adjustment resources here.

Learn more in my digital photography and digital printing workshops.

New Features In Photoshop CC 2015

PSCC2015
Photoshop CC 2015 was updated Nov 30.
What’s new?
Here’s a list of updates with links for more detail.

Find a timeline of Photoshop CC’s new features dating back to June 2013 here.
Learn more in my digital photography and digital printing workshops.

Enhancing Local Contrast In Black & White Images

AntarcticaLIV_after_425

After

AntarcticaLIV_before_425

Before

Color to black and white conversions are radical transformations of an image. They establish the tonal foundations of a neutral image, creating tonal relationships by determining which areas of an image become light and which are dark. While this process can generate some localized effects (all blues become darker or lighter), this is quite different than selectively lightening and darkening an image to accentuate existing tonal relationships (only select blue areas become darker or lighter). Selectively enhance a tonal structure after conversion, rather than before. Selective enhancement may yield dramatic results.
Here are two ways.


Insights Members can login to read the full article.
Email:
or Sign up

Create Amazing Distortion With Photoshop’s Liquify Filter

1
Awareness of the distortions produced by angle of view and lens choice is the beginning of using them creatively. Curiously, permission is the beginning of using distortion in post-processing creatively. Many people have been told that it’s inappropriate to do so. Why? Why accept an unintended mechanical by-product, but not a consciously intended effect? Why take such a powerful tool for expression off the table? Even the subtlest applications of distortion can produce powerful results. Once you understand what kinds of distortions are possible during post-processing, you may even find yourself changing your angle of view during exposure.

There are many reasons why you might want to distort an image. Here are four:

1. Correct Optical Distortion
It can be produced by many things, including lens choice, angle of view, motion, panoramic stitches, etc. You can choose to make the selection of a wide-angle lens less about distortion and more about including more.

2. Modify Proportion
Adjust the height and/or width of objects and/or areas. Just for starters, take off the 10 pounds that the camera adds on.

3. Change Proximity
Reduce or increase the spaces between objects. Make things feel more or less related.

4. Enhance Or Change Gesture
Make a leaning object more tilted or straighten it out. Think of this as adding the words “very” or “less” into a sentence.

When exploring the many distortion tools in Photoshop, you’ll find that the Liquify filter is one of the most powerful. The Liquify filter is so powerful that, when in use, it offers its own toolbar and menus, somewhat like Camera Raw. To get the most of the Liquify filter, it’s worth taking the full tour …

Read all the details on Digital Photo Pro.

Photoshop’s sophisticated distortion capabilities are relatively new to photography, and so is the mindset of using them to photographers. Both are worth acquiring. Everyone can find a use for them at one time or another, if not on every image. As every photographer uses distortion to one degree or another, ultimately, what separates photographers is not whether they use distortion but when, how, and why they use it. The same tools can be used to achieve entirely different effects. There’s a world of difference between using distortion to remove process artifacts for more accurate representations, using distortion to aesthetically refine the formal qualities of images, and using distortion to interpret subjects expressively. Intent is everything. Practice is a reflection of intent. Simply asking yourself how far you are and aren’t willing to go and, finally, why will help clarify yours. Consider these questions seriously, and you’ll find your vision will grow stronger and clearer.

Learn more in my digital photography and digital printing workshops.

Tips & Strategies For Mastering Color In Photoshop

9_4Blended copy

OPTIC 2015 featured dynamic presentations by the world’s top outdoor photographers and gear from the premier manufacturers over three days in New York City brought to you by B&H and Lindblad Expeditions.

Couldn’t attend in person or want to review at your own pace? Now you can view all the presentations of your favorite speakers from the conference.

I presented tips and strategies For Mastering Color In Photoshop. Watch it and you’ll get a taste for the artistic perspective and advanced color adjustment strategies I offer in my digital photography and digital printing workshops. You’ll see in new ways.
View Mastering Color In Photoshop here.