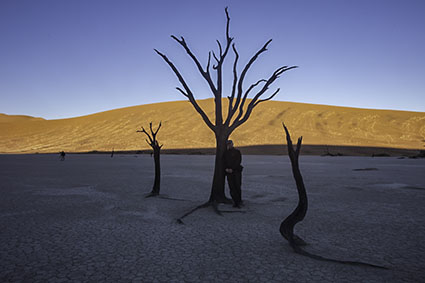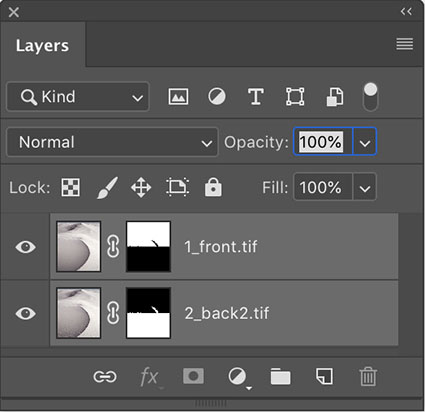
Top frame of a panoramic stitch

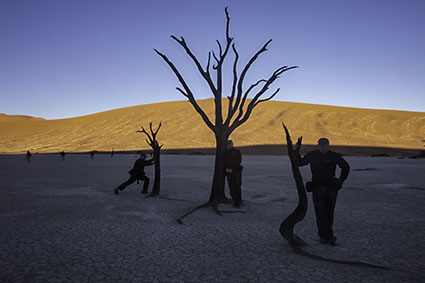
Bottom frame of a panoramic stitch
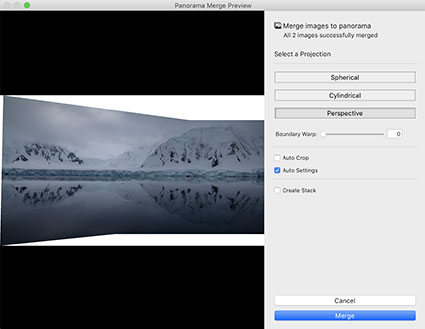
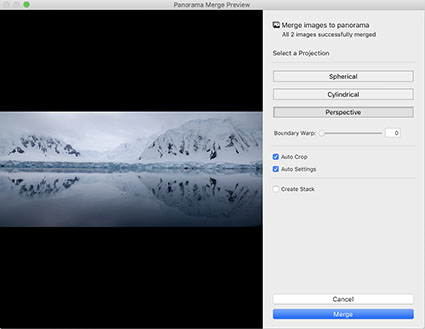
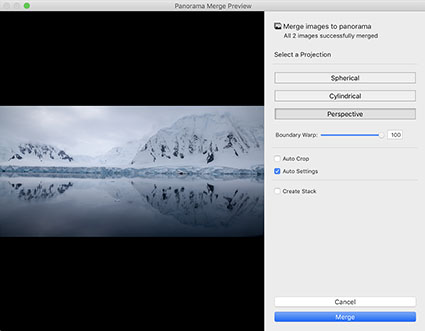
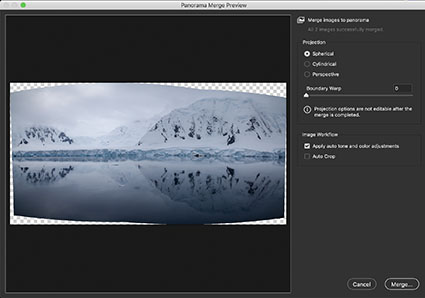
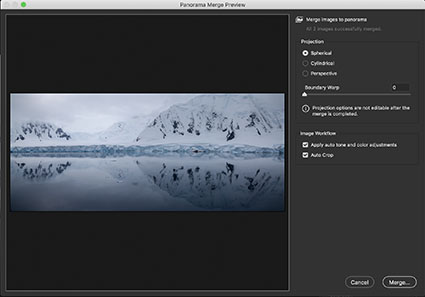
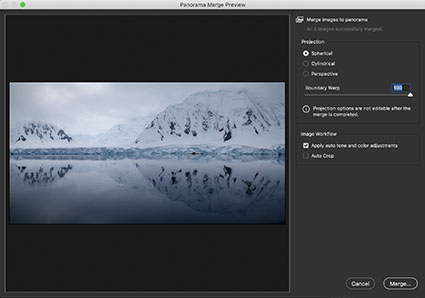
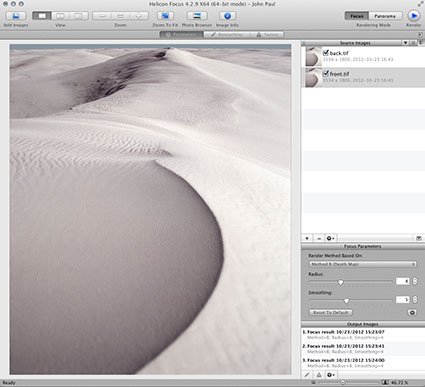
Panoramic stitch

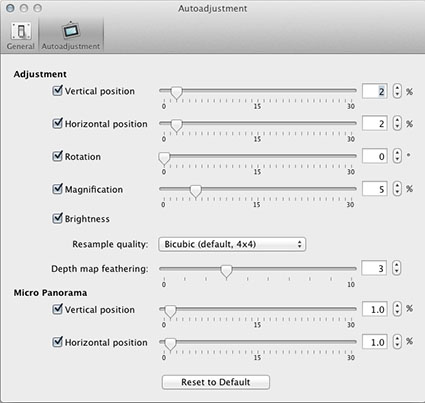
Panoramic stitch distorted

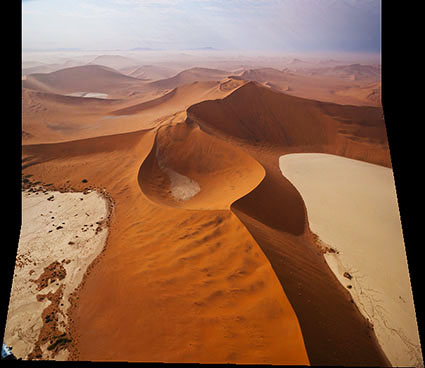
Panoramic stitch cropped
Panoramic stitch cropped and retouched

Panoramic stitch retouched
The strategies above are not limited to panoramic stitches.
We’re responsible for everything that’s in the frame. We’re also responsible for everything that’s not in the frame. Deciding what’s in the frame and what’s out is a critical decision that can make or break an image.
Here are two essential framing strategies.
One. Use the frame to eliminate distracting information around a subject(s). Take extra care with image information that touches the frame, as it will draw extra attention. Do this with significant compositional elements.
Two. Eliminate excess space around a subject(s) to focus the attention of the viewer. A lot of surround space between the subject and the frame can be used to use to call on psychological associations with space, such as freedom or isolation. Some space between the subject and the frame can give the appearance of the subject resting gracefully within the frame. Touching the subject with the frame strongly focuses the attention of the viewer and may seem claustrophobic. Cropping the subject with the frame can focus the attention of the viewer on specific aspects of the subject and/or give an image a tense quality, evoking evasion and incompleteness – this often seems accidental if less than half the subject is revealed.
Cropping is extremely simple to practice. (While cropping techniques are simple to practice, the reasons for their application and the choices made about how to apply them as well as the final effects may be exceptionally complex.)
Here are two cropping choices.
One. Reposition the frame before exposure.
Two. Contract the position of one or more of the borders of an image after exposure, generally with software.
Because distorting an image during post-processing, by expanding or contracting one or more sides or corners, is a relatively new possibility, most people don’t think of exercising this option. Ironically, anyone who uses lens profiles distorts their images in post-processing to correct lens distortion. Consider this a creative supplement to and extension of that practice. While cropping potentially changes the aspect ratio of an image, distortion does not.
Here are two distortion choices.
One. Use Photoshop’s Edit > Transform to distort an image. Push the areas you wish to crop outside the frame. Move one or more sides by pulling the point in the middle.
Two. Use Photoshop’s Edit > Transform to distort an image. Push the areas you wish to crop outside the frame. Move one or more corners by pulling the corner point while holding the Command key.
Retouching used to be complex. Today it can be simple. Never before, has retouching been so easy to do or the results so sophisticated. (To be certain, not all retouching is simple. You can make retouching as simple or as complex as you choose to make it. Retouching is an art that continues to be elevated on a daily basis. But what once required specialized tools and a Herculean effort can now be done with standard software in seconds.)
Here are four retouching choices.
One. There’s cloning. Simply use the Clone Stamp Tool set to Current and Below on a new blank layer. (This will ensure that any retouching can be removed or redone at a later date.) Hold the Option/Alt key and click to sample information to copy, then move the cursor to the area you’d like to copy the information to and click and drag. Repeat until a desired effect is achieved. Typically, donor information is drawn from the same document but you can also clone from one image or file to another.
Two. There’s healing. Use the Healing Brush Tool as you would the Clone Stamp tool. Or, use the Spot Healing Brush, which will automatically select the information sampled for you and can be used within a selection to contain the results. Or, finally the Patch Tool, which will copy information selected with it from or to (depending on whether you check Source or Destination) wherever you drag it to. Healing can’t be done on a transparent layer, so work on a copy of the layer you’d like to retouch. Click on the layer and select Duplicate Layer from the Layer menu or palette. If you need to heal image material contained on multiple layers, create a new composite layer by holding the Option/Alt key select Merge Visible from the Layer palette.
Three. There’s copying and pasting. Just select a region of an image with any selection tool. Copy it. (Edit: Copy) Paste it. (Edit: Paste) Then move the resulting layer into play and mask as needed. (Click the mask icon at the bottom of the layer palette and use a black brush at varying opacities to hide the information.)
Four. There’s filling. Select a region. Fill with Content Aware fill. (Edit: Fill and select Content Aware from the drop down menu in the dialog.) (This feature was introduced with Photoshop CS5.) Photoshop will automatically create an appropriate random texture in the selected area. Like healing, this feature won’t work on transparent layers/areas so, again, use it on a new merged layer.
Software routines such as lens correction and panoramic stitching may distort the frame, subtly but sometimes significantly distorting a composition, and requiring additional measures to restore a rectangular frame. When solving this challenge, you may get better results if you don’t contract the frame as aggressively as you once did and retouch rather than crop to fill in the gap and/or eliminate distracting elements.
Your choice of practices or their application may or may not change the nature of the artifact that you finally create. And, whether the means you choose is appropriate for your objective, the practices you adopt may or may not be accepted by the community of artists you choose to work within – some are more permissive than others. Nevertheless, you should explore your options. You simply won’t know whether it’s for you until you try it for yourself.
Learning to think within the frame is an essential skill for creating strong photographic compositions. But today, learning to think within the frame is only the beginning. You can learn to think outside the frame as well.
It’s a new mindset. Once it becomes second nature, you’ll not only find you have more options for visual problem solving but you’ll also find your visual horizons will have expanded – significantly.
Learn to see in new ways. Combine them with old ways. You’ll find you’ll make images that you once passed by, leaving them unmade or even unnoticed. As a result, you’ll make many more successful images.
Read more in my Exposure lessons.
Learn more in my digital photography and digital printing workshops.