Achieving neutrality in your images is so important. Few things are as important. Why?
Here are four reasons.
1 – The color in your images will appear more believable.
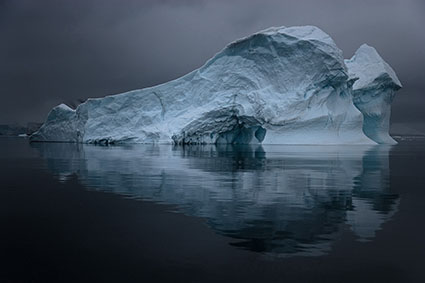
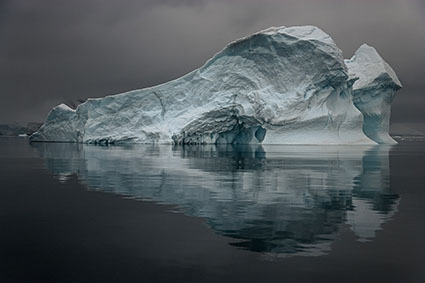
Casts make colors seem false. This is true for memory colors like fire engine red, sky blue, and grass green, particularly true for flesh tones (Are you feeling a little bit green today?), but nowhere more true than with neutrals. There can be some debate about which blue is sky blue. On which day? At what time? But there’s very little debate about what gray is truly neutral. Sure those neutral grays can vary in brightness but not hue or saturation. Make the neutrals in your images truly neutral, and you’ll make the other colors in your images more believable.
2 – The colors in your images will look more saturated.
When you remove color casts you can see the colors beneath them more clearly. The color beneath appears purer. This effect won’t be as strong as if you had increased their saturation. It will be subtler but more convincing. Oversaturated colors often appear false and you’ll have to work the saturation of your colors twice as hard if they contain color casts. Clean color is a great foundation to add saturation to. You can get the best of both worlds.
3 – Your images will appear more three-dimensional.
Without casts, the colors in your images will have more contrast.
They’ll have more luminosity contrast. When they’re not unified by a color cast, luminosity or brightness values will become more distinct.
They’ll have more hue contrast. Often shadows will appear cooler while highlights appear warmer, making them appear even more different than they already are.
They’ll have more saturation contrast. When neutrals are neutral, you’ll get maximum contrast between them and the more saturated colors in your image.
Add these three kinds of color contrast together, and you’ll see a dramatic difference in your images. The illusions of three-dimensional depth and volume in our two-dimensional images will be significantly amplified.
Once again, these effects will be powerfully felt but not obvious. Clean colors won’t call attention to themselves because they seem natural, unlike imbalanced images that you’ll need to over-process to get similar effects.
4 – You’ll have the best color foundations to make black-and-white conversions from.
It sounds strange when you first hear it but color matters even when you’re going to remove it. The maximum hue and saturation separation created by achieving neutrality gives you more control over how dark or light to make hues during conversions to black and white.
5 – You’ll know color management is working.
Neutrals are one of the first things to look for when you’re checking your color management for printing, whether it’s evaluating a viewing light, examining a profile, a rendering intent, or a media setting. You not only look for neutral midtones but also neutrals throughout the entire tonal scale (gray balance). If you’ve achieved both your color management is working correctly. If not, check your system.
I’m sure you’ll find a few more reasons why neutrality in your images is so important.
Achieving neutrality in your images isn’t something you do for all of your images. There are many exceptions. Nevertheless, being able to achieve neutrality in your images is a critically important skill. When you know how and why to achieve neutrality all of your color choices become more sensitive, deliberate, and meaningful.
Read more on Color Adjustment here.
Learn more in my digital printing and digital photography workshops.